


Zilele acestea am vorbit cu cineva care și-a propus să înceapă să finiseze lemnul. Urmează să înceapă testarea unor produse și a venit să-mi spună în ce etapă este cu amenajările. Mi-a cerut sfatul în legătură cu unele aspecte legate de locul unde se va face colorarea și lăcuirea si despre dotările necesare. Cred că este un subiect care poate interesa pe mai mulți, asa că iată câteva sfaturi privind amenajarea spațiului și materialele de strictă necesitate.
Este bine de știut încă de la început că finisarea poate aduce plusvaloare obiectului, dar îl poate și strica. Gândiți-vă că ați făcut un dulap foarte frumos din stejar, la care toți se uită cu admirație, după care îl finisați. Obțineți un dulap cu pete, cu scursuri de lac, iar pelicula te zgârie când treci mâna peste ea. Credeți că va mai observa cineva frumusețea lemnului de stejar? Vreau să fie foarte clar, nu vreau să supraapreciez importanța lacurilor. Mobila a existat cu mult înainte de apariția lor. La țară încă se fac mese și scaune bine geluite (șlefuite foarte bine) și sunt folosite fără a fi lăcuite. Dar, pentru ca lemnul să fie protejat, să se evidențieze desenul lui natural prin colorare și lăcuire, ar trebui folosite materiale și echipamente potrivite și să existe amenajările necesare.

Un prim sfat este să separați spațiul de prelucrări mecanice de cel pentru lăcuire și uscare. Praful provenit de la prelucrările mecanice este cel mai mare dușman al finisării. Pelicula va îngloba praful și va deveni rugoasă. În cazul în care se dorește obținerea unui finisaj lucios, chiar dacă nu este un luciu oglindă, acest lucru nu se va putea face decât prin polișare.
- Dacă aveți posibilitatea să faceți locul pentru finisat in alta clădire, nu ezitați. În timp veți vedea că a fost cea mai bună alegere.
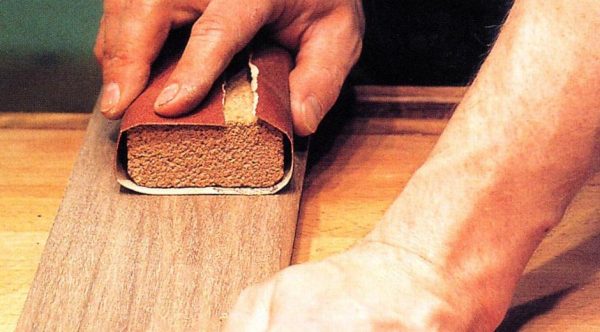
Șlefuiți foarte bine lemnul în alb pentru că finisajul scoate în evidență toate defectele.
- Amenajați un loc special unde să faceți acest lucru, departe de zona de finisare. Dacă puteți să asigurați și aspirația prafului în zonă ar fi cea mai bună investiție.
- Folosiți granulația recomandată pentru șlefuirea lemnului (100, 120,…, max 220). O hârtie prea fină nu reușește să rupă fibra lemnului și atunci cand aplicați baițul sau grundul, fibra se ridică și va fi mai dificil să o îndepărtați. În plus, suprafața și porii se umplu de praf foarte fin și pot apărea pătările sau lipsa de aderență.
- Nu ezitați să schimbați hârtia atunci când se colmatează sau când începe să dispară materialul abraziv de pe hârtie. Credeți că faceți economie, dar nu faceți decât să vă creați probleme mai târziu. Șlefuirea nu va fi bine făcută iar defectele vor apărea imediat ce începeți să finisați
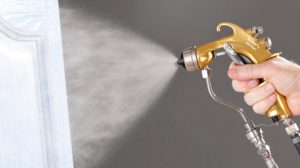
Dacă veți aplica materialele prin pulverizare, cumpărați pistoale bune. Nu vă gândiți că dați o sumă mare pe un singur pistol și mai bine cumpărați mai multe cu aceeași bani. Pistoalele ieftine nu se strică întotdeauna de tot, în așa fel încât să le schimbați și să nu aveți probleme. Ele cedează încet, încet – se mărește duza, se lărgesc garniturile, admisia aerului comprimat se schimbă în timp – și descoperiți că nu mai aveți aceeași calitate a finisării ca la început. Apar scursuri, peliculă cu întreruperi sau neuniformă, pete la colorare sau alte defecte pe care trebuie să le remediați și care vă vor costa. Cunoașterea avantajelor și dezavantajelor celor mai folosite sisteme de pulverizare îți va fi de ajutor pentru a ști cum să alegi pistolul de pulverizare potrivit.
- Dacă folosiți și produse pe bază de apă și pe solvent, luați 2 pistoale, unul pentru fiecare tip de materiale. Costul îl veți scoate economisind diluantul de spălare și evitând apariția defectelor la schimbarea de la un sistem la altul.
- Dacă faceți finisări care presupun aplicarea patinelor de învechire, luați pistoale speciale. Aplică o cantitate mai mică și economisiți astfel, pentru că aceste materiale sunt destul de scumpe.

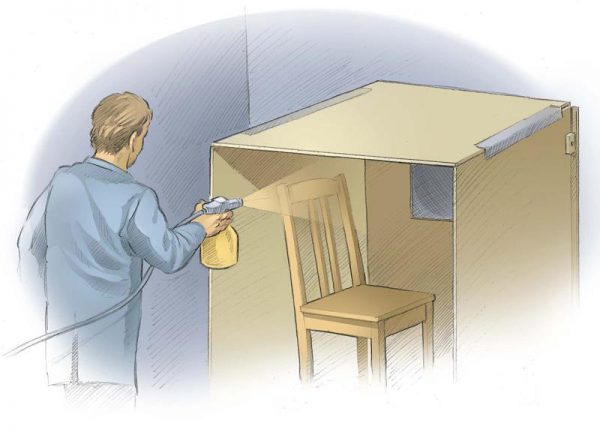
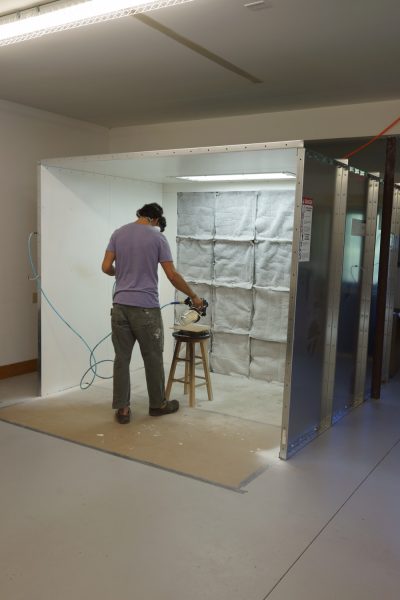
Investiți într-o cabină de pulverizare sau un perete absorbant. Veți elimina astfel particulele de lac care rămân în aer când se face pulverizarea și care cad pe piesă gazând pelicula. O peliculă gazată zgârie și are un aspect neplăcut.
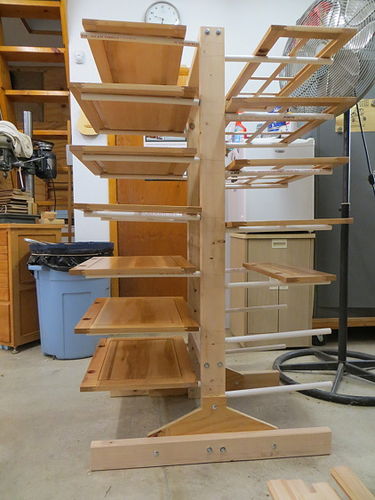
Amenajați locul unde se va face uscarea produselor finisate. Puneți rastele cu brațele îmbrăcate în cauciuc (folosiți un furtun la dimensiune) ca să nu se zgârie piesa.
- Dacă folosiți produse hidrodiluabile asigurați-vă că în zona de uscare aveți circulație de aer. La uscarea acestor produse, mai importantă decât temperatura este mișcarea aerului.
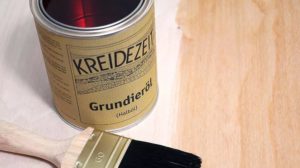
Folosiți produse de finisare bune.
- Stabiliți o relație cu un furnizor de lacuri și vopsele pentru a avea calitate și continuitate. Cereți fișele tehnice și tehnologiile produselor și respectați indicațiile.
- Când comandați un produs nou spuneți și ce vreți să obțineți cu el. S-ar putea ca produsul la care vă gândiți să nu fie cel mai bun și să primiți o recomandare mai bună.
- Dacă nu sunteți sigur de modul cum trebuie folosit un produs sau de calitatea lui, vorbiți imediat cu cel de unde l-ați luat. Este mai simplu și mai ieftin de prevenit decât de reparat.
Nu dezarmați dacă pare dificil. Toți au început așa, lucrurile se învață treptat.
- Cereți sfatul și ajutorul celor care vă sunt parteneri – furnizorii de echipamente, materiale și accesorii
Sunt convinsă că mai sunt multe alte lucruri la care aș putea să mă gândesc, dar deja cred că este prea mult. Însă subiectul poate fi completat oricând. Dacă întretimp găsiți voi alte sfaturi utile pentru un astfel de început, vă rog să le scrieți. Sunt convinsă că vor fi apreciate de toată lumea.


Stimata doamna, mă interesează tratarea lemnului cu silicat de sodiu și ulei de cedru.Am efect iar,probe
In cateva zile apare articolul legat de tratarea lemnului cu silicat de sodiu. Urmariti revista! 🙂
Sarut mana, stiti cumva cum se poate reconditiona o usa de stejar care a inceput sa se cojeasca ? Au aparut pe ea si puncte de carii. Ce solutii sa cumpar si cum sa fac ?
Multumesc mult
Chivu Iulian, Teleorman
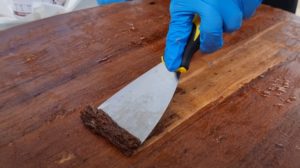
Aici cea mai mare problema sunt carii. Ar trebui sa indepartati stratul de finisaj cu un decapant (eu am gasit in magazinele de bricolaj). Se aplica, se lase sa atace stratul (se inmoaie) si se indeparteaza cu un spaclu. Dupa indepartare totala se slefuieste cu hartie 150-180 si se refiniseaza.
Inainte de refinisare insa trebuie sa scapati de cari. Este destul de greu. Exista astfel de materiale in magazine online. Cautati “solutii contra carilor de lemn”. Ei o sa va dea si indicatii de tratare. Trebuie sa repetati tratamentul de 2-3 ori pentru a fi sigur sa i-ati omorat. Sunt animale foarte rezistente.
Succes!
Buna ziua,
Puteti sa imi recomandati(din oferta firmei partenere) ceva grund(eventual si vopsea) pentru canturile de MDF care sa astupe eventual si unele imperfectiuni. Am de vopsit numai canturi de MDF si niciodata nu imi iese cum trebuie… Nu conteaza pe ce baza este atat timp cat se poate slefui usor acest grund inainte de vopsirea finala.
Multumesc
Multumesc am gasit !