


Vă promiteam când am scris despre shellac, că voi relua subiectul pentru a spune mai multe despre french polish – metoda specială de aplicare a acestui lac natural. Nu uit promisiunea, așa că urmează o serie de detalii și sfaturi care cu siguranță vă vor face să doriți să lăcuiți măcar un lemn mic folosind această metodă. Cel puțin la mine asta a fost reacția.

Procedeul de aplicare shellac este unul de lungă durată, repetitiv, care implică multă manoperă. Tehnicile de aplicare țin foarte mult de fiecare specialist în parte, experiența căpătată în timp ajutându-i să găsească metoda care se potrivește cel mai bine cu modul lor de lucru. Indiferent de tehnica folosită există câteva elemente comune: pregătirea lacului, a suportului, a tamponului de aplicat și principiile obligatorii din timpul aplicării.
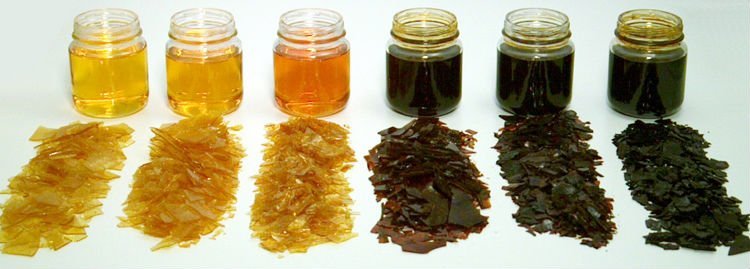
Prima operațiune este obținerea lacului din fulgi. După cum ați văzut, shellac-ul se comercializează mai ales sub formă solidă pentru că nu rezistă foarte mult gata pregătit. Există și astfel de lac, dar conține o serie de aditivi care îi prelungesc viața și care pot influența calitatea finală. De aceea cel mai bine este ca lacul să fie pregătit de cel care-l aplică. Fulgii sau nasturii de shellac se dizolvă în spirt denaturat (alcool industrial). Există mai multe proporții în care se poate face diluția, dar cele mai folosite sunt:
- 350-360 g/l de alcool – pentru aplicări ca prim strat (primer sau grund) sau pentru aplicări în domeniul picturii, pentru pregătirea suportului. În acest caz se folosește numai shellac deparafinat;
- 240-250 g/l de alcool – proporția cea mai folosită pentru aplicare și șlefuire;
- 100-120 g/l de alcool – straturile finale care se aplică fără șlefuire intermediară și care dau luciul oglindă.
Fulgii se aleg în funcție de culoarea dorită și se mărunțesc foarte bine într-un mojar pentru a se dizolva mai ușor.
Este bine sa folosiți recipiente de sticlă cu capac pentru a putea agita amestecul. Nu folosiți recipiente metalice pentru că interacționează cu componenții. După cântărire, măsurare și amestecare, se pune capacul, se agită bine amestecul și se lasă 1-2 zile pentru dizolvare completă. La final se filtrează printr-un ciorap fin de damă pentru a îndepărta impuritățile. Dacă este o perioadă rece, pentru dizolvare mai rapidă, puteți pune vasul cu lac într-unul cu apă caldă. Atenție, vasul nu se pune direct pe foc sau în apă fiebinte pentru că temperatura ridicată strică lacul.
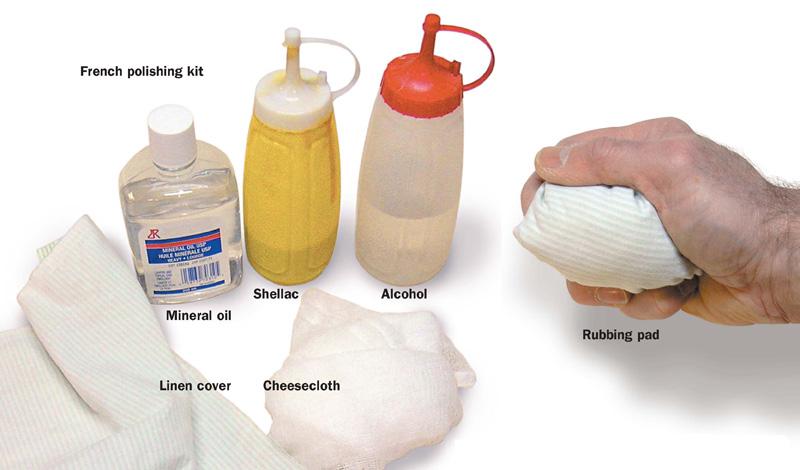
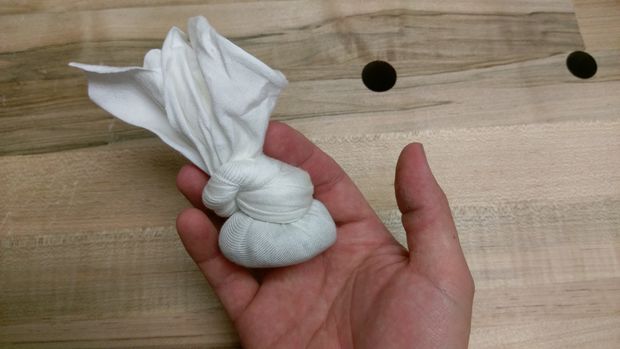
Etapa următoare este pregătirea tamponului cu care se face aplicarea, șfam cum îi spun specialiștii. Se poate face din vată, bucăți de bumbarc din tricouri vechi sau lână, care se pun într-o bucată de finet sau de bumbac, se strâng bine și se înnoadă pentru a nu se desface în timpul aplicării. La final, tamponul se bate de câteva ori de o suprafață plată pentru a se teși și a se așeza. Partea de jos trebuie să fie bine întinsă și plată, fără cute, cusături sau găuri, din cauza cărora lacul poate fi aplicat neuniform.
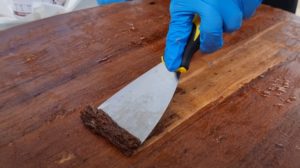
Înaintea aplicării lacului suprafața lemnului trebuie pregătită și șlefuită foarte bine. Zgârieturile și găurile se repară. Dacă finisajul va fi satinat, lemnul dur cu porii mari (nuc, stejar) se șlefuiește cu hârtie abrazivă cu granulatie 400, iar cel fin cu porii mai mici si (paltin), cu 600. Pentru luciu oglindă se folosește hârtie cu granulația 600, respectiv 800. Instrumentele muzicale se șlefuiesc cu 1000.
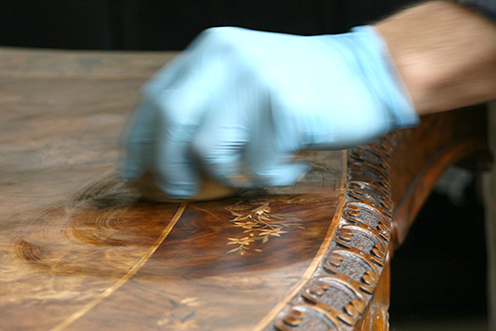
Încărcarea cu lac a tamponului se face cu multă grijă și turnând lacul puțin câte puțin. Cel mai bine este să se folosească o pipetă. Tamponul nu trebuie să mustească, dar nici să fie uscat. Se poate testa pe dosul palmei, unde trebuie să-l simțiți umed, iar lacul nu trebuie să se scurgă. La final pe tampon se pun câteva picături de ulei mineral, ulei de nuc sau de măsline. Uleiul de in nu este bun pentru că este prea viscos. Uleiul ajută tamponul să alunece, iar lacul nu rămâne prins pe lemn în cantitate mare. Încărcarea tamponului este momentul când experiența își spune cuvântul. Veți știi care este cantitatea potrivită de lac sau de ulei numai după ce veți începe să lucrați. Dacă tamponul se blochează pe suprafață înseamnă că s-a pus prea mult lac sau prea puțin ulei.
Toate fiind pregatite puteți începe aplicarea propriu-zisă a lacului, cu mișcări continue circulare sau sub forma cifrei 8. Nu vă opriți niciodată pentru că acolo va apărea o adâncitură. Nici dacă din tampon picură lac mișcarea nu trebuie să înceteze. Se continuă mergând către margine. Oprirea nu trebuie făcută brusc ci tot ca o continuare a mișcării. Din rotirea mâinii practic se iese la marginea piesei.
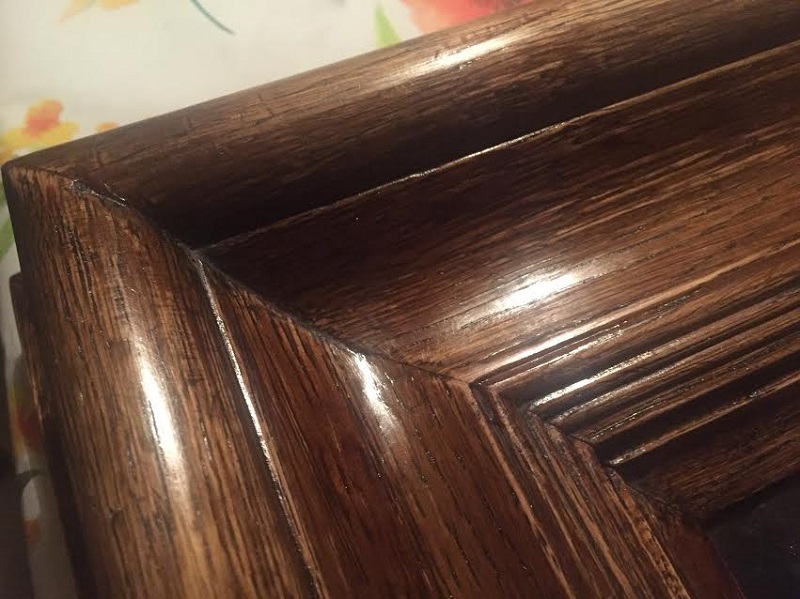
Shellac-ul se usucă repede comparativ cu alte lacuri sau cu uleiul, în 5-10 min. După fiecare aplicare suprafața se șlefuiește pentru îndepărtarea eventualelor denivelări. Chiar dacă se usucă în 5 min. este bine ca șlefuirea să se facă după 20-30 min. La început se șlefuiește cu granulația 800, după care se continuă cu 1000, 1200 sau cu lână de oțel fină. Pentru a obține o suprafață frumoasă sunt necesare chiar și 30 straturi sau mai mult. Pentru luciu oglindă se folosește pentru ultimile straturi lac mai diluat și nu se mai face șlefuirea între straturi.
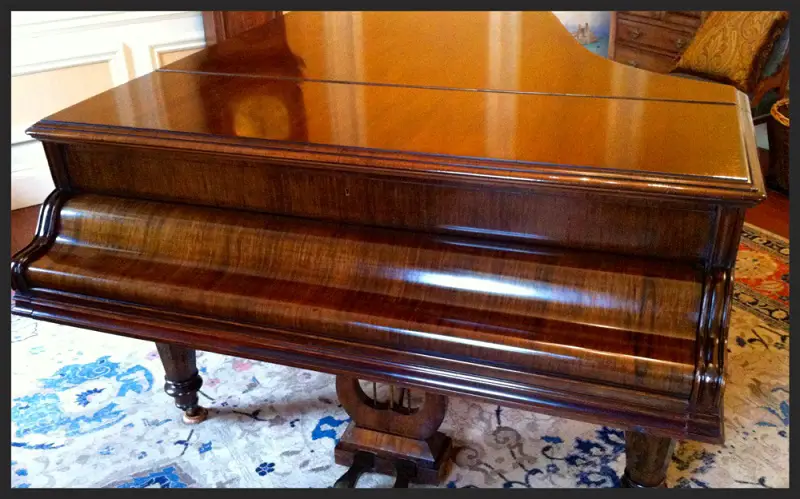
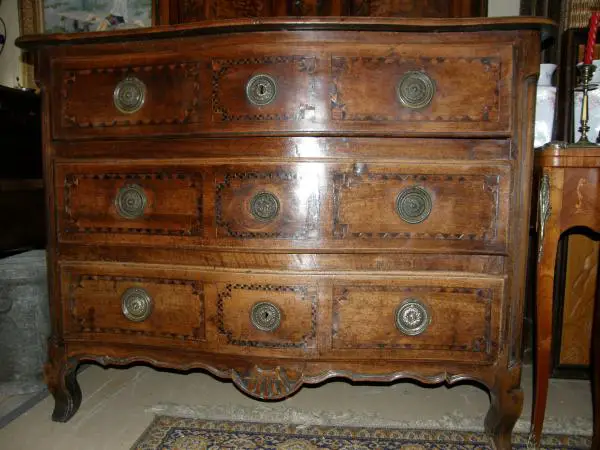
Aplicarea shellac-ului nu este un lucru simplu și e bine să apelați la firme specializate dacă proiectul implică vechi piese de mobilier care trebuie să iasă perfect. Exact ca în articolul despre recuperarea mobilierului vechi de 100 de ani.


Super descriere !
Va citesc intotdeauna cu multa placere si interes.
Va multumesc pentru articolele dv.
Cred că în articol este o eroare privind concentrația de shellac/alcool.
Dacă ar fi ca în articol 35 – 36 gr/l alcool, ar însenna 3,5 % concentrație shellac. Exagerat de puțin?!
Corect este 350gr/l alcool.
Aveti dreptate, lipseste un zero.
Voi face modificarea. Multumesc foarte mult.
Toate cele bune!
Multumesc pentru articol,
Am o intrebare : am mostenit niste mobila de prin anii 1920, curbata si furniruita cu radacina de nuc si din ce-mi aduc aminte mi s-a povestit ca ar fi lacuita cu serlac, care ar fi solutia sa-i reinprospatez luciul , deoarece dupa 2 refugii in timpul razboiului, timpul si intemperiile si-au lasat amprenta . Initial am vrut s-o vind dar negasind cumparatori si vazind si preturile (dupa mine ridicole- fata de mobila actuala din lemn tocat) m-am hotarit sa incerc s-o integrez in spatiu . Multumesc anticipat pentru sfatul dumneavoastra,
Cu stima, Sorin Crasi
Buna ziua!
Si noi va multumim pentru ca ne urmariti!
La vremea aceea – 1920 – uleiul si shellac-ul erau cam singurele posibilitati. Cred ca stiu despre ce vorbiti, am vazut un astfel de mobilier de nuc cu usile curbe la dulap si comode. Sfatul meu este sa curatati mobila si apoi sa o ceruiti si lustruiti. Este cea mai simpla si la indemana metoda. Curatarea o faceti cu o carpa moale (bumbac), care sa nu zgarie si cu apa si detergent de vase sau sapun. Inmuiati carpa in apa, stoarceti bine si stergeti bine mobilierul. Apoi reveniti cu o carpa uscata, tot moale. Daca este nevoie, repetati operatiunea. De-a lungul timpului se aduna murdarie si se fixeaza cu produsele moderne de curatare (!) care contin ceruri sintetice. La final lasati sa se zvante bine inainte de a aplica ceara.
Folositi ceara de mobila din comert. Aplicati pe toata suprafata in strat foarte subtire dupa care listruiti cu o carpa moale uscata. Mai jos aveti un link unde gasiti si alte solutii de improspatare a finisajului.
Toate cele bune!
https://revistadinlemn.ro/2017/12/04/sfaturi-pentru-improspatarea-finisajului-mobilierului-si-al-pardoselilor-din-lemn/
Puteți afla mai multe despre subiectele preferate și din revistele tipărite. Încă vă puteți abona pentru a primi revistele apărute în 2019 accesând link-ul de mai jos.
Vă mulțumim!
https://revistadinlemn.ro/product/abonament-2019/
Buna ziua! Mi-au folosit foarte mult indrumarile dvs legate de aplicarea selacului. Cunoasteam cate ceva despre acesta, dar nu chiar intreg procedeul. Sunt acordor si tehnician de piane si in prezent lucrez la finisarea unui pian cu selac. Am curatat vechiul finisaj cu un decapant, iar dupa cu hartie abraziva de 240, 400, 800 si 1000. Furnirul ce se afla pe acest pian are foarte multi pori, inainte de a-l baitui am frecat cu praf abraziv foarte fin si alcool, ceea ce a dat rezultate bune acoperind porii. Am inceput finisajul cu selac, momentan pe capacul mare de deasupra, dupa 60 de straturi am obtinut un luciu superb, oglinda. As avea totusi 2 intrebari:
1) Exista o varianta mai simpla de a umple porii lemnului fara a-i strica “desenul”? deoarece la 1 m2 a trebuit sa frec 2 ore cu praf abraziv pentru a se acoperi tot.
2) As dori la final sa aplic un strat de ceara de protectie pentru finisajul cu selac, ce fel de ceara mi-ati recomanda ca sa nu ii schimbe deloc luciul si sa ramana exact cum arata acum? Am vazut ca exista in comert ceva ceara microcristalina, dvs ce mi-ati sugera?
Multumesc anticipat. Cu stima.
Buna ziua!
Ma bucur ca am putut fi de folos.
1. Exista chituri umplutori de pori. Le gasiti la cei care vand prodese speciale pentru lemn.
2. Ceara microcristalina provine de la rafinarea petrolului. Este neutra, stabila in timp, nu schimba culoarea suportului si este rezistenta la UV. Asa este Renaissence Wax, ceara folosita de restauratori. O puteti folosi pentru protectia finisajului, dar pentru a nu pierde luciul trebuie foarte bine luctruita.
Toate cele bune!
https://revistadinlemn.ro/2017/03/29/renaissance-wax-ceara-restauratorilor-dar-nu-numai/
Va multumesc mult pentru sfaturi. Intre timp, am gasit un grund incolor pentru umplere a porilor la lemn. Nu am apucat sa il testez inca pe altceva, nu stiu sigur daca nu reactioneaza cumva alcoolul din shelac cu acesta .
Foarte folositoare informațiile. Îmi place la Revista din Lemn că se tratează subiectul în mod obiectiv, analizandu-se atât avantajele cât și dezavantajele unui anumit proces. Felicitări!
Vă mulțumim!