


Uleiul este varianta pe care o aleg în majoritatea cazurilor când trebuie să finisez lemn aflat la exterior, mai ales dacă este vorba despre un proiect de bricolaj. Lazurile Kreidezeit sunt printre preferatele mele pentru că au rezistențe bune în timp. În urmă cu mai bine de cinci ani am văzut cum a fost refăcută fațada din lemn a unei case aflată pe malul lacului Snagov și finisajul arată în continuare foarte bine. Amestecul de ulei de tung și de in protejează lemnul foarte bine împotriva intemperiilor, iar conținutul mare de pigmenți asigură rezistența la radiațiile solare.
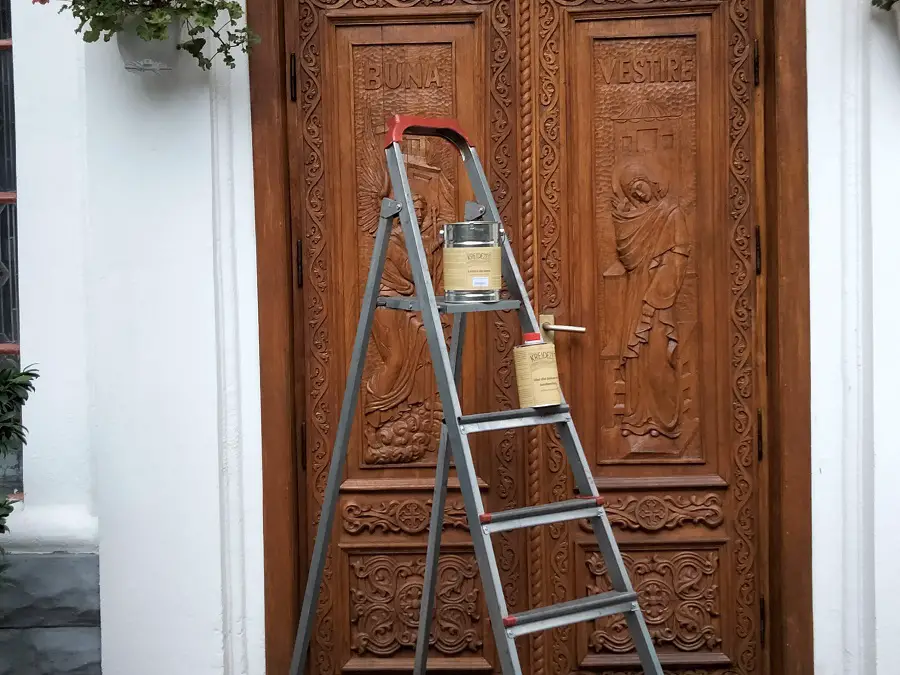
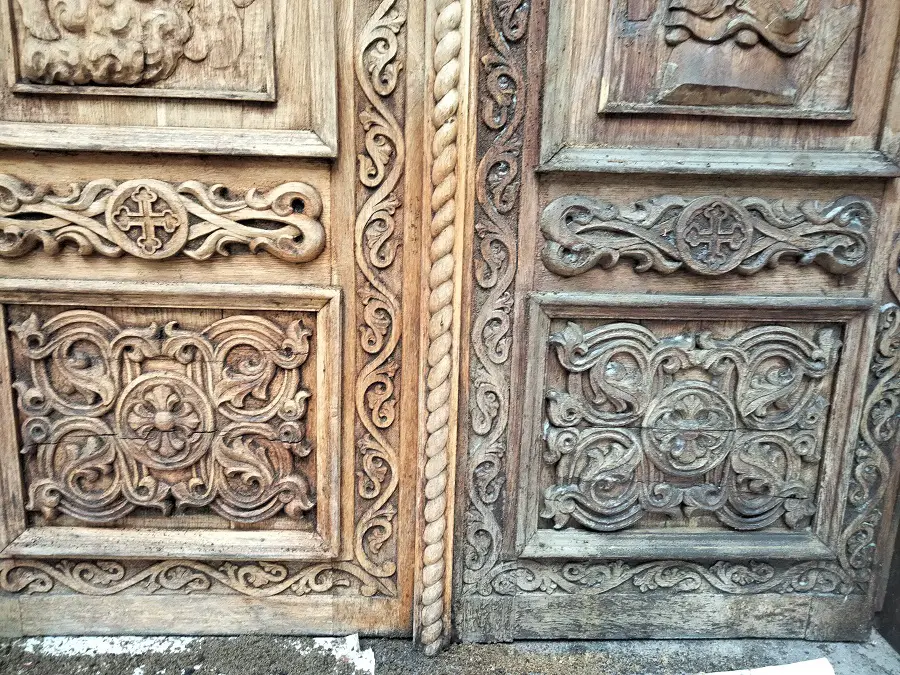
De data aceasta am apelat la lazurile Kreidezeit pentru a reface finisajul unor uși exterioare din lemn. Sculptura complicată de pe suprafața ușilor din lemn de stejar și finisajul anterior făcut cu ulei de in din abundență nu prea lăsau loc altor variante. Ar fi fost greu de îndepărtat total uleiul, pentru a aplica, fără riscuri, un finisaj de exterior pe bază de apă. Așa că am rămas la varianta gândită încă de la început – lazură precolorată pe bază de ulei – sperând ca procesul de curățare a ușilor să nu fie foarte dificil. Speranțe deșarte! 🙂
Cum am ajuns să mă ocup de această “lucrare”
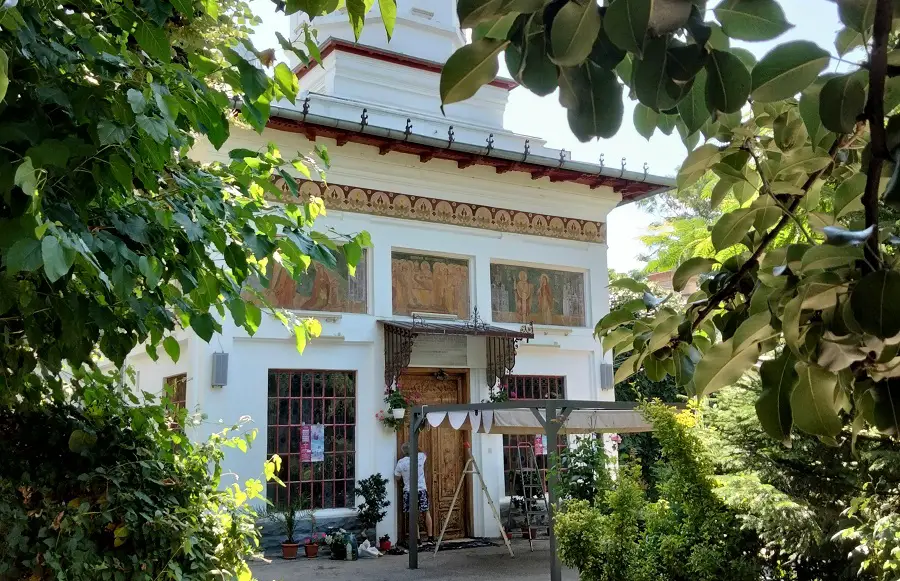
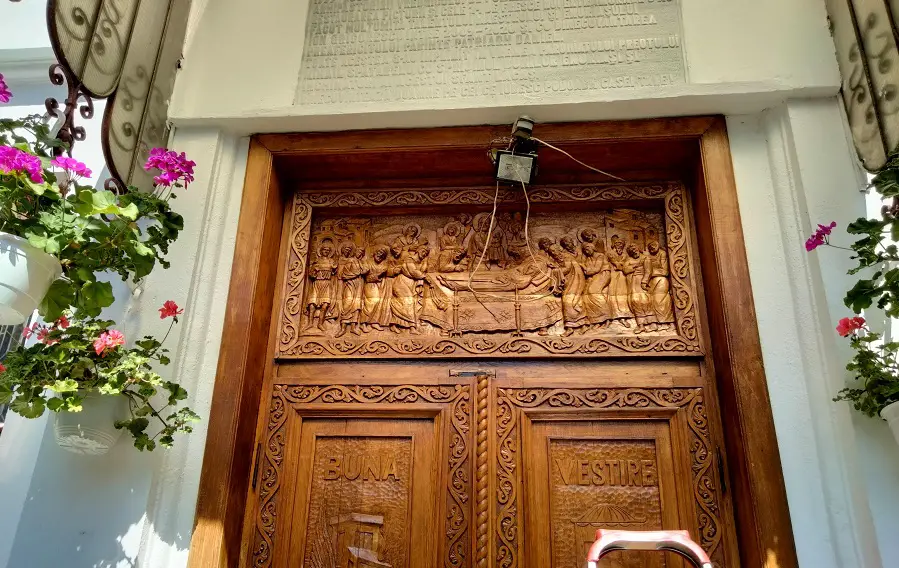
Locuiesc aproape de strada Pitar Moș, unde se află biserica cu același nume. Este o biserică mică și foarte veche, fiind ctitorită la sfârșitul secolului al XVIII-lea. Renovarea total greșită făcută înainte de 1989 a stricat în bună parte pictura murală, fapt ce a dus la neintroducerea ei în patrimoniul național. De aceea, lucrările de refacere a micii biserici s-au făcut greu și de multe ori greșit.
Din fericire, de peste 15 ani biserica are un preot paroh hotărât să aducă biserica la “strălucirea” de odinioară. A luptat mult, a vorbit cu toată lumea încercând să strângă o comunitate în jurul bisericii care să sprijine demersurile sale. Și a reușit. Procesul a început cu mulți ani în urmă și între timp au fost refăcute stranele, pictura interioară și cea exterioară, s-au montat lumini arhitecturale. Aspectul bisericii s-a schimbat mult în bine, lucru care i se datorează în totalitate.
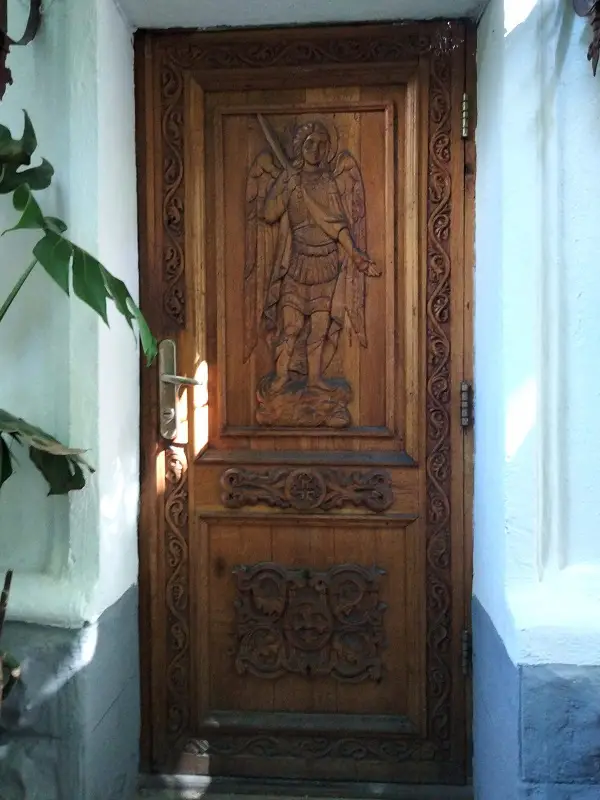
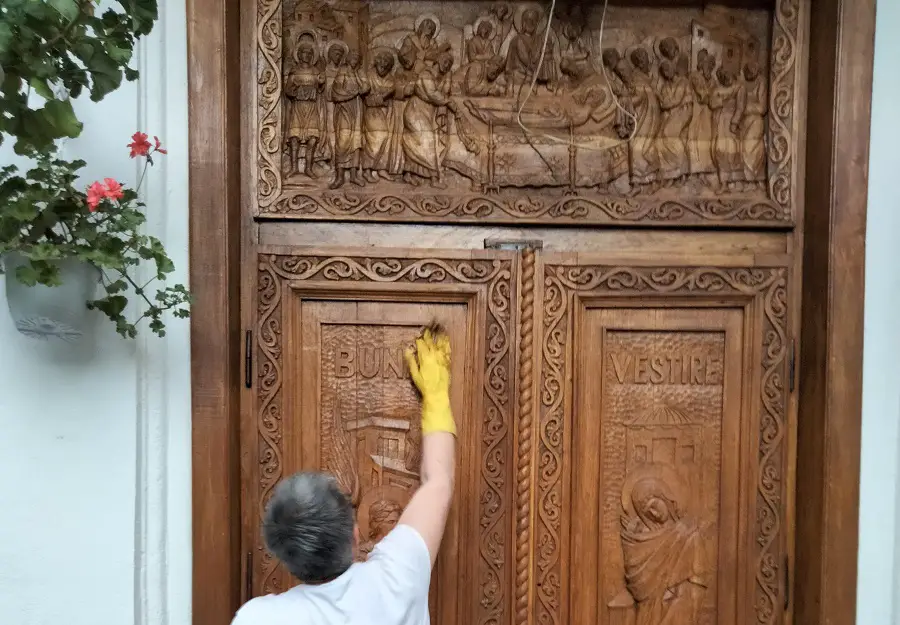
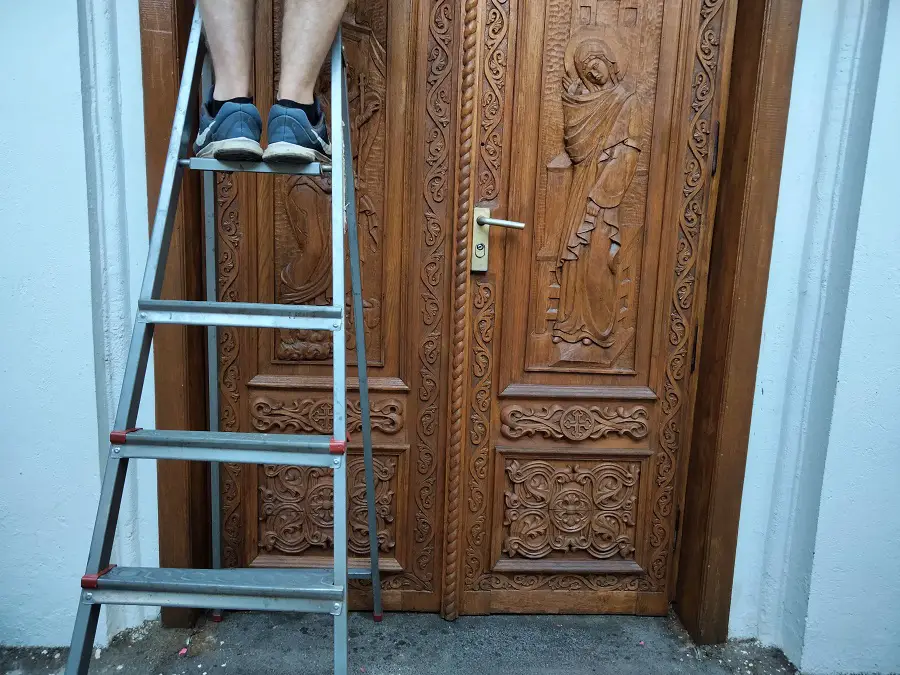
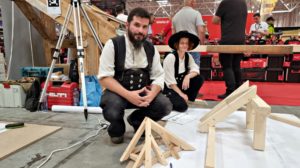
Acum a venit rândul ușilor din stejar sculptat, cele duble din față și una simplă, la intrarea în altar. Știind care este specializarea mea, m-a întrebat dacă pot ajuta. Am început să caut pe cineva care să facă lucrarea, dar a fost imposibil să găsesc un meșter dornic să se înhame la o lucrare așa de mică. Așa că am apelat la un foarte bun prieten, foarte priceput în lucrul cu materialele de finisare, căruia i-am propus să refacem împreună ușile. Și așa a început aventura.
Ce materiale și metodă de lucru am ales pentru curățarea lemnului de stejar
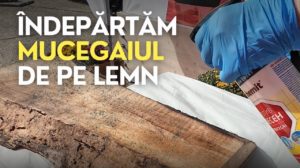
Primul pas a fost să vedem starea reală a ușilor, pașii și metoda de lucru și să facem rost de materialele necesare. Ușile arătau destul de bine din punct de vedere al integrității lemnului, dar erau foarte murdare și încărcate cu ulei gumos. Fuseseră tratate anual, din abundență, cu ulei de in fără a fi, însă, șters surplusul. Uleiul de in nu este dintre produsele care pot fi aplicate în cantitate mare pentru a forma peliculă. În strat gros nu se usucă niciodată, formând o masă gumoasă foarte lipicioasă care prinde tot praful și toată mizeria din atmosferă. Asta explica aspectul lor foarte murdar.
Următorul pas a fost să vedem cum putem îndepărta mizeria și guma de ulei. Primul gând a fost apă cu detergent, dar metoda nu a avut succes din cauza stratului gros. Nici șlefuirea cu disc de hârtie abrazivă nu a reușit, hârtia încărcându-se imediat. O soluție foarte bună ar fi fost sablarea cu bicarbonat de sodiu, dar fondurile nu permiteau acest lucru. Așa că am decis să folosim decapant, urmat de ștergere cu diluant și șlefuire.
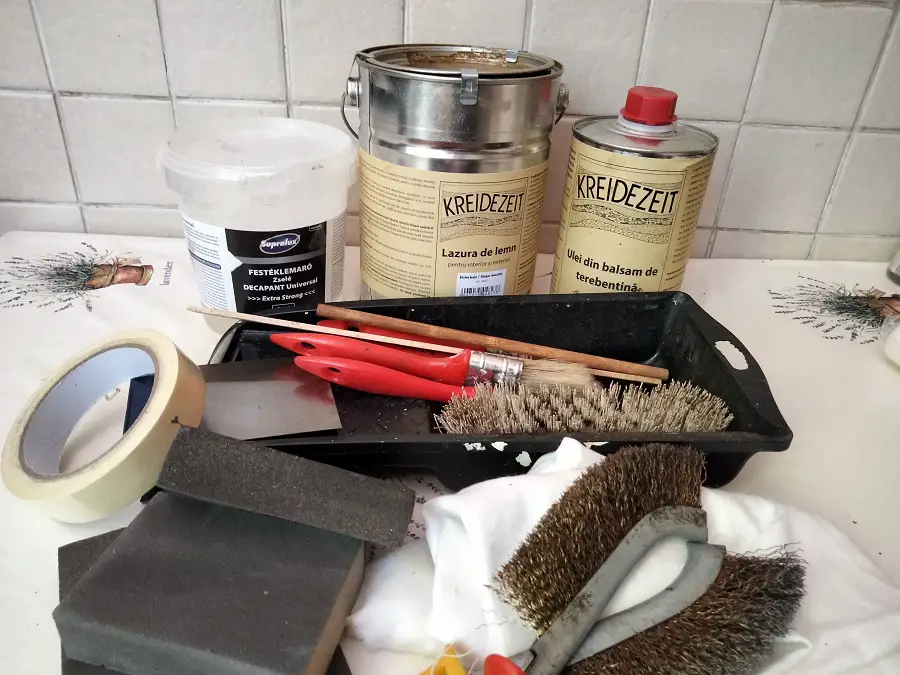
Ultimul pas al pregătirilor – materialele necesare (pe care le-am achiziționat de la un magazin de bricolaj, cu excepția lazurii și a diluantului):
- Decapant. Pentru că informațiile referitoare la eficiența lor erau contradictorii, am decis să luăm 3 tipuri, urmând a vedea cu care obținem rezultatele cele mai bune. Am folosit Decanol Super/Policolor, Dekapant Gel/Kober și Decapant Universal Extra Strong/Supralux.
- Role din hârtie de șlefuit pe care le-am folosit pe bormașină
- Perii de sârmă
- Bureți abrazivi grosieri, medii și fini
- Pensule.
Am mai folosit recipiente de plastic, amestecătoare din lemn și cârpe de bumbac. Cele mai bune cârpe de șters sunt cele din tricouri vechi. De data aceasta, însă, le-am făcut dintr-o față de masă veche și au absorbit foarte bine, fără să lase scame.
De ce a fost dificilă curățarea lemnului și cum am reușit să îndepărtăm stratul gros de ulei
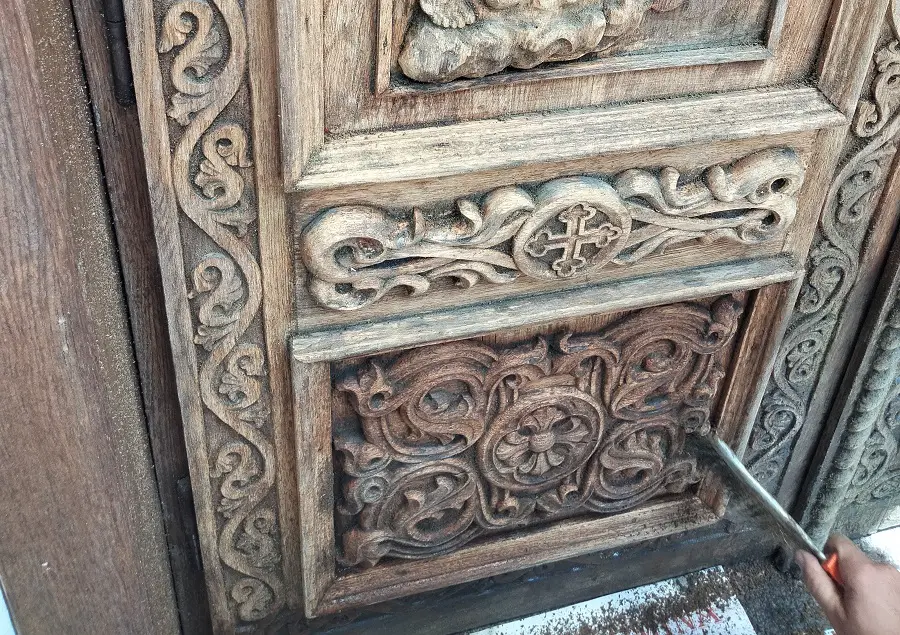
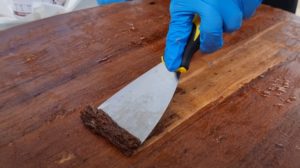
Pentru a curăța stratul gros și gumos de ulei de in am aplicat cu pensula decapantul și după 20 de minute am început îndepărtarea cu peria de sârmă a stratului înmuiat. Procesul a fost dificil, mai ales din cauza sculpturii care împodobea toată suprafața ușilor. Ajungeam greu în zonele din planul doi și am renunțat repede la utilizarea bormașinii cu rolă de hârtie abrazivă de teama de a nu strica sculptura. Am rămas la peria de sârmă, mai ușor de controlat.
O altă problemă a fost încărcarea periilor de sârmă cu uleiul gumos luat de pe ușă, ceea ce o făcea repede inutilizabilă. Având, însă, mai multe, am putut să le lăsăm pe cele colmatate în diluant pentru a se curăța, timp în care avansam folosind o perie curată. Pentru curățare am folosit acetonă și diluant de spălare, îndeajuns de agresive pentru a face din nou peria utilizabilă.
Dintre cei trei decapanți folosiți, de departe cel mai bun a fost Supralux extra strong. A acționat în profunzime astfel încât nu a fost nevoie să revenim de mai multe ori pentru a îndepărta total uleiul vechi. Rezultate satisfăcătoare am avut și cu decapantul marca Kober, cel mai slab fiind Decanolul de la Policolor. La final, indiferent de decapantul folosit, am ”spălat” suprafața cu diluant. Am folosit un diluant profesional de spălare, datorită conținutului mare de acetonă care-l face mai eficient. Spălarea s-a făcut cu pensula pentru a pătrunde și în cele mai dificile locuri. La final suprafața a rămas curată, fără gume de ulei și fără să fie lipicioasă, cum era după decapare.
Curățarea ușilor de uleiul vechi și transformat în gumă a fost cea mai dificilă parte a lucrării. Când se protejează lemnul cu ulei de in, excesul de ulei rămas neabsorbit TREBUIE îndepărtat prin ștergere. Altfel se va transforma într-o gumă care reține toată murdăria din atmosferă stricând repede aspectul obiectului protejat.

Finisarea cu lazură Kreidezeit
După îndepărtarea vechiului strat de ulei și spălarea suprafeței cu diluant am șlefuit toată suprafața cu burete abraziv mediu. Suprafață a devenit plăcută la atingere fără a fi foarte fină, astfel încât a putut absorbi lazura. După ștergerea prafului de lemn cu cârpa am început aplicarea cu pensula a lazurii Kreidezeit precolorată stejar deschis, culoare foarte potrivită cu ușile din stejar masiv ale bisericii. Aplicarea s-a făcut în exces și după 45 minute, timp în care lemnul a absorbit cât a avut nevoie, am șters întreaga suprafață cu o cârpă curată, insistând pe zonele sculptate pentru a nu rămâne ulei ascuns.
Timpul minim de uscare a lazurii este de 24 ore, dar noi am lăsat mai mult de atât. Nu este o problemă dacă lăsați mai mult timp, problemă este dacă se aplică al doilea strat înainte ca primul să fie complet uscat. Am lăsat mai mult timp pentru că au fost câteva zile foarte călduroase, fiind greu și riscant de aplicat uleiul în condiții de caniculă.
După ce au trecut zilele foarte călduroase, am reluat activitatea. Era nevoie și de al doilea strat de lazură pentru o rezistență bună în timp. Pentru a nu închide foarte mult culoarea ușilor am decis ca al doilea strat să fie de lazură incoloră. Primul strat adusese suficientă culoare pentru ca ușile să fie protejate de razele soarelui, mai ales că nu erau expuse direct. Ușa din spate aproape că nu e ”văzută” de soare niciodată, iar cele din față, pe lângă protecția dată de arborii înalți din curte, are și o copertină care o protejează suplimentar.
Am aplicat lazura incoloră la fel ca pe cea colorată, cu pensula, în exces, după care am șters uleiul neabsorbit de lemn cu cârpa curată. Timpul de așteptare a fost tot de 45 de minute. A rezultat o suprafață cu o culoare frumoasă, plăcută la atingere și mai ales, curată.
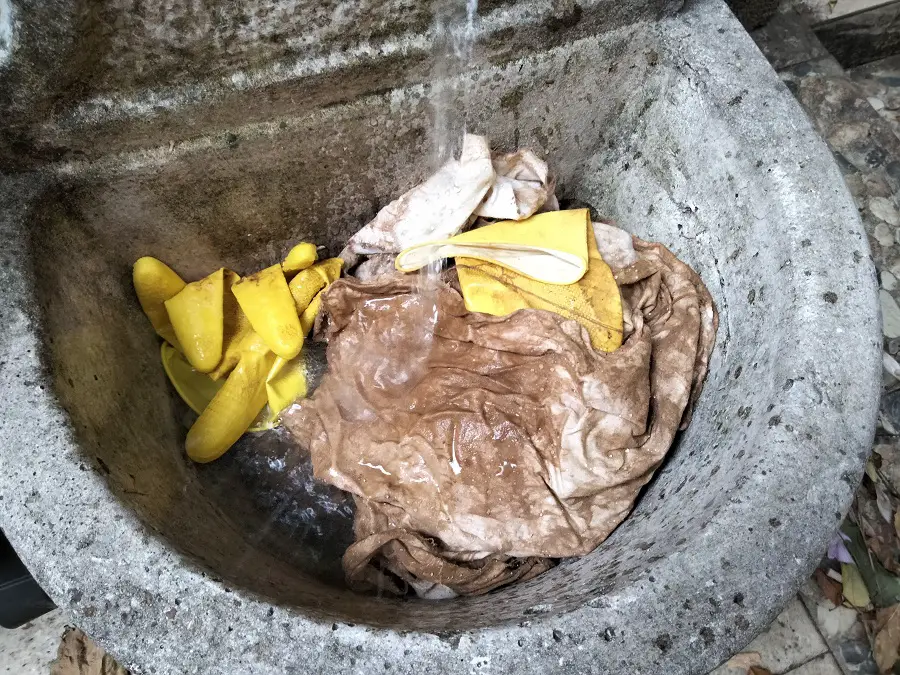
ATENȚIE! Resturile de ulei, cârpele și bureții îmbibați pot prezenta fenomenul de autocombustie, mai ales în zilele foarte calde și dacă stau direct în bătaia soarelui. Este din cauza uleiurilor volatile din solvent. Pentru a preîntâmpina orice problemă toate resturile trebuie puse în recipientele goale de ulei și acoperite cu apă. Uneltele folosite se spală bine cu diluant, după care se șterg bine sau se țin în apă. Și noi am pus toate cârpele folosite în recipientele rămase goale și le-am acoperit cu apă.
În concluzie
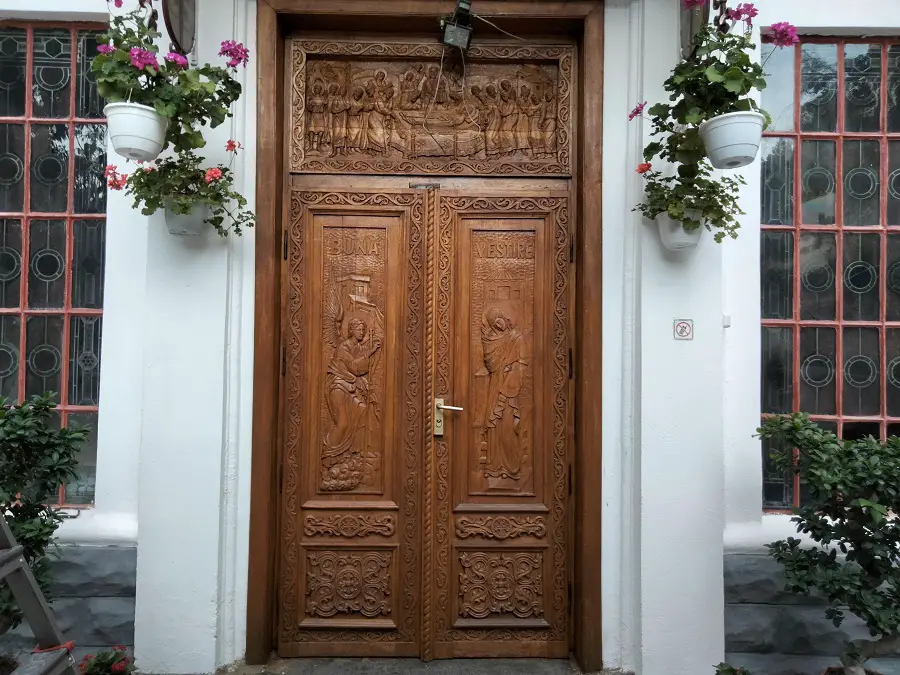
Acum ușile biserici Pitar Moș arată din nou bine. În urma întregului proces am rămas cu o stare de bine pentru că am putut face acest lucru, dar și cu câteva concluzii:
- Uleiul nu trebuie lăsat în exces decât dacă producătorul recomandă acest lucru (există uleiuri cu întăritor care formează peliculă). În general, uleiurile naturale nu fac peliculă vizibilă, așa cum fac lacurile, iar excesul neșters nu se usucă ci se transformă în suprafețe gumoase, lipicioase, care atrag murdărie și praf.
- Uleiul transformat în gumă se îndepărtează foarte greu, mai ales dacă suprafața nu este plană. Încarcă repede hârtia de șlefuit și periile de sârmă, făcându-le inutilizabile. Soluția cea mai eficientă a fost decaparea urmată de ștergerea suprafeței cu diluant.
- Decapanții folosiți au avut putere de acționare diferită, cel mai eficient fiind cel extra strong, marca Supralux.
- Pentru rezistență cât mai bună în timp, lazura pe bază de ulei se aplică în exces, se lasă pe lemn ca să absoarbă bine, după care se șterge excesul. Se aplică minimum 2 straturi. Cel puțin unul dintre ele trebuie să aibă conținut de pigment (colorat semitrasparent) pentru ca finisajul să fie rezistent și la radiațiile UV.
- Resturile de ulei și cârpele sau bureții îmbibați trebuie puși în recipiente cu apă și acoperite pentru că pot prezenta fenomenul de autocombustie.
Voi urmări comportamentul ușilor în timp și mă voi ocupa de întreținere astfel încât să prelungesc cât mai mult viața finisajului. Imediat ce aspectul lor va deveni mai tern, fără luciul specific dat de ulei, voi aplica încă un strat de lazură. Lipsa luciului este un semn că precipitațiile au ”spălat” uleiul și pentru a păstra rezistența la apă trebuie aplicat încă un strat. La momentul respectiv refacerea va fi simplă, fără decapări și șlefuiri, pentru că acum am aplicat materialele corect, respectând tehnologia de lucru.
Sper să considerați interesante informațiile. Dacă aveți neclarități sau doriți informații suplimentare, lăsați întrebările mai jos, în spațiul dedicat. Sigur vă voi răspunde.


Ati facut o treaba tare frumoasa. Dumnezeu sa va rasplateasca. Doamne ajuta.
Bravo!
Usile arata foarte bine.
Multumim si pentru recomandarile de materiale si proceduri.
Buna ziua!
Felicitari pentru implicare si rezultat!
As dori un sfat, daca se poate, va rog! Am salvat (spun asta deoarece, daca nu l-as fi cumparat, ar fi ajuns la gunoi) un dulap lucrat in stil brancovenesc. Acesta a fost vopsit cu vopsea alba (nu stiu ce tip). Cum as putea sa-l curat de vopsea, fara sa afectez lemnul si toata “broderia” aceea facuta manual?
Va multumesc anticipat pentru raspuns!
Bună ziua!
Mulțumim pentru aprecieri!
Variante pentru curățarea vopselei vechi sunt sablarea, șlefuirea, decaparea sau arderea. Sablarea are rezultatele cele mai bune, dar este scumpă și trebuie făcută de cineva care știe cum se sablează lemnul. Sablarea lemnului se face cu bicarbonat de sodiu, gheață carbonică, spărtură de coji de nucă și alte astfel de materiale mai puțin dure.
Cea mai la îndemână și sigură variantă în cazul dumneavoastră este folosirea unui decapant. Las mai jos un link către un articol în care am descris pe larg procedura. De asemenea, las link către articole despre metode de curățare a straturilor vechi de vopsea.
Succes!
https://revistadinlemn.ro/2022/09/08/cum-sa-cureti-cu-decapant-straturile-vechi-de-vopsea/
https://revistadinlemn.ro/2017/09/15/cum-se-curata-stratul-vechi-de-vopsea/
https://revistadinlemn.ro/2021/09/16/lemnul-innegrit-de-vreme-sau-straturile-vechi-de-vopsea-se-pot-curata-prin-sablare-atentie-insa-la-riscuri/
https://revistadinlemn.ro/2020/12/03/ce-trebuie-sa-stii-daca-vrei-sa-cureti-prin-sablare-vechiul-strat-de-vopsea-de-pe-usile-de-lemn-sau-mobilier/
Bună ziua!
Toată stima pentru munca (destul de grea) depusă, cu efect magic, deoarece rezultatul final este minunat!
Acum vă rog cu un sfat referitor la cum pot la nivel de amator (fără multe cunoștințe), să renovez ușile din interiorul apartamentului!
Ușile cu pricina sunt din lemn de brad date cu lac transparent acum mai bine de 25 ani. Nu sunt ele foarte grozave dar sun totuși din lemn și nu vreau să le înlocuiesc cu unele ( destul de scumpe) din “rumeguș” plasticat.
Mai rău este faptul că au unele spații dintre plăcuțele ușilor ce trebuiesc reparate (umplute). Acum ușile au un aspect foarte deschis de lemn gălbui, și doresc o nuanță mai închisă.
Vă rog cu puțină răbdare explicați care și cum sunt pașii de urmat în ceea ce am de făcut!
Mulțumesc anticipat!
Bună ziua!
Mulțumim pentru aprecieri!
Pașii de urmat sunt:
– Ușile se curăță până la lemn. Sunt mai multe metode de curățare, cel mai simplu mi se pare cu decapant. Aveți mai jos un link către un articol unde este explicat pe larg cum se face.
– se rezolvă defectele apărute în timp: zgârieturi, loviri, imprimări, găuri. Zgârieturile fine și imprimările se rezolvă șlefuind suprafața cu hârtie abrazivă cu granulația 100, apoi cu 150 sau 180 pentru ca să redevină fină.
Spațiile dintre plăcuțe este posibil să fi apărut din cauza umidității foarte mici din interior. Se întâmplă în casele încălzire cu calorifer, este o căldură uscată (las jos un link cu explicații detaliate). De aceea se recomandă punerea de vase cu apă pe calorifer. Dacă este așa, nu trebuie să faceți nimic. Ușa își va reveni la primăvară, când nu se mai încălzește în interior și umiditatea se echilibrează. Dacă plăcile sunt în ramă, NU trebuie lipite de ea pentru că vor crăpa. Ele trebuie să se poată mișca în ramă tocmai pentru a permite mișcarea generată cu variația de umiditate.
Dacă spațiile sunt permanente (nu apar doar iarna) și nu străpung ușa, trebuie chituite. Folosiți chit de lemn, se găsește în orice magazin de bricolaj. Se pune chit în spațiul apărut, în exces, se lasă să se usuce, după care se șlefuiește pentru a fi adus la nivelul ușii. Aveți procedeul descris pe larg în link-ul de mai jos.
Dacă spațiul este străpuns (se vede prin ușă), vor trebui puse pene din lemn care se lipesc cu aracet.
– se șlefuiește toată ușa cu hârtie de șlefuit cu granulație 150 sau 180, în lungul fibrei. Se desprăfuiește bine cu cârpa.
– se aplică 2 straturi de lac pe bază de apă. Se găsește în magazinele de bricolaj.
Lemnul și lacul îngălbenesc în timp, mai ales lemnul de rășinoase și lacul nitrocelulozic (cum cred că a fost pe ușă). Lacul pe bază de apă îngălbenește mult mai puțin.
Sper să vă fi fost de ajutor.
Las mai jos link-urile despre care am vorbit.
Succes!
https://revistadinlemn.ro/2022/09/08/cum-sa-cureti-cu-decapant-straturile-vechi-de-vopsea/
https://revistadinlemn.ro/2021/11/10/usile-sunt-prea-colorate-cum-pot-indeparta-lacul-fara-sa-slefuiesc-si-de-ce-este-lemnul-asa-putin-vizibil-desi-a-fost-doar-lacuit/
https://revistadinlemn.ro/2017/01/11/lemnul-si-obiectele-din-lemn-timpul-iernii/
https://revistadinlemn.ro/2018/11/13/chit-de-lemn-cum-se-foloseste-tipuri-de-chit/
https://revistadinlemn.ro/2020/10/29/ce-trebuie-sa-stii-daca-vrei-sa-revopsesti-mobila-sau-usile-de-lemn/
https://revistadinlemn.ro/2020/04/23/vopsirea-si-lacuirea-sfaturi-pentru-incepatori/
Foarte frumos! Am hotărât sa folosesc aceasta lazura pentru căsuța de gradina din lemn, urmând recomandările d-voastră. Pardoseala căsuței este din osb, pentru ea ce pot sa folosesc? Mulțumesc anticipat!
Din gama Kreidezeit puteți folosi ulei dur pentru podele și un strat de ceară pentru podele.
Sau puteți aplica 2 straturi de lac de parchet pe bază de apă. Se aplică cu trafaletul și protejează bine. Găsiți astfel de lacuri în magazinele de bricolaj.
Succes!