


At first glance, wood burning can be a scary, if not frightening, subject. In this vein I even had at one time an article about protecting wood against fire by treatment with flame retardants. Yet how did we get from fire protection to fire protection and coloring with it? Why do I assert that you do good to wood if you burn it? It is what I intend to tell you next.
Protecting wood with fire was discovered by the Japanese in the 1700s (some documents even earlier). The method is called Shou Sugi Ban (in translation, burnt cedar plank) or Yakisugi. They saw that by burning the surface of the cedar plank (sugi) until charred, the wood becomes highly resistant to weathering, rotting and insect attack, making it very suitable for outdoor use. The method was intensively used until about 100 years ago when the advent of modern building materials (cement and later plastics), combined with a shortage of indigenous wood at that time, almost led to its disappearance.
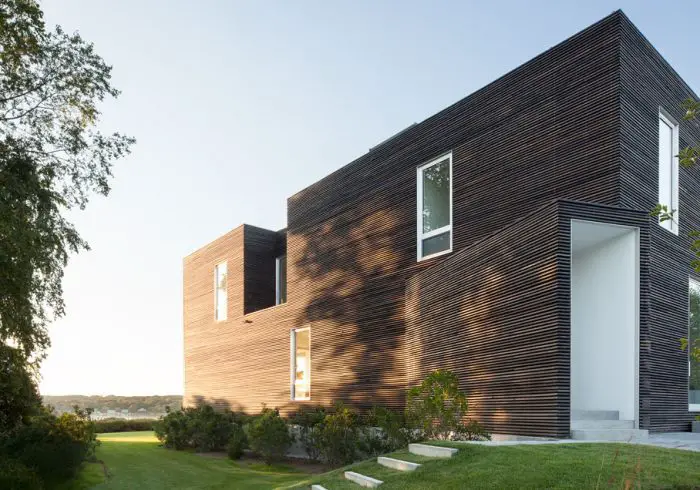
In the 2000s the technique was rediscovered and quickly came to the attention of designers and architects in Europe and North America. Enthusiasm was so great that burned wood went beyond fencing and cladding houses and became widely used indoors for flooring, wall decoration and furniture. Producers have emerged who industrially obtain burned wood and then process it to enhance its beauty.
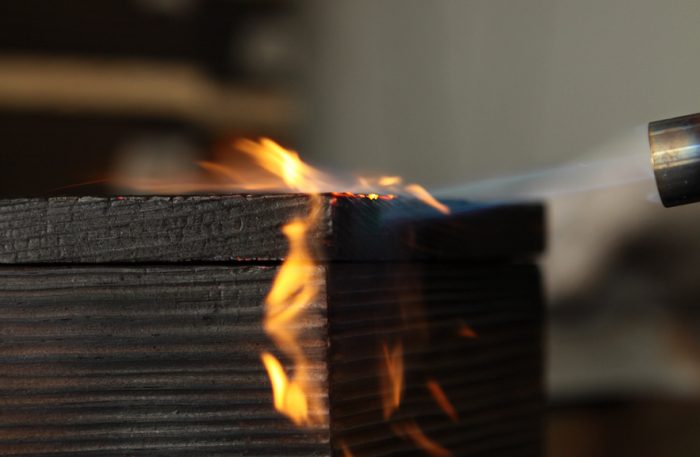
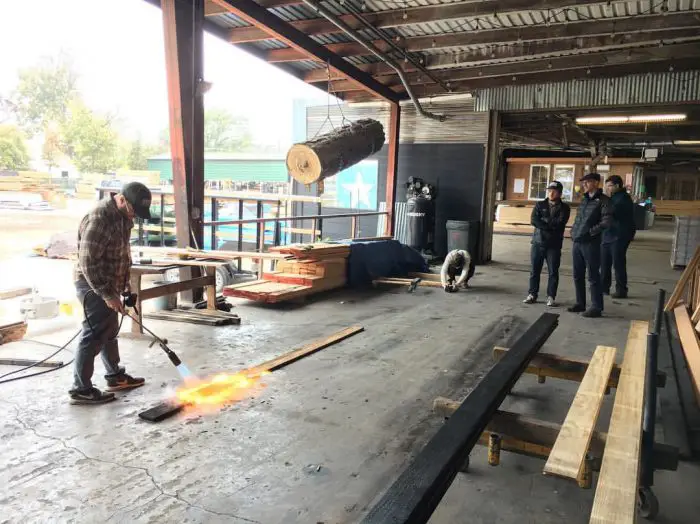
Basically, the method consists of burning the wood using various processes (gas burner, direct flame burning by basically setting the wood on fire, etc.), extinguishing the fire and cooling the surface using water and cleaning the burnt surface. This cycle can be repeated several times until the desired result is achieved. Cleaning of the surface is done with wire brushes and can be done only superficially or in depth.
Wood burned in this way can be used to build houses, fences or for other outdoor uses. The charcoal coating has a good protection against UV radiation, and it is considered that such wood can last 80 to 100 years without any maintenance. The wood can be used as it is or, after brushing, it can be treated with oil.
Starting from the basic steps of the method, all kinds of techniques have been developed to obtain surfaces with different textures and colors. Burning can be done to different depths. Cooling with water can also be done in different ways: by pouring a large amount of water directly onto the plank or by slowly dripping the water. This produces different structures of the burnt wood, controlling the breakage of the 'charcoal' layer on top.
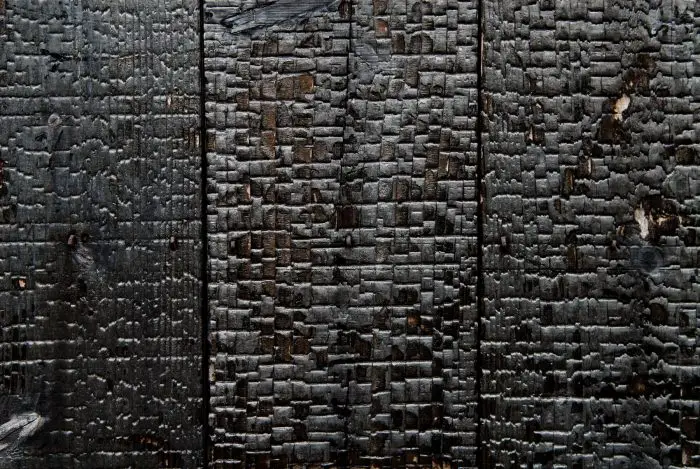
Cleaning wood can also lead to various effects. It can be cleaned only to remove the soot layer on top and get to the stable burnt part, or that part can be removed, more or less, depending on the desired design. It can be obtained as follows structured wood.
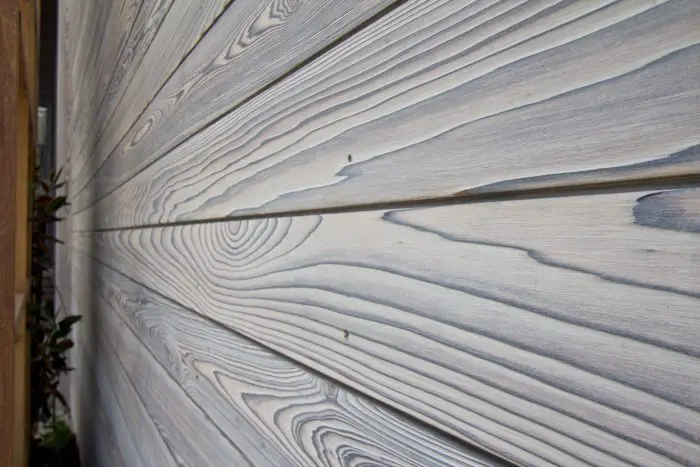
How does structuring work? Early wood, being softer and looser, burns faster than late wood. When the burn is removed by brushing with a wire brush, more material will be removed in the early wood area and the late wood will stand out.
The way the burned wood is cleaned can also color the wood. By brushing the wood, the part of the wood that is cleaned first is the late wood, where the natural color of the wood appears, and the rest of the wood remains the black color of charcoal. This will give the wood a patina finish.
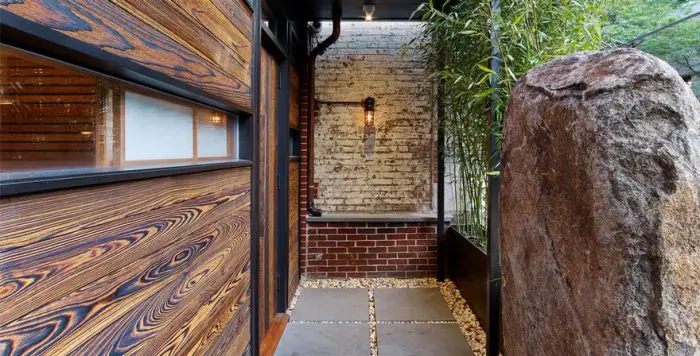
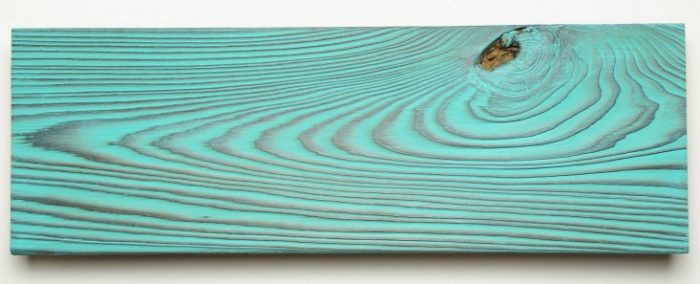
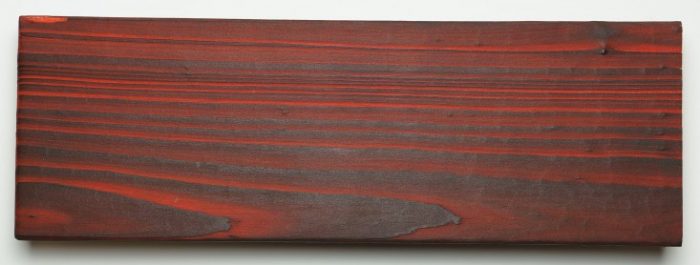
But the most spectacular is when you combine the burn with the bath. The wood is brushed to partially remove the burned part, and a glaze is applied to the surface. The burned area does not absorb the color, remaining black, unlike the area where the wood has been reached and the bath is absorbed normally, coloring the wood. The combination of applied color and charcoal black is truly spectacular.
While the method was initially applied to Japanese cedar, it was gradually extended to other species. But it looks best on resinous wood (fir, pine, spruce, douglas fir) and especially when it is cut so that it has a flaring.
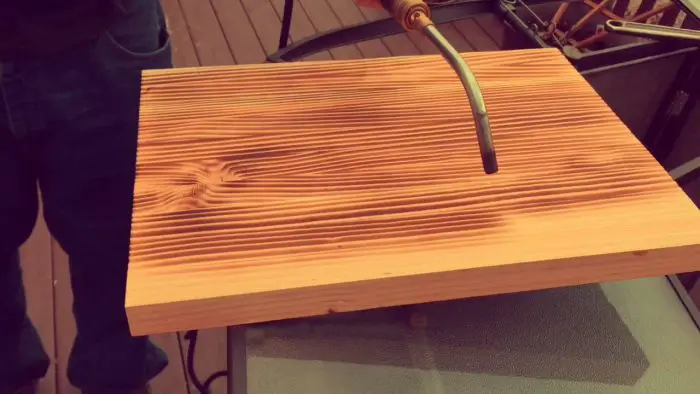
Fire staining can also be done without the wood being carbonized. By superficial burning, the early wood will be the first to change color, thus bringing out the natural design of the wood. Burning is done with a simple gas torch, without the need for complicated, high-powered and much more dangerous installations.
Once it has been stained, the wood can be protected by applying varnishes or, even better, by applying oils.
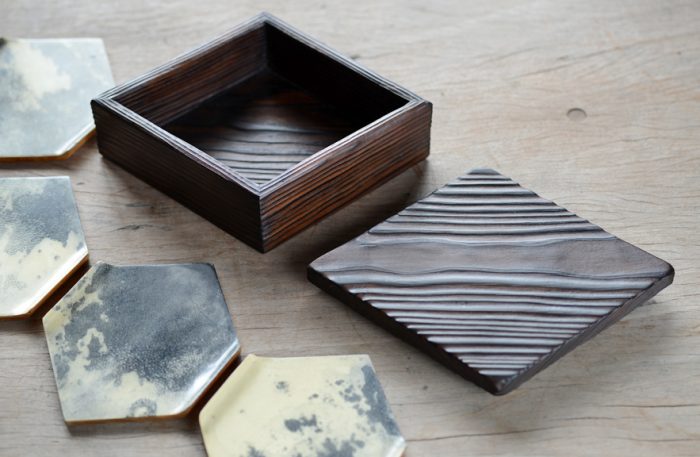
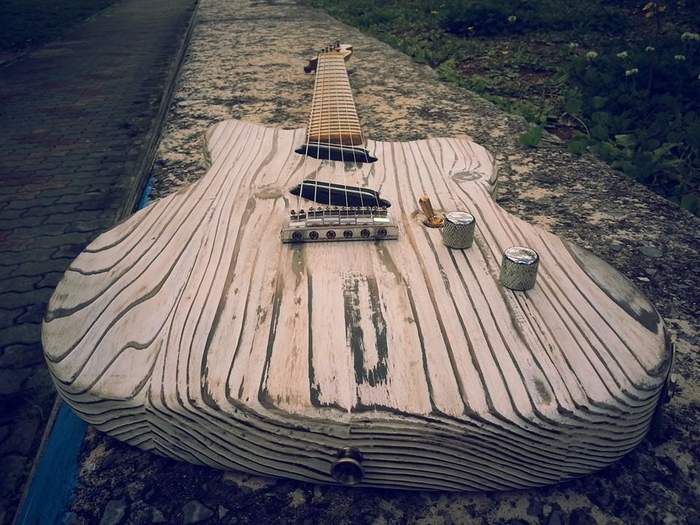
The method has now gone far beyond its use as an exterior protection and has entered the field of interior design, but also furniture and decorative objects. The special effects that can be achieved by carefully controlling the burning, brushing or staining have allowed it to be used to decorate more special objects, such as jewelry boxes or even electric guitars.
This is a coloring method that you can also use in diy projects. But remember that wood burns easily and you should be very careful when doing this. And if you don't have the conditions or the skill, it's best to leave the burning staining to the professionals.
Another interesting method with spectacular results, but also extremely dangerous, is electric wood burning. I don't recommend it, but I think any information is welcome even if we don't put it into practice.


Awesome!!! Thanks so much for so much information!!!! Priceless!
Interesting! Thanks for the information!
Extremely interesting article, thanks for these invaluable lessons!
Can't wait to try it!
I thank you for your appreciation and for following us.
All the best!
Beautifully detailed with pictures , congratulations on the article . Even though I was aware of it I still enjoyed hearing your opinion.
Thank you.
Would this process be recommended for a resin fence? Shallow cleaned and given with linseed oil.
After how long should the oil layer be renewed?
It is a very good outdoor protection system and can also be applied to softwood. The more pronounced the burn, the greater the resistance. The charcoal on the surface protects very well.
If you clean a lot and then apply linseed oil, depending on how heavy the weathering is, you will need to re-spray the finish every 1-3 years. If you leave more burn on the surface it will last longer.
All the best!
Don't forget to subscribe to the printed Wood Magazine! For only 58 lei/year you can find out news in the field, discover craft ideas or trade secrets. We remind you that the content in the printed magazine is different from the one on the website. Details in the link below.
Thank you!
https://revistadinlemn.ro/product/abonament-revista-din-lemn/
Do you have any idea in Romania in which century this method appeared? And now there are houses with smoked attic/roof timbers or burnt shingles. Superb article. Thanks
In France they realise roofing, exterior cladding and furniture from wood burnt in depth at a very high temperature.They protect it with a black resin. Interesting article.