


Cu toate că sunt păreri care spun că lemnul ar trebui folosit necolorat, farmecul fiind culoarea lui naturală, cel mai mult îl întâlnim colorat, de la nuanțe naturale de nuc sau pin la culori dintre cele mai neobișnuite. Este preferat așa și pentru că prin culoare este pus în evidență mult mai bine desenul lui natural. Colorarea lemnului nu este însă o operație simplă. Lemnul este un material neomogen și anizotrop, cu proprietăți diferite de la specie la specie, în cadrul aceleiași specii și chiar în interiorul aceleiași bucăți de lemn în funcție de orientarea fibrei. Acest lucru face ca obținerea unei colorări uniforme, fără pete, să fie o sarcină destul de grea. Dar nu imposibilă.
De ce apar petele la colorare
Principala cauză a apariției petelor este absorbția diferită a culorii în lemn. Se întâmplă din cauza calității lemnului sau a modului în care este prelucrat înainte de colorare. Dacă ne referim la calitatea lemnului vorbim despre densitatea lui, despre cât de ușor absoarbe soluția de colorare, conținutul de rășini sau taninuri sau defectele de creștere (noduri, fibră rasucită). Adică, un lemn precum plopul, cu creștere rapidă și foarte afânat, absoarbe culoarea repede și diferit iar petele pot apărea foarte ușor. Stejarul însă este dens și mai dur ceea ce face ca absorbția să fie uniformă și colorarea fără pete.
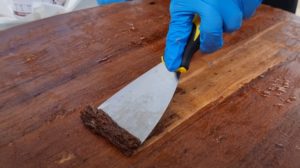
Legat de prelucrare important este modul cum este tăiat lemnul și cum este șlefuit. Tăierile curate, fără smulgeri și scămoșări, făcute cu scule de calitate bine ascuțite, fac ca absorbția să fie mai uniformă. Șlefuirea este unul din procesele cele mai importante pentru aspectul final al produsului. Colorarea uniformă, aderența lacului, tușeul plăcut al peliculei depind de câtă atenție s-a dat șlefuiri. Consider atât de importanța șlefuirea pentru a obține un produs final de calitate încât am pus-o pe primul loc în recomandările privind colorarea fără pete a lemnului.
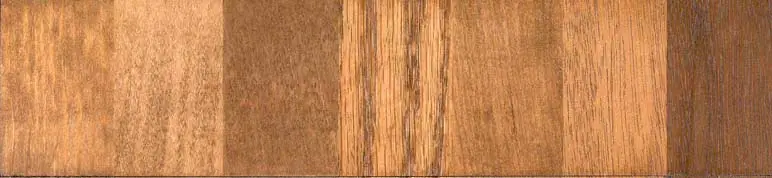
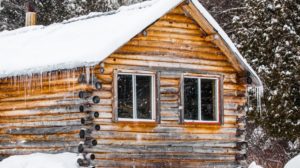
sursa foto: homesteadfinishingproducts.com
1. Șlefuirea lemnului înainte de colorare este foarte importantă pentru o colorare fără pete
Prin șlefuire se netezesc acele capete de fibră care rezultă la tăierea lemnului. Prin aceste fibre hrana intra în copac înainte ca el să fie tăiat. De aceea pătrunderea culorii pe aici este naturală și dacă nu este controlată poate duce la apariția petelor.
Șlefuirea se face întâi cu hârtie abrazivă sau bureți abrazivi grosieri – granulația fiind 80-100. Apoi se trece la granulație mai fină pentru a da acel tușeu plăcut. La lemnul dur – stejar, frasin, fag – granulația mai fină este considerată 150, suficientă pentru a obține o suprafață de calitate. Dacă lemnul este moale, afânat și neuniform – plop, tei, arin, chiar și molid – este nevoie de granulație 180 sau 220 pentru a “îmblânzi” fibra scămoșată și a putea obține o colorare cât mai uniformă.
Prin șlefuire se îndepărtează și eventualele pete de adeziv sau grăsimi (amprente grase de la mâncare sau produse folosite în producție) sau zgârieturile fine. Pe aceste zone, dacă nu sunt șlefuite, după colorare apar pete. Pe lemn ele nu sunt vizibile înainte de băițuire. Șlefuirea însă le îndepărtează și astfel se înlătură riscul de apariție a petelor.
Nu ignorați această etapă dacă vreți să obțineți un produs de calitate. Cu cât mai mult timp veți petrece la această fază cu atât mai de calitate va fi colorarea și mai târziu, finisarea. Mai multe informații despre șlefuirea în alb puteți găsi și aici.
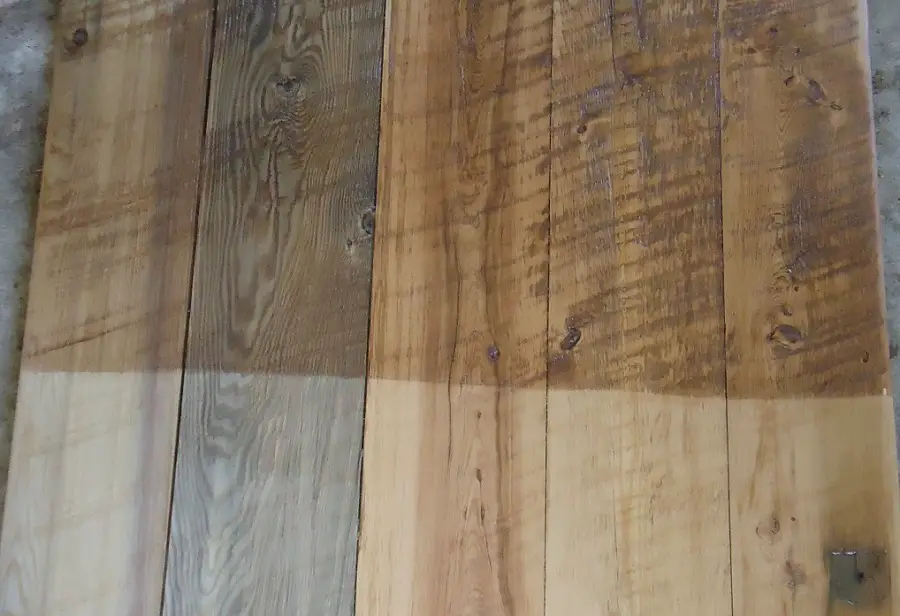
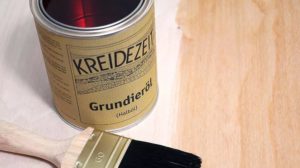
sursa foto: circlerockinc.com
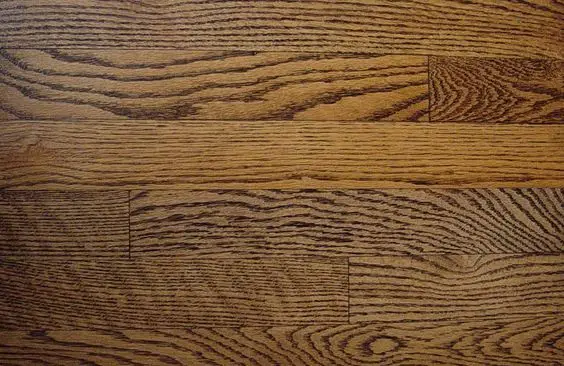
2. Alegeți soluția de colorare ținând cont de esența lemnoasă
Poate părea ciudat, dar nu toate speciile de lemn se comportă la fel atunci când sunt tratate cu un anumit tip de soluție de colorare. De exemplu, stejarul și fagul sunt amândouă esențe dure, cu densitate mare. Totuși atunci când sunt tratate cu o soluție de colorare făcută din smoală si white spirit (P43 – celebră în urmă cu zeci de ani) se comportă total diferit. În timp ce stejarul se colorează foarte frumos și uniform lemnul pe fag, indiferent cât de bine este șlefuit, va fi plin de pete. De aceea o minimă documentare privind comportamentul lemnului la colorare vă poate scuti de multe probleme.
Soluțiile de colorare (baițurile) pot fi pe bază de apă sau pe bază de solvent, cu rășină adăugată sau fără, făcute din coloranți solubili sau din pigmenți. Cu toate că, la modul general, fiecare are tipul ei de comportament (pigmenții uniformizează, coloranții scot în evidență desenul natural, etc) interacțiunea cu lemnul poate produce surprize. Și asta pentru că lemnul conține taninuri, rășini, coloranți și multe săruri care pot influența colorarea și absorbția în lemn. De aceea în fabrici se fac întotdeauna teste cu baițul ales pe lemnul care va fi folosit în producție. Așa se poate vedea comportamentul lemnului și se poate ajusta baițul în funcție de nevoi.
Câteva “ponturi” despre colorarea lemnului:
- baițurile pe bază de apă pătrund mai mult în profunzimea lemnului, probabilitatea să păteze fiind mai mare. Dar culorile sunt mai vii și desenul natural mai bine pus în evidență;
- baițurile pe bază de solvent au comportament diferit în funcție de amestecul de solvenți folosiți. Cu ele se poate jongla mai ușor făcându-le să se usuce mai repede sau mai încet sau să pătrundă mai mult sau mai puțin în lemn. Totul se reglează variind proporția solvenților din amestecul diluant;
- un baiț făcut cu acetonă este uniformizat, colorarea făcându-se numai la suprafața lemnului (acetona se evaporă foarte repede);
- acetona și alcoolul etilic (alcool tehnic) sunt miscibile cu apa. Puteți grăbi uscarea baițurilor pe bază de apă înlocuind o parte din apa de diluție cu acetonă sau alcool.
Indiferent de tipul baițului verificați întotdeauna pe o suprafață mică compatibilitatea cu lemnul folosit. Vă puteți da seama de aspect doar după uscarea completă a baițului și acoperirea cu un strat de lac (sau grund). Acestea scot în evidență defectele, chiar și cele care sunt mai puțin vizibile.
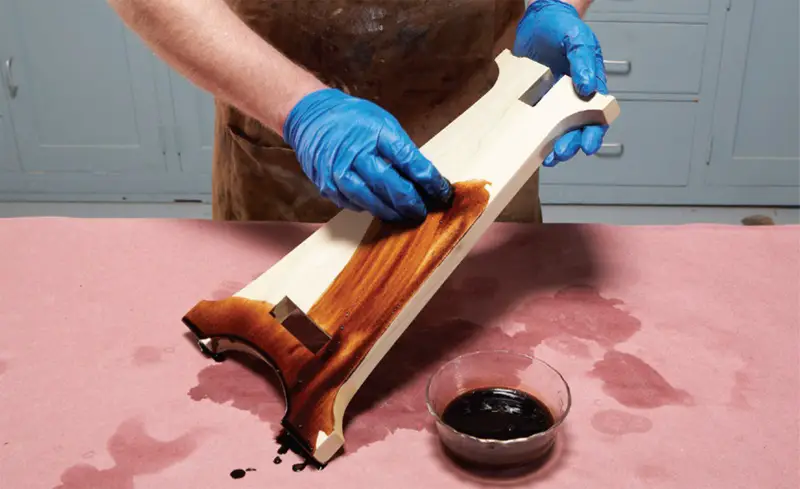
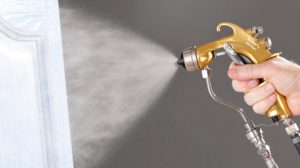
3. Alegeți o metodă de aplicare care să permită un control mai mare al cantității aplicate
Petele apar mai ales în urma absorbției soluției de colorare în lemn. Dacă într-un loc lemnul poate absorbi mai multă culoare în acel loc se va păta. Dacă pensula încărcată de culoare este pusă direct pe lemn fără a diminua cantitatea prin ștergere de marginea recipientului, acolo va apărea o pată închisă la culoare. De aceea un control asupra cantității aplicate poate reduce riscul de pătare.
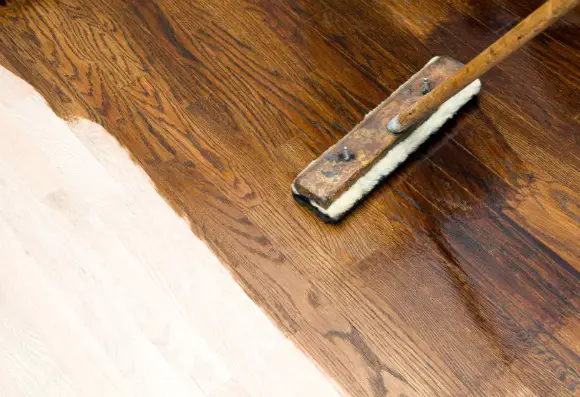
În fabrici cel mai bine se controlează colorarea atunci cand aplicarea se face cu pistolul. Pulverizarea începe în afara suprafeței de colorare și se termină tot în afara ei, tocmai pentru a nu depune o cantitate mai mare sau mai mică de culoare. Se poate regla cantitatea ce iese din pistol astfel încât să se aplice o anumită cantitate/m². Colorarea va fi mai uniformă iar petele vor apărea numai dacă lemnul nu este bine pregătit în alb.
Trafaletul permite de asemenea un control destul de bun al cantității aplicate. Alegerea tipului de material care îmbracă tamburul este importantă. În cazul bureților, aceștia pot fi de diferite calități. Cu cât înglobează o cantitate mai mică sau cu cât cantitatea eliberată este mai controlată cu atât colorarea va fi mai uniformă.
Atunci când se face colorarea cu pensula, cârpa sau buretele trebuie avut grijă ca ele să nu fie puse încărcate de soluție pe lemn pentru că în acel loc va apărea o pată. Ele se storc întotdeauna înainte. Cârpa se bagă cu totul în vasul cu culoare, după care se stoarce. Nu o îmbibați numai parțial pentru că în timp va acumula din ce în ce mai multă culoare pe care o va transfera lemnului, colorarea fiind mai deschisă la început și mai închisă la final.
Indiferent de metodă, nu suprapuneți parțial straturile de culoare pentru că acolo va apărea o pată. Adică nu treceți de 2 ori cu pensula, cărpa, trafaletul, pistolul peste o porțiune unde lemnul a absorbit deja culoare și s-a zvântat puțin. Acolo lemnul va absorbi dublu iar porțiunea respectivă va fi mai închisă la culoare.
4. Blocarea absorbției în profunzime atunci când lemnul este moale și absoarbe neuniform
Sunt situații în care indiferent cât de atenți suntem la aplicare, cât de bine controlăm cantitatea aplicată, tot apar pete pentru că lemnul este mult prea moale, scămoșat și neuniform. În acest caz soluția este să păstrăm culoarea cât mai la suprafață astfel încât lemnul să aibă o influență cât mai mică.
Am văzut mai sus că o modalitate de a face acest lucru este folosirea baițurilor pe bază de solvenți repede volatili, adică acetona. Atunci când aplicarea se face cu pistolul baițul ajunge aproape uscat pe suprafața lemnului, colorarea fiind foarte uniformă. Dezavantajul este că desenul natural al lemnului este mai puțin reliefat și mai ales, mediul de lucru devine foarte greu de suportat din cauza solventului.
O altă metodă este “îngroșarea” baițului astfel încât să fie mai greu de absorbit. Se poate face prin adăugarea de rășină în baiț. O metodă simplă este adăugarea de lac (grund) nitro în baițurile simple pe bază de solvent sau lac (grund) hidrodiluabil în cele pe bază de apă. Trebuie verificată compatibilitatea înainte prin amestecarea unor cantități mici. Nu se adaugă o cantitate foarte mare pentru că se transformă în lac colorat care poate da un aspect de plastic lemnului.
Tot de grund ne putem folosi pentru a crea o barieră în calea baițului. Grundul (lacul) ce urmează a fi folosit se diluează 50, chiar 100% și se aplică pe lemn înainte de colorare. Nu trebuie să facă peliculă. După uscare se șlefuiește din nou lemnul și se aplică baițul. Absorbția va fi mai mică și colorarea mai uniformă și fără pete, dar mai deschisă la culoare. Pentru o colorare mai închisă folosiți un baiț mai concentrat sau dați 2 straturi de culoare.
Zonele unde sunt capete de fibră și absorbția este mare (frezări sau strunjiri) pot fi blocate cu o soluție diluată de aracet (aracet în apă). Soluția va fi absorbită, se va întări și va bloca fibra. Ea nu trebuie să fie groasă și să facă peliculă. După uscare și înainte de aplicarea baițului lemnul se șlefuiește în alb.
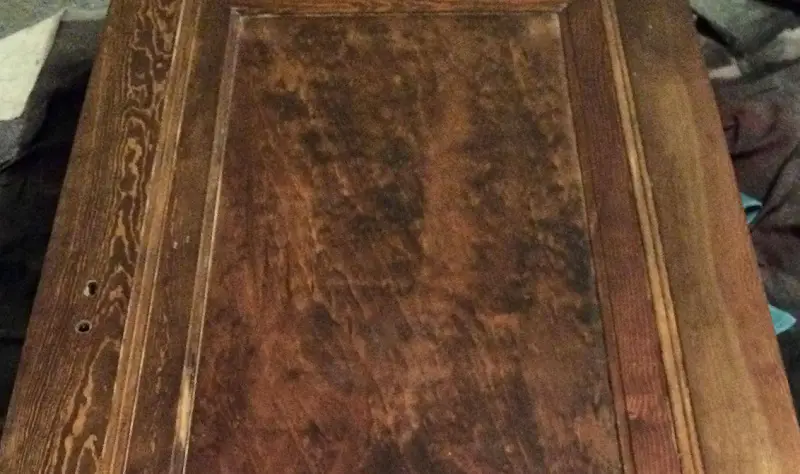
5. Folosiți soluții de uniformizare
Dacă totuși colorarea este neuniformă și pe suprafața lemnului apar pete, dar nu foarte pregnante, defectul poate fi redus prin folosirea unor metode de uniformizare a culorii. Este o metodă care se aplică foarte des în fabricile de mobilă, dar nu este complicată și poate fi folosită și în proiecte de mai mica anvergură sau chiar pentru cele diy.
Uniformizarea poate fi făcută cu o soluție de colorare asemănătoare celei cu care s-a colorat lemnul, dar mai diluată, care se aplică într-un strat foarte subțire pe suprafața băițuită sau după primul strat de grund. Soluția trebuie să fie pe bază de solvenți, cel mai bine pe bază de acetonă. Stratul trebuie să fie foarte sub,ire pentru a nu modifica culoarea (uniformizarea va închide puțin culoarea inițială) și a nu afecta aderența straturilor următoare (în cazul în care aplicarea se face peste stratul de grund). Stratul peste care se aplică uniformizantul nu trebuie să fie șlefuit pentru a nu altera culoarea.
Un alt mod de a uniformiza este prin colorarea ușoară a primului strat de grund. Și în acest caz adaosul de culoare trebuie să fie mic pentru a nu schimba foarte mult culoarea și a nu da un aspect de plastic finisajului. Pentru a putea fi adăugat în grund baițul trebuie să aibă aceeași natură. Adică, în grund pe solvent se adaugă baiț pe solvent și în cel hidrodiluabil baiț pe bază de apă. Atenție, nu toate sunt compatibile chiar dacă au aceeași natură. De aceea trebuie făcut un test înainte.
Colorarea lemnului este o etapă importantă și dacă nu este făcută bine poate fi ratat întreg proiectul. Am spus întotdeauna că lemnul este foarte important, dar ceea ce vinde mobila (sau alte obiecte din lemn) sunt design-ul și finisajul. Un mobilier din cel mai bun lemn, chiar dacă are un design atractiv nu va fi cumpărat dacă este plin de pete.
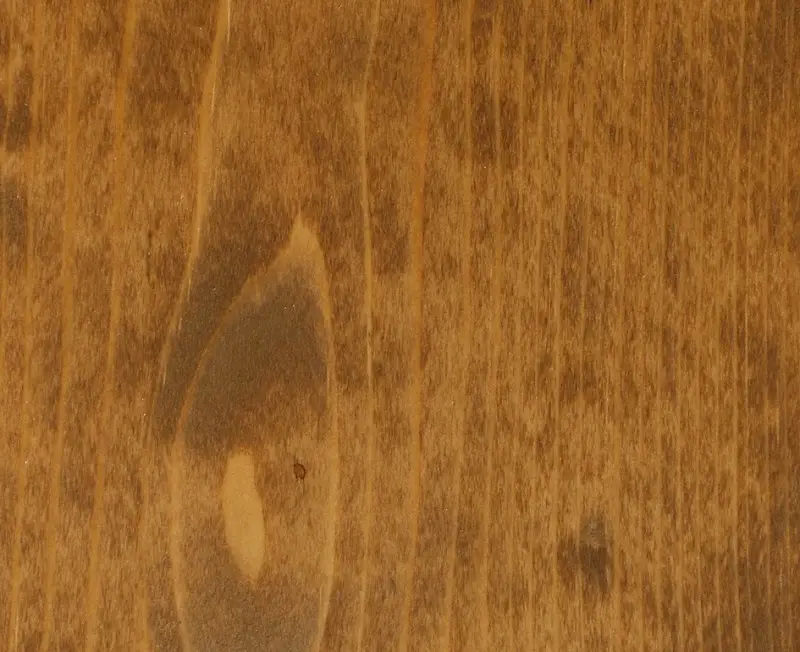
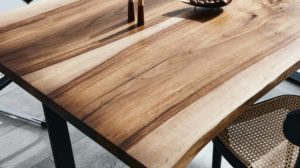
Pe de altă parte trebuie să învățăm că lemnul este un material aparte, cu personalitate, pe care nu putem întotdeauna să-l îmblânzim. Dar tocmai ăsta este farmecul lui. Un lemn care absorbe diferit și are aspectul final nu foarte uniform poate fi mult mai apreciat și mai dorit decât unul a cărui uniformitate poate fi considerată monotonă. Nu vorbesc aici de pete urâte ci de aspectul lemnului care absoarbe mai mult într-o parte și mai puțin în alta. Este semnătura lui pe care trebuie să învățăm să o respectăm.
sursa foto: diy,stackexchange.com


Bună ziua
Frumos articolul, vreau sa va întreb dacă pot uniformizare cu metoda cu grund diluat 2 panouri furniruite stejar unul fiind ușor roșiatic. Peste ele ulterior se aplica bait pe baza de apa și lac.
Va mulțumesc.
Buna seara!
Pentru a-l uniformiza ar trebui sa faceti un bait cu corp mai mare adaugand grund pe baza de apa. Apoi incercati uniformizarea aplicand materialul cu un pistol de pulverizare. Trebuie verificata compatibilitatea intre cele 2 produse inainte. Nu trebuie sa se formeze pelicula pentru ca lemnul sa poata fixa in continuare baitul. Inainte de aplicarea baitului lasati sa se usuce bine si slefuiti usor cu hartie cu granulatie 150 sau 180.
Toate cele bune!
Nu uitati sa va abonati la Revista din Lemn tiparita! Cu numai 58 de lei/an puteti afla noutati din domeniu, puteti descoperi idei de mesterit sau secrete ale meseriei. Va reamintim ca in revista tiparita continutul este diferit de cel din site. Detalii in link-ul de mai jos.
Va multumim!
https://revistadinlemn.ro/product/abonament-revista-din-lemn/
Buna ziua si La Multi Ani!
As avea nevoie de un sfat cum sa transform un parchet vechi de stejar baitat, ce urmeaza sa il raschetez,eventual si decolarat , intr-un parchet de stejar norvegian, nuanta alba sau gri. Nu gasesc bait sau lac de aceasta nuanta si nu-mi este clar daca se aplica pe rand intai un bait de nuanta respectiva si apoi un lac pe baza de apa, mat, pentru protectie sau se poate face totul cu un singur produs.
Multumesc anticipat de sfat!
Buna ziua!
Va dorim un an bun, cu sanatate si bucurii.
Exista si varianta cu bait si lac si cea cu lac colorat. Pentru prima varianta aveti nevoie de un gait gri care sa imite lemnul “imbatranit” de vreme. Peste el se aplica un lac care nu ingalbeneste pentru a nu-i schimba efectul (lac acrilic pe solvent sau lac hidrodiluabil). Exista si posibilitatea aplicarii unui lac colorat, dar exista riscul sa nu poate fi controlata foarte bine colorarea. Daca se suprapun straturile colorate pe anumite portiuni acolo apare o culoare mai inchisa si o acoperire mai buna a lemnului, pierzind efectul dorit.
Astfel de materiale se gasesc la distribuitorii specializati de produse pentru lemn. Ei distribuite produse special facute pentru astfel de finisari speciale. Cautati in orasul dumneavoastra distribuitori ai produselor profesionale (ICA-Lomilux, Milesi, Sirca, Bona, Sayerlack, Renner sunt numai cteva astfel de marci).
Toate cele bune!
Buna ziua,
Am o intrebare si anume cu ce se poate amesteca diluantul pentru a face un bait ?
Pentru un bait pe baza de apa este mai simplu, se pot folosi coloranti pentru vopsea lavabila, acestia nefiind compatibili cu diluant/ white spirit.
Astept cu nerabdare un raspuns din partea dumneavoastra.
Multumesc
Buna ziua!
Exista coloranti minerali sau sintetici, sub forma de pulberi solubile in solventi organici sau in uleiuri. Ar trebui sa-i gasiti in magazinele cu produse pentru pictura. In trecut se gaseau cu usurinta pentru ca se faceau la Codlea. Era mai complicat obtinerea baitului pentru ca praful se imprastia cu usurinta si era si foarte concentrat. Dar se obtineau coloranti foarte frumosi.
Acum exista insa concetrate de culoare unde colorantul este deja dizolvat intr-un solvent fiind astfel mult mai usor de folosit. Solutia respectiva se poate dilua si de cateva ori cu diluant pentru a obtine nuanta dorita. Sunt solutii pe care le gasiti la distribuitorii de lacuri si vopsele pentru lemn sau in magazinele de bricolaj.
Unii coloranti folositi pentru lavabile sunt solubili si in solventi organici. Puteti incerca sa-i dizolvati in alcool sau in acetona.
Cu uleiul este mai complicat, dar puteti folosi pigmenti minerali. Ei nu se dizolva, dar se pot amesteca foarte bine cu uleiul. Se porneste cu o cantitate mica de ulei in care se adauga pigmentul si se freaca foarte bine amestecul pana dispar cocoloasele. Cel mai bine se face operatia asta pe o masa de metal amestecand cu o spatula sau un cutit cu lama lata sau intr-un mojar (ca cel pentru usturoi). Dupa ce ati obtinut o pasta foarte omogena diluati cu ulei pana ajungeti la intensitatea dorita.
Succes!
Buna ziua, as dori sa reconditionez sageacul casei care este din lemn de brad, care acum 13 ani a fost dat cu ulei de in (cred) si un bait pe baza de apa. Din cauza conditiilor atmosferice si modului de aplicare de la acea vreme este f. patat . Ce as putea sa-i aplic astfel incat sa nu se mai vada aceste pete si totodata sa il si protejez pentru mai mult timp ?
Multumesc
Buna ziua!
Puteti aplica o lazura colorata. Daca uleiul s-a dus total puteti aplica una pe baza de apa. Daca mai sunt urme de ulei va trebui sa aplicati o lazura pe baza de ulei pentru ce cea pe baza de apa nu va avea aderenta. Lazura va estompa diferentele de culoare si va proteja lemnul. Daca veti aplica 2 sau 3 straturi culoarea se va inchide, va fi mai putin transparenta, dar va proteja mai bine lemnul.
Toate cele bune!
Buna ziua. Cum îndepărtez vopseaua de pe o usa vopsită cu vopsea, prin pensulare cu soluţie pe baza de soda caustica. Mă interesează cum prepar soluţia pe baza de soda caustica şi cum se aplică, în câte straturi.
Buna ziua.
Soda se foloseste la indepartarea straturilor vechi de vopsea alchidica sau pe baza de ulei de in. Se dizolva 3 linguri de soda in 1 l de apa calda si se aplica solutia cu buretele sau pensula pe suprafata vopsita. Se lasa sa actioneze 10-15 minute dupa care se spala cu apa in exces. Daca vopseaua este alchidica sau pe baza de ulei, ea se va transforma intr-un lichid maroniu. Dupa spalare, neutralizati suprafata cu otet inainte de a aplica un alt finisaj. Lasati sa se usuce inainte de a aplica un alt strat.
Atentie: lemnul se poate inchide la culoare in urma tratarii cu soda. Verificati mai intai pe un loc mai ascuns. Folositi manusi de protectie atunci cand aplicati soda.
Toate cele bune!
Am o mobila de bucătărie din brad lacuita care și-a schimbat culoarea spre rosietic. As dori sa o recondiționez. Ce îmi recomandați sa fac?
Buna ziua!
Lemnul de rsinoase (brad, molid, pin) are acesta tendinta de a se inchide la culoarea in timp, ajungand la galben rosiatic inchis. Sfatul meu este sa o vopsiti. Va trebui sa o spalati cu apa si detergent de vase, sa o stergeti bine si apoi sa o slefuiti usor cu un burete abraziv su hartie abraziva cu granulatia 280-320 (se gasesc in magazinele de bricolaj). Dupa aceea aplicati cu pensula 2-3 straturi de vopsea nitrocelulozica (pa baza de solvent) sau vopsea pe baza de apa. Si pe aceste tipuri de vopsea le gasiti in magazinele de bricolaj.
Toate cele bune!
Buna ziua! Doresc sa reconditionez parchetul vechi si as vrea sa stiu care este ordinea corecta a etapelor de finisare, in conditia in care as dori sa il si colorez. Am inteles ca se poate colora direct cu bait, se poate adauga bait in grund sau in lac si procedeul sau numarul de straturi incepe sa varieze in fiecare situatie. Ce varianta imi recomandati ca fiind cea mai putin complicata deoarece sunt presata de timp.
Bună ziua!
După rașchetare și șlefuire, se colorează (băițuiește) în culoarea dorită apoi se aplică 2-3 straturi de lac de parchet, preferabil pe bază de apă, cu uscare și șlefuire între straturi. Șlefuirea între straturi este necesară pentru a avea aderență între straturile de lac și pentru o suprafață fină și plăcută la atingere. Aplicarea lacului se face cu trafaletul.
Așa cum ați menționat, colorarea se poate face și punând baiț în lac. Nu recomand însă această metodă, mai ales pentru începători, pentru că există riscul unui aspect neuniform dacă stratul de lac nu este egal sau dacă se revine în unele locuri. Neuniformitățile pot apărea și la băițuirea directă, de aceea este bine să folosiți baițuri pentru parchet care au timp de uscare mai lung și permit parchetarului uniformizarea culorii.
În concluzie, aplicați întâi baițul, apoi 2-3 straturi de lac de parchet.
Aveți mai jos link-uri către articole care vă pot fi de folos.
Toate cele bune!
https://revistadinlemn.ro/2018/02/13/raschetare-parchet-etape-si-realizare-intretinerea-parchetului/
https://revistadinlemn.ro/2019/05/16/5-sfaturi-de-finisare-pentru-a-evita-obtinerea-suprafetelor-aspre-si-rugoase/
https://revistadinlemn.ro/2021/03/18/am-colorat-parchetul-cu-lazura-iar-lacul-aplicat-deasupra-s-a-exfoliat-unde-am-gresit-si-cum-pot-remedia/