


Most of the apartments in the old blocks of flats had veneered and lacquered doors on the inside. They were simple, made on a wooden frame, with veneered plywood attached in studs, staples or glued to the two sides of the door frame, forming the door faces. Inside were zig-zag strips of cardboard, the width of which was equal to the distance between the two plywood plates. The cardboard prevented the doors from warping and the hollow spaces inside insulated the doors by the air inside. They were called cellular doors. The refurbishment of such a door is discussed below.
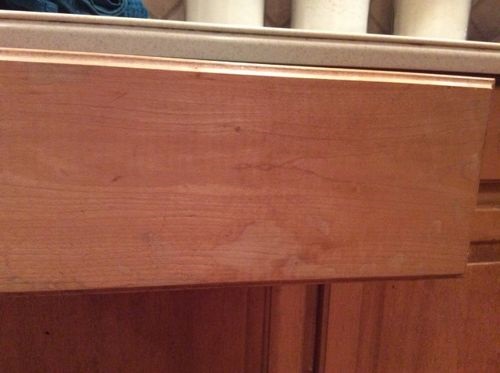
The way doors are refurbished depends on the degree of damage. Veneered doors start to look bad because the varnish melts over time from cleaning products and the water it comes into contact with quite often, especially at the bottom (bathroom, kitchen). Over time, cracks appear in the film and water reaches the veneer, initially blackening it. If no action is taken, the veneer will start to peel away from the door and break.
From the above we see that there are 3 levels of damage:
- the lake has lost its original appearance and shine;
- the varnish layer is deeply damaged and the veneer has blackened or discolored;
- the veneer has peeled off at the edges, is heavily stained, torn or ripped.
Each level has a different remedy. Let's take them one at a time.
The lake has lost its original appearance and shine
Immediately after application, the finish is clean and has a certain sheen, a glow, even if the varnish was not very glossy. Over time dirt builds up, the products used for cleaning start to leave streaks and the lacquer itself "ages" like everything else in the world. Ageing translates into a duller appearance, a decrease in transparency, superficial scratches.
If the veneer has not changed its appearance (darker or lighter colored spots, tears, cracks), it means that the film has no cracks or deep scratches. If there is discoloration on larger areas, not in the form of specks or streaks, it is likely due to light or sunlight affecting only a portion of the door. The defect would only require removal of the varnish coating for aesthetic reasons. If it doesn't bother you, then proceed in the same way as with the aged film.
In other words, just wash the veneered door with water and detergent and wipe it thoroughly. You can use dishwashing detergent or even soap. After sanding, lightly sand the entire surface with a fine sanding sponge or 280 or 320-grit sandpaper. If you want to apply high-gloss varnish, use 400-grit sandpaper. Polishing will remove small scratches in the varnish film and will help the varnish you apply to adhere better. Then apply a coat of nitrocellulose or water-based varnish. They're compatible with most finishes, so you won't have any problems with rejection between them.
You'll find both varnish and abrasives or trafalet at DIY stores. Before you buy, read the labels carefully to make sure it's what you're looking for and to see any hazards. If you are going to use nitrocellulose varnish, you need a solvent-resistant putty knife.
To prolong the life of the varnish you can apply a thin coat of wax. But be careful, the wax is the final coat and you can't apply varnish or any other product over it because it doesn't adhere.
The varnish layer is deeply affected
If the veneer has black spots, streaks, or in any way it is visible that water has gotten to it, the varnish film is cracked. At this stage you have a choice between two solutions.
The simple solution is to paint the door so that the veneer is no longer visible. Clean and sand the door as above, then apply paint instead of varnish. Pay attention to compatibility between coats! Try the paint on a more hidden spot first. If it does not crack or "slip" on the undercoat when it dries, then the materials are compatible.
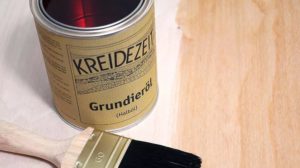
This solution is applied if the veneer is not moldy. If water has infiltrated so that the veneer is blackened in places or over larger areas, it has reached the veneer and caused it to mold. In this case the entire finish must be removed down to the veneer. Then sand and treat against mold. After drying, apply 2-3 successive coats of varnish, with drying in between (according to the manufacturer's instructions).
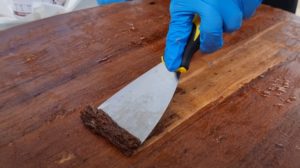
Removing varnish is done by sanding or stripping. There are paint strippers in hardware stores. I have worked with Decanol, but there are other brands. Paint stripper is applied with a brush all over the surface, allowed to work, then the soaked varnish is removed with a squeegee or scraper. Repeat to remove all traces of varnish. Finally wipe the surface with thinner or technical alcohol
If the removal of the varnish layer is done by sanding, the operation must be done very carefully. The veneers are quite thin and the risk of getting plywood is high.
You can treat your veneer against mold with special fungicides or sodium hypochlorite (laundry chlorine). Wipe the surface of the veneer with a solution of one part hypochlorite to 2-4 parts water. The wiping cloth must be wrung out well to avoid damaging the adhesive with which the veneer is bonded. After total removal of the mold, wipe the surface of the veneer several times with a clean, well wrung-out cloth with clean water and allow to dry. When completely dry, sand with a medium or fine sponge to smooth the wood grain.
Before applying the finish repair the surface where damaged. Fill small holes with putty. Repair is only recommended if the veneer is not badly damaged.
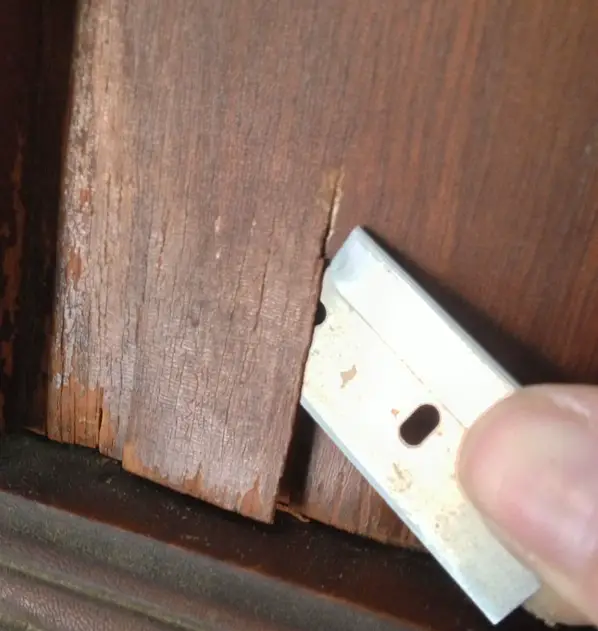
The veneer is blackened over large areas, detached and/or torn off
When the veneer is stripped, torn or ripped at the ends of the door, or there are bumps on the surface of the door, the film has been so damaged that the water has become soaked through to the adhesive under the veneer. There is also a possibility that the adhesive has 'aged', lost its bonding qualities and any mechanical impact or aggression can cause it to separate from the plywood.
In this case too we have a simple and a radical solution, depending on how damaged the door is. If the swelling is from place to place and there are no veneer tears, a local repair. Notch the bulge, carefully insert glue with a spatula or spoon, carefully, under the veneer and press it down. Any excess glue that comes to the surface is wiped off immediately, then a weight is placed on the glued surface. To work without fear, use aracet adhesivesfor wood. Avoid contact adhesives that cure immediately. They do not give you time to correct any mistakes. Finally, if the film is damaged, protect as above.
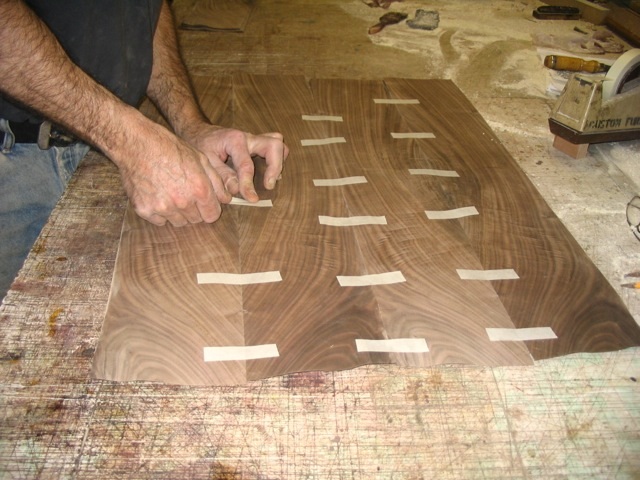
If the veneer has pulls, tears and is blackened over a large area and in depth it needs to be replaced. It is best to call in a specialized firm that can do it flawlessly. The veneer strips must first be pinched together to form the door leaf which is then glued to the door plywood. In order not to have any gouges or bumps, the plywood should be thoroughly cleaned before veneering. You will find information on how to veneer here.
After the new veneer has been laid, the veneered door is sanded and sanded and then the desired finish is applied like a new door.
I hope I have given the full answer, both to the reader interested in how to salvage an old door from the 1970s, and to others interested in the subject. If you find it interesting, feel free to share. If you have any clarifications, additions or questions not covered by the article, leave them below in the dedicated space!


I would be interested to know how a similar door can be reconditioned, but which has been painted several times. Thank you.
Hello!
Just like the ones that have damaged veneers. You need to remove all layers of paint that have been applied over time. Use paint stripper, with it you are sure that the wood is not attacked. As there are several coats, you may need to try several times. Finally wipe the wood with thinner, smooth with a fine abrasive sponge, then you can apply whatever varnish or paint you want.
If you don't want to get to the wood, but only want to freshen or change the colour, wash the door with water and detergent, wipe well, gently smooth the entire surface with a fine abrasive sponge, dust and apply a water-based paint so there are no incompatibilities.
All the best!
Before getting down to business, you need to decide if refurbishing a cellular door is worth the effort. Especially since a solid laminated wood door is relatively inexpensive.
Hello!
I am pleased with the presentation, Mrs. Mihaela Radu.
Now I have all the options for reconditioning the doors and it remains to see which option I choose.
Thank you!
With pleasure!
All the best!
Hello,
I would like to refurbish the interior doors of my apartment, which are veneered. There are most of them in situation1 you presented and a few in situation 3. I am interested in a company to come and take them, as the repair work cannot be done in the house. Do you have any suggestions?
Thank you
Hello!
For Bucharest and nearby cities you can go to SaveMob (savemob.ro) and find out who you can call if you are very far from the capital.
All the best!
Can you recommend a company for refurbishing interior doors (7 veneered cardboard doors)?
I'd be interested in having them veneered, lacquered and then fitted....