


One of my obsessions when talking about finishing is sanding - both sanding the wood before finishing and between coats. I firmly believe it is a key requirement for quality products. Some time ago I wrote about grinding, approaching the subject from the point of view of production, factory work, where there are special sanding machines and technologies. This time I aim to tell a little about sanding to those who love DIY, have DIY projects or want to start tinkering.
First of all it should be known that there are two stages of grinding that influence the quality of the final product. One is wood sanding or white grinding which is done before staining and varnishing the wooden object. The other is sanding between layers lake. Both are done with abrasive paper or sponges, but the grit differs. I'll take them one at a time.
Wood sanding
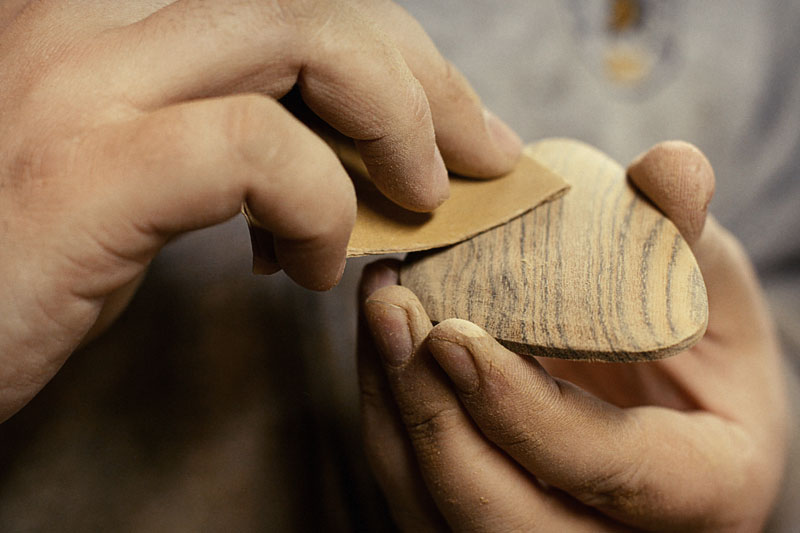
To build an object, wood must be cut, drilled and machined with various tools. All these operations act on the wood grain by breaking it. When you run your hand over the wood you can feel the roughness scratching us, some more, some less. These are the ends of the wood fibre remaining after mechanical processing. When the wood is sanded, these fibre ends are broken off in a way organized so that they all behave the same, absorbing colour and varnish evenly.
While the object is being made, the wood may be knocked, scratched or bevelled, leaving marks. Most of these marks become visible only after the stain has been applied. A good sanding removes the marks, evens out the surface and reduces the risk of stains.
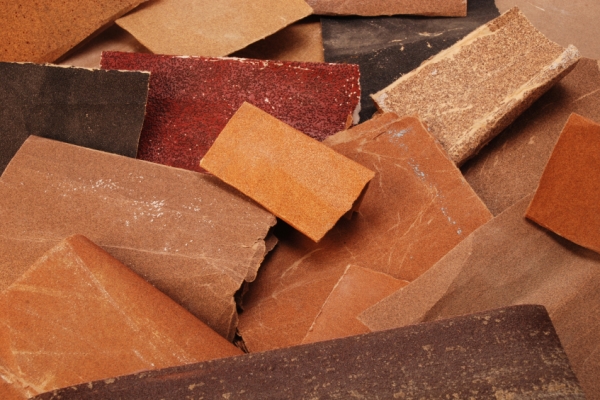
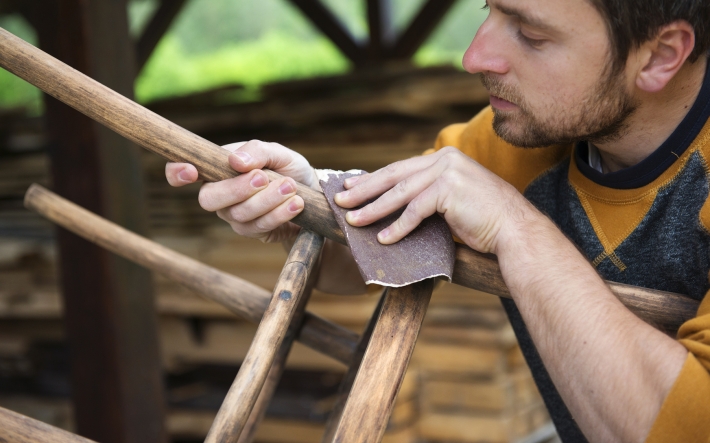
The wood is sanded with low-grit sandpaper from 80 to 220 or with coarse and medium abrasive sponges. The number indicating the fineness is written on the back of the sandpaper. For the best surface quality it is recommended to use two types of paper, one coarse, which breaks the grain, and one finer, which smoothes it. For example, you can use 80 paper first, followed by 120 or 150. Or paper 100, followed by 150 or 180. In the case of abrasive sponges, start with the coarse ones, then the medium ones.
The wood is always sanded along the grain, insisting on the areas where the grain ends are felt. It is not recommended to use sandpaper with a grain size greater than 220 because fine wood dust clogs the grain, blocking absorption. This is how light-coloured stains appear.
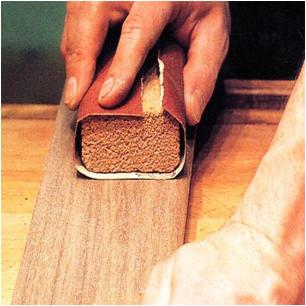
For ease of use, sandpaper can be wrapped around a rectangular piece of wood. This applies an even force over the entire surface of the wood, giving a better sanding result.
When sanding profiled elements - edges, table or chair legs, cornices - it is advisable to use abrasive sponges because they can be moulded and the sanding quality is much better.
In the sanding process, the quality of the abrasives decreases. Abrasive grains bonded to paper or cloth melt or fall off. Also, fine wood dust penetrates between them and settles there, reducing the sanding ability of the paper. When it is noticed that the result is not as good as at the beginning, the paper has to be replaced. Don't cut corners at this point in the project. Any cutbacks made now will pay off later, when finishing, when mistakes are much harder to fix.

Sanding of varnish layers
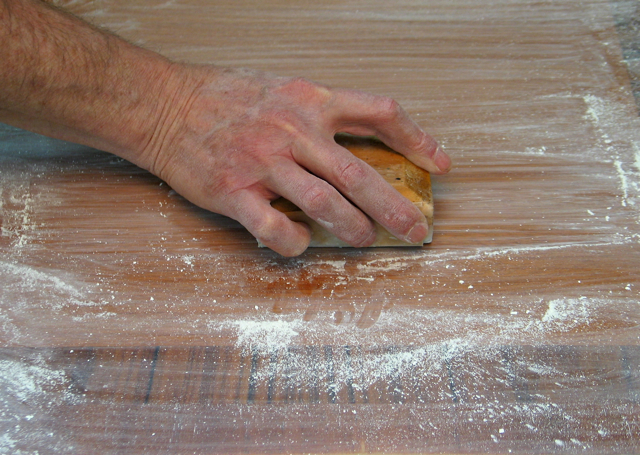
The sanding between the layers is done to ensure a nice tufting of the object, a smooth surface and pleasant to the touch. When the staining solution (the stain) and the first coat of varnish are applied, the wood absorbs these materials and the wood grain rises. This phenomenon is much more pronounced with water-thinnable products, because of the natural tendency of wood to absorb water. After the varnish has dried, the raised fibre feels unpleasant to the touch, being very stiff because of the varnish trapped in it. To make the surface smooth and pleasant to the touch again, the lacquer layer must be sanded through.
The materials used are still sandpaper or abrasive sponges, but the grain is finer. Fine and very fine sponges are used and the paper should be a minimum of 240. If the final lacquer is to be glossy, the sandpaper used must be a minimum of 400. As already mentioned, pike lake accentuates defects and fine scratches from coarser abrasive materials become very visible.
Sanding between coats is done all along the fibre after the varnish coat has dried completely. When the varnish is thoroughly dry, the sanding will result in a fine white powder. If the drying is not complete the sanding is heavy, the paper is prevents and cover with a foamy layer of varnish. The next coat is applied only after the dust has been completely removed with a cloth.
Refurbishment of old furniture
A special case of sanding is when you want to refresh or change the finish. Because of use, finished furniture and wooden objects become covered with a fine layer of dust and dirt. In order for the new varnish coat to adhere, this patina of time must be removed.
The object is cleaned by washing it with a cloth, water and detergent. Any furniture can be washed, no matter what it is covered with. The important thing is to wipe it quickly and thoroughly after washing. The old coat is then lightly sanded with 280-320 sandpaper (over 400 for gloss varnish) and the new coat of varnish is applied.
Always check the compatibility between the old coatings and the varnish to be applied. To do this, apply a little varnish to a small, inconspicuous area of the furniture and wait for it to dry. If nothing happens - cracking, swelling, peeling - it can be used. Furniture that has been cared for over time with products such as Pronto, which have wax in their composition, should be washed and sanded until the wax layer is completely removed. Wax is the final finishing coat and nothing can be applied over it. If it is not completely removed, the varnish will have no adhesion and will peel off easily.
Sanding is an important operation in the wood finishing process. Quality objects can only be achieved if both the wood and the intermediate layers of varnish are sanded correctly. A new finish will only adhere to the old one if it has been cleaned and sanded first.
I wish you success and look forward to hearing how your projects are going. Don't forget, if you need help and information, I'm here.☺


Excuse me, but the article is ridiculously weak. Even if it's meant to be a popularization article it's probably not aimed at 3 to 4 year olds right?
I'm sorry the article doesn't live up to your expectations. I am sure there are things you know very well, but I have met people who do not know this information. That's where the idea for the article came from. It is information for people whose profession has nothing to do with wood but who want to remake or make an object out of wood. I hope that in the future you will find interesting information too.
It is good to specify why the article is weak, or where the mistakes are. There are many beginners who read your comment and get confused.
An important element was omitted before varnishing. This is the degreasing of the wood, which can be done with very good results with technical alcohol. Because we have recently varnished, in our house, about 250-280 square meters of wood (panelling, doors, windows, furniture, etc.), and on all the woodwork the fly "skates", as they say, every square cm was passed as follows: sanding, dusting, degreasing, the first "coat" of varnish. After drying, the second coat of varnish followed. Again sanding, again dusting. The third and final coat of varnish followed, after which I sanded only in the places I thought necessary. Periodically, with a natural bristle brush (on the ceiling), I wipe off the dust that has settled. Otherwise, I use the finet. Thanks for your advice.
Thank you for sharing your experience. Normally wood does not need degreasing before finishing. Sanding is sufficient. In your case the wood probably came into contact with greasy products during cutting or wiping, or was even resin (in the case of resinous wood). Congratulations on the technical alcohol idea. It is very good. You can also use nitrocellulose thinner or universal thinner. And the maintenance you do very well. And I choose not to use commercial maintenance products. If they are applied directly to the furniture or not polished very well, the furniture remains slightly soggy and more dusty. I wish you all the best and continued success.
In case anyone needs the information/is curious: by chance, I once saw someone cleaning some old window frames by sandblasting. The frames had a complex relief, which would have been very difficult to clean by sanding (possibly using stiff bristle brushes on a Dremel tool, but it would have been a terribly painstaking and time-consuming operation). When sanding, the effort is much less than sanding, and the quality of cleaning the old paint is extremely good. The wood hardly wears at all, if you don't insist too much, and remains almost as smooth as before the paint was applied, making sanding after sanding useless, while even the smallest trace of paint flakes disappears.
Thanks for the information. I think for wood enthusiasts, any news is welcome. We also have new articles on sandblasting. I hope you find them interesting.
All the best!
https://revistadinlemn.ro/2016/08/08/structurarea-lemnului-prin-sablare/
https://revistadinlemn.ro/2016/08/14/sablarea-ca-arta/
Very welcome absolutely all information. For a novice who is itching to chew on his own and if possible, not by ear, the article is a goldmine. Thanks so much for the article and the comments!
Thank you!
[...] assemble. The boards were glued to the OSB plywood with glue and the finishing part followed. After a preliminary sanding, two coats of wood stain and one coat of wax followed, for [...]