


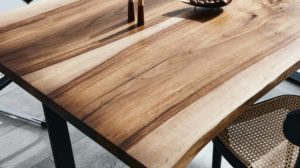
It is not enough to use quality products to achieve smooth, non-scratch wood surfaces. The way the wood is prepared, how the primer or varnish is applied and sanded, as well as the thinning, the dust in the varnish application area are all factors that affect the quality of the film. Average quality varnishes can be used, but by sanding the wood and the primer correctly and applying the finishing products with a suitable trowel, brush or spray gun, very good quality surfaces can be achieved. Lacquers and primers, no matter how good, can't work wonders.
Someone recently asked me, describing the whole process of refinishing an old solid oak parquet floor, why it resulted in an unpleasant to the touch, scratching surface. The answer may be useful to others too, so here are some tips that can help you achieve smooth, nicely-touched surfaces.
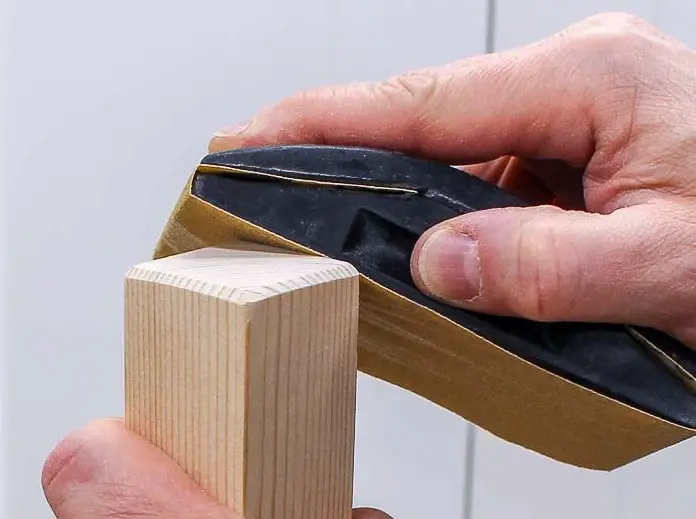
1. Sand the wood properly before applying the wood stain or primer/lacquer
Sanding wood is essential to achieve quality surfaces. I say it time and time again. Don't neglect this step because it will pay back later and it will be much harder to fix defects.
Sanding raw wood is done in stages. Ideally, 3 levels of sanding should be used, but if this is not possible and the wood is fairly well machined, you can also sand using a single grit. But it must be done carefully and carefully, without missing any corners or profiles. To make it easier to identify defects, the surface can be moistened before sanding (wet sanding). This can be done with solvent or water. If water is used, the surface should only be wiped with a wrung cloth to avoid increasing the moisture content of the wood.
Use specific wood grains. Do not go for very fine grits, usually used for varnish, because you will not get the desired result. On the contrary, other problems will arise, which you will find described at length here. Use as final grain 150 for hardwood (oak) and 180 for softer wood (plop, brad).
The sanding is done to remove defects and to bring the fiber ends resulting from the flow to a common denominator. In this way the absorption will be uniform, stains will not appear and adhesion to the substrate will be good.
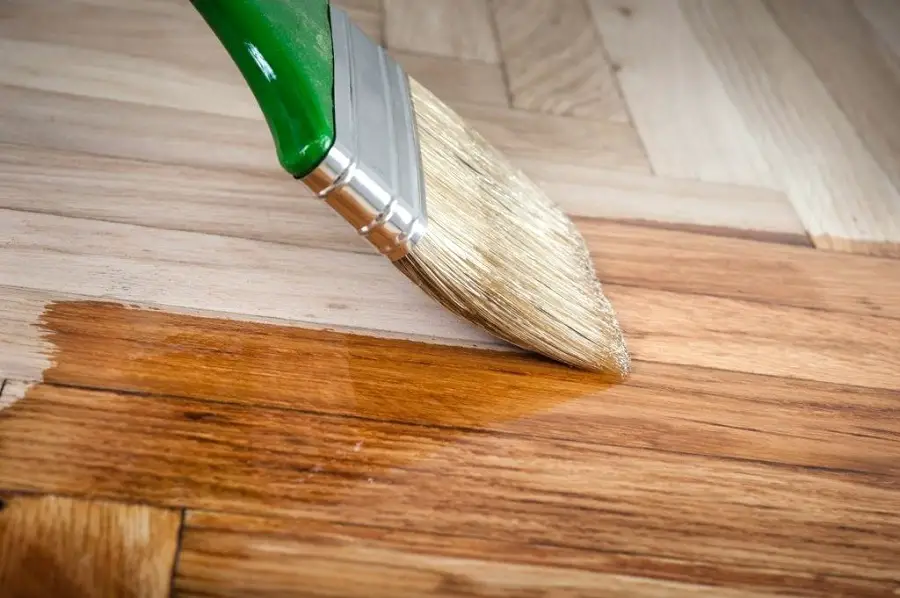
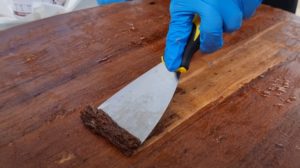
2. Always sand after the first coat of primer or varnish
After the first filming coat, sanding should be done to remove the high wood grain. The wood is not sanded after application but only after it has been coated with a coat of primer/lacquer. This first coat must be absorbed by the wood for the film to adhere. During absorption the ends of the fibers lift up, are "coated" with varnish and dry out and become very unpleasant to the touch. The better the wood has been sanded, the smaller the raised grain is and the easier it is to sand away.
Sand the first coat of primer or varnish is done with sanding paper with a minimum grain size of 240. Sanding with a coarser paper (below 240) results in the removal of a large amount of primer or varnish. This leads to losses and increased costs. Another drawback is that the rice grains from coarse sanding become visible on the final film.
As with sanding wood, sanding primer must be done carefully and carefully. This is the stage when the varnish-laden wood grain is removed. Later it will be harder to remove because each layer will deposit a new amount on the raised grain and make it harder and harder to slice it off. Thicker paper will have to be used and you end up with the above problems. If this step is done well and no problems occur later when applying the final coat of varnish, you will get a quality surface.

3. Thin primer and varnish as directed. Do not apply thick coats
Don't apply thick coats in the hope of finishing faster because problems will occur:
- the first coat will not be well absorbed into the wood and adhesion problems will occur (the film will peel off the wood when knocks and scratches occur, giving the appearance of broken glass or bleaching);
- The air embedded in the film does not escape much harder. The coating will dry out on the surface and block the air inside. The film will get unpleasant "wrinkles" that can only be removed by sanding;
- a thick coat cannot be well spread and may dry with bumps. In order for the final coat to look nice the surface will need to be sanded well to get it smooth again;
- thick coats obtained in a single application risk cracking over time. The same thickness must be obtained from several thin coats for the film to be elastic and resistant over time.
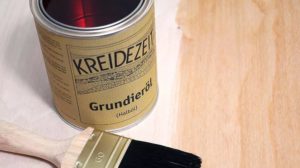
Both DIY and professional products have indications on labels or data sheets on the dilution percentage. Don't think you are saving money by eliminating thinner. The problems that can arise will make you spend a lot more.
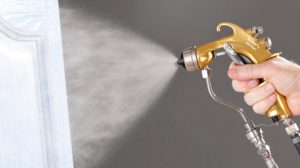
4. Use application tools/application equipment that will incorporate as little air into the film as possible
Primer or varnish application can be done with a brush or trowel for DIY applications, or with a spray gun or other more advanced technologies for professional applications. In most cases, more or less air gets into the film. The more it is, the harder it will be to get out before the film hardens, and thus those wrinkles I mentioned above will appear.
For DIY applications I recommend using stiff sponge draggers so that as little air comes out as possible when pressed. If you use brushes, buy soft ones that handle easily. Don't get very thick brushes as the risk of bringing more air into the film increases. If you use simple compressor-pressure guns, don't increase the pressure to get a strong spray. You will feel like you are working faster, but the final quality will suffer. Gassing occurs and you will have to sand over and over again to get a nice surface.
For professional applications I recommend using the following systems Airmix or Airless. The air intake is very low and the appearance of the film is much better compared to a conventional application.
5. Work in the cleanest, dustiest and dustiest workplaces
Dust is the enemy of varnish. After applying varnish, it takes time for the film to dry on the surface. This time is referred to as dust drying. During this period atmospheric dust that has fallen on the film is absorbed and the unpleasant appearance and scratching effect to the touch appears. Especially when mechanical work is being carried out nearby and the dust in the atmosphere is wood dust, much coarser than that normally found in the air.
Work in separate areas from where mechanical work is being done, or after the area has been cleaned and dust and sawdust removed. At the end wet down - dust will be attracted to the wet surface.
If dust particles are still trapped on the surface of the film after the final coat, you can polish them off (polishingPolishing should be done on the entire surface because it can change the gloss (the polished area can become shinier).
I hope you find the above information useful. If you find it useful to others, please feel free to share. And if you have any questions, additions or concerns, please leave them below in the space provided.


thanks for the advice, really good
Very cool girl, bravo!
even though the surface is WHITE when I hit it with Palux it still comes out reddish on the oak
how do I make it yellow? whoever answers this question gets a gift
Hello!
You give us very little information.
If the white surface means white sanded, then the reddish tinge may be from the varnish or tannins in the oak. If it is from the varnish, you need to change it. You realise that the varnish is to blame if you have the same effect, no matter what surface you apply it to.
If the blush is from the tannins in the wood, you should apply a first coat of clear sealant to lock them in. You can find insulators at companies that sell wood varnishes and paints.
If the surface is bathed in white, but that white is a yellowish white or a shade of beige, there is a possibility that the lacquer thinner is "pulling" the red out of the dye mixture that formed the base color. Or the above varinates are valid.
For a more precise answer, you would need other information: how is the surface (wet or not), what did you use for sanding, what kind of varnish do you use (if it is the classic Palux - carbamide varnish for parquet - or another kind of parquet varnish), what thinner do you use.
All the best!
Hello,
I've looked at several paint stores today for that 'insulator' and most seem to have heard of it first. Only one out of about ten sells Cetol C711 from AkzoNobel but I don't know if it's any good.
https://www.sikkens-wood-coatings.com/products/product-details/product/show/cetolr-sf-711/
Then I found this: Wood Knot Sealer from Colorex Sweden
https://colorex.se/en/product/kvistlack-2/
It's oak parquet that looks very good but it was scratched and to be repaired it was sanded with sandpaper 60-80-120 then given with versions of varnish that are found on the Romanian market, including Palux classic, Oskar, Spor 3 in 1 etc all with the same effect: the floor looks UD after you put varnish on it. Thinner is the one from Dedeman: component 2 for Palux.
I'm thinking of getting 1L of Bon Mega if it's better than Palux.
I've tried pin bait, clear bait and others and to no avail. I can't keep the natural colour of the wood. I have ordered Kvistlackde lacquer from Colorex and hope this will help.
If that doesn't work, I'll hire you.
Ms 🙂 🙂
Hello!
Cetol is not what you need. It is an alkyd product for outdoors.
You need a polyurethane or water-based insulator for indoors. Find the products at the distributors of professional wood varnishes and paints: ICA-Lomilux, Sirca, Sayerlack, Renner, Milesi, etc.
On the other hand, any varnish will make the wood look wet, more or less yellow. A coating closest to the natural look is achieved with solvent-based acrylic varnishes (also called natural-looking varnish). Water-based ones also give a fairly natural look. There are water-based floor varnishes with very good traffic resistance. These products can also be found at the above-mentioned distributors.
Good luck!