


At some point a lady asked me for a link to an article describing, step by step, for a beginner, the steps to finish a wooden object. This is how I discovered that there is no such article. There are all sorts of tips and hints on finishing, defects that may occur and how to fix them, but nothing gathered in one place like a data sheet or a description of a technological process. I promised I'd fix this so I'm rushing to do it right now.
1. Materials needed
First of all you need to be prepared with the necessary materials. In addition to the varnishes and paints you will be using, you will need a means of application and some auxiliary materials. Here are the ones I consider necessary:
- Lint-free cotton rags. From experience I can tell you that the best ones for such operations are good quality cotton T-shirts that you have taken out of use. White ones are ideal, but you can also use colored ones if you know the color won't come out. You'll need them for stripping, spot wiping, hand wiping, brush cleaning;
- Abrasive paper/abrasive sponges. You need them both for sanding wood and between coats of primer/lacquer. For sanding wood the paper should be 150 or 180 grit and the sponges should be medium. For sanding between coats use 280 or 320 grit sandpaper or fine sponges. For glossy surfaces (which I don't recommend because they are difficult to achieve even for an advanced sander) the grit should be min 400. Abrasives can also be used for special effects such as distressed.
- Wooden rods for mixing the paint, a short-bladed knife, a penknife for opening the cans.
- Rolls of adhesive paper to mark out the parts you don't want to paint. They are available in any DIY store and are very easy to use.
- Cup for holding brushes in water or solvent. After you have finished applying the paint, so that it does not harden on them and you can use them again, wash the brushes with water or thinner, depending on the nature of the paints used. When not in use keep the brushes in a bowl of water/thinner.
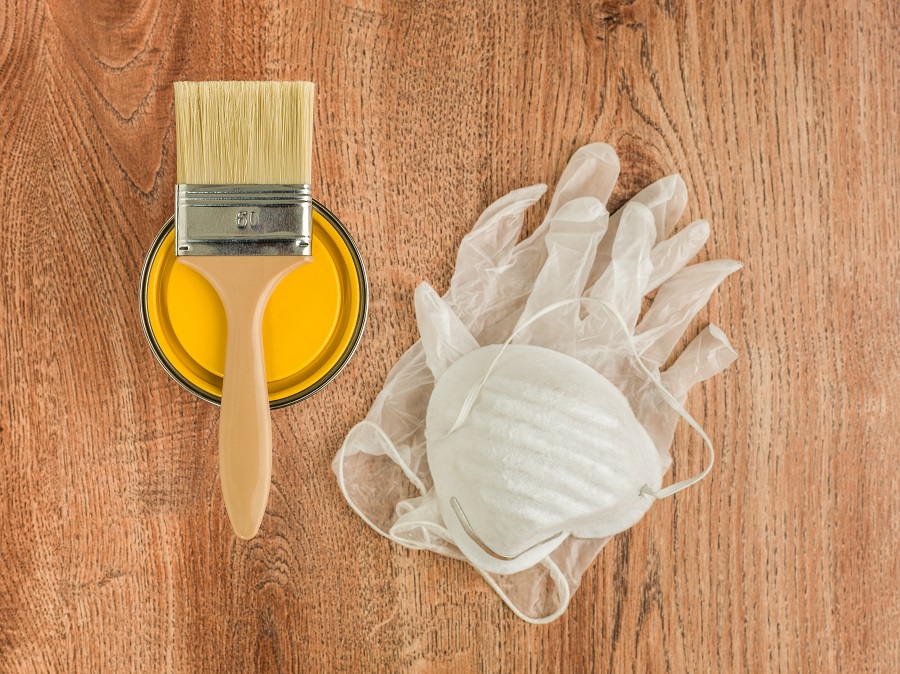
- Protective gloves. Wear gloves even when using water-based products. Water-based products are not always environmentally friendly. And anyway, after curing, any varnish or paint is hard to remove.
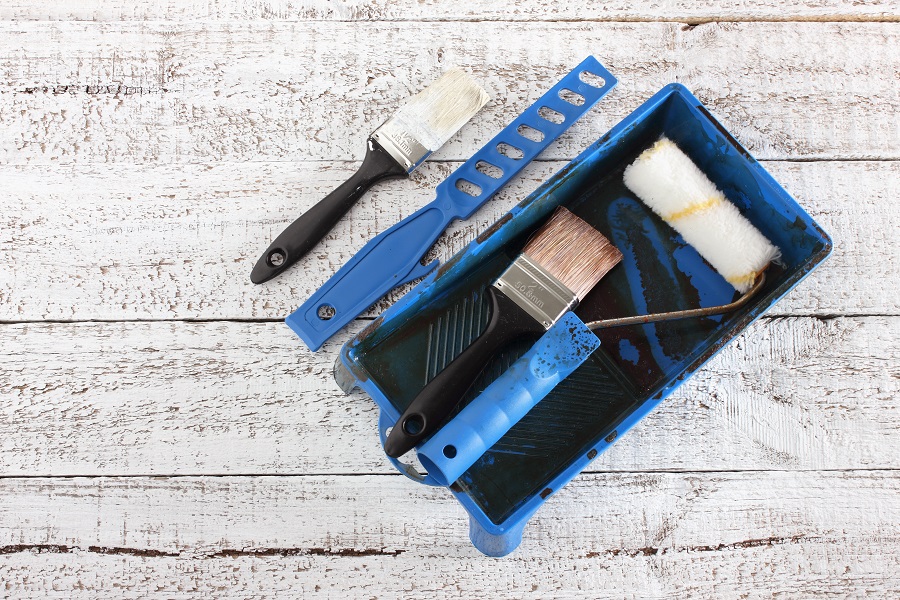
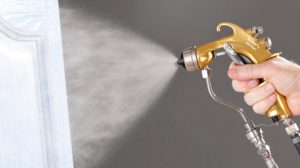
For application use brushes, sponges or mops. Don't buy cheap brushes, you'll waste more time picking up fallen threads or fixing faults. Buy a set of brushes in different sizes. In collars or on different patterns it's easier to paint with narrow, thin brushes and flat, large surfaces paint faster and better with large brushes. Trafaletta should have hard sponge because it embeds less air and the resulting surface will be nicer, more pleasant to the touch. Make sure the sponge is thinner resistant. Ordinary sponges enlarge in contact with thinner.
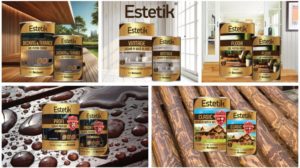
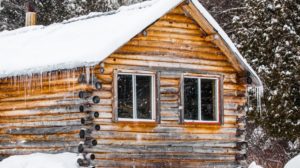
Buy the right varnishes/paints. If you're finishing something that will be outdoors, buy products specially made for outdoors. Water-based products are recommended for DIY projects. Get rid of the smell of thinner in your home. Go to specialized stores, say what you need the material for and ask for as much information as possible.
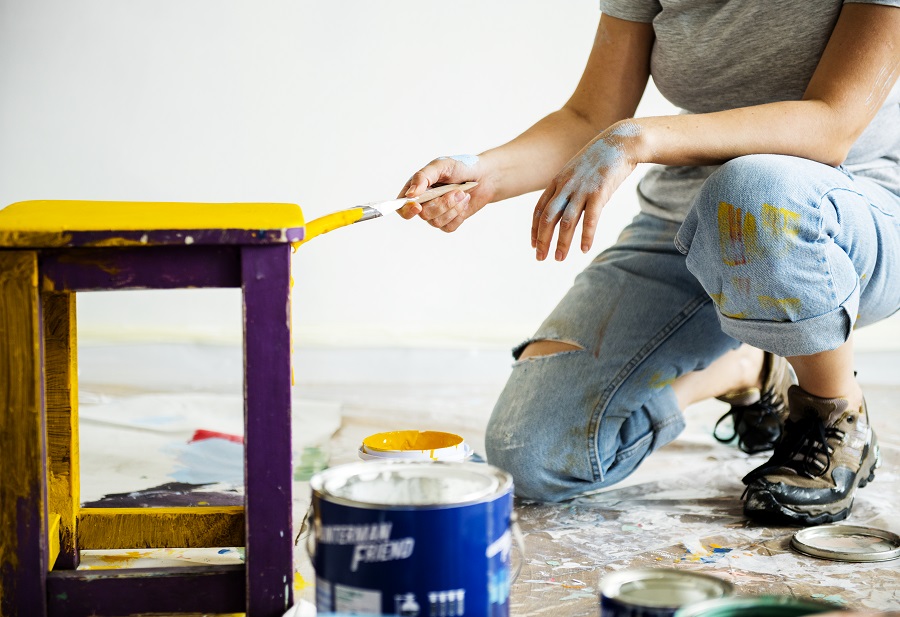
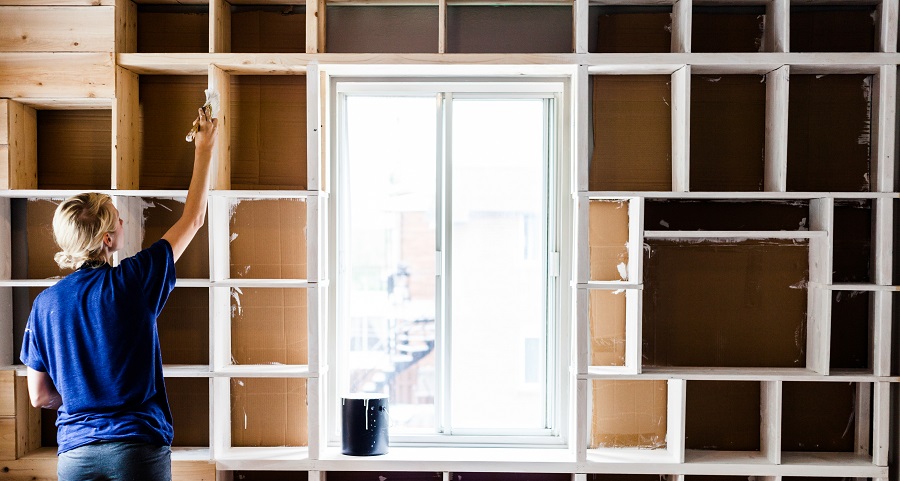
2. You'll make a mess, so prepare your workspace beforehand
You will need to have a place where you can work undisturbed and without fear of getting dirty. Some recommendations for this place:
- Choose the place inside. If possible, find a place indoors. Using water-based paints makes this possible. This way you get rid of the gums and dust that stick to the painted surface during drying.
- Choose a brightly lit place. Natural light is ideal, but if the windows are not large enough, a lamp can bring in the necessary light.
- Make sure the place is ventilated (air currents are created). Ventilation is very important for drying paints, especially water-based paints.
- Protect your floor. You never know when an accident might happen, so it's a good idea to use protective sheeting (available in DIY stores).
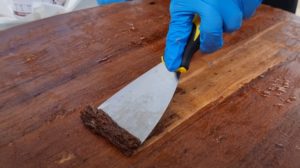
3. Always sand the wood substrate before painting
Sanding the wood support is very important to obtain a quality product. It is done for solid wood as well as plywood, veneer, or milled MDF. As mentioned, sanding at this stage is done with 150 or 180 grit sandpaper or medium grit sanding sponges. A finer grit will leave the surface rough and unpleasant to the touch and too fine a grit will fill the pores with fine wood dust, decreasing adhesion.
Insist on sanding at this stage. The better it is sanded, the better the surface will look in the end. After sanding, dust with the cotton cloth and check the smoothness of the finish with the palm of your hand. If you feel a smooth, even surface that doesn't scratch, you can move on to the next phase.

4. Colouring
If you use a varnish, which is transparent and you don't want the wood to stay with its natural color, use for coloring stains (staining solutions) to give wood the desired color. Find classic wood colors in the shops - nuc, oak, mahon, pin, wagons - but also common colors - red, yellow, black, brown - which you can mix in different proportions to get the color you want.
Don't use a concentrated color from the start. It's better to apply several coats to get to the color than to have to open up the color, which is very difficult to do.
The bleaches can be water-based or solvent-based. Solvent-based stains dry more quickly, stain more evenly but duller, and lift wood grain less. Water-based dries more slowly, may stain the wood, absorbs more deeply to bring out the wood's design, gives brighter colors and lifts the wood grain more. Whatever its nature, let it dry thoroughly before applying a coat of varnish or primer.
To avoid staining the colorant can be added in the first coat of varnish/primer. The coloration is more uniform, but the natural wood design is less emphasized.
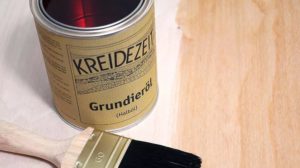
4. Applying the first coat of varnish or primer
Wood primer is not the primer you know for metal. It's not something you apply to prevent rusting but to increase adhesion and the amount of material that forms the film. There are refinishing systems that recommend primer and lacquer or others that use a single product, lacquer or paint, applied in successive coats. They are designed to ensure sufficiently good adhesion. The primer does not have surface properties, i.e. it is not scratch or impact resistant, it does not have the same texture or appearance as varnish or paint. That's why it should always be covered with a final coat of varnish/paint.
Apply 1-2 coats of primer before the varnish. Thin it so that it spreads well with a brush or trowel. If you use the same product (successive coats of varnish/paint), replace the primer with varnish/paint. Allow the recommended drying time before sanding. It is best to leave it on from one day to the next.
5. Sanding between coats
Sanding between the layers is done to remove fibers raised during dyeing or priming, dust trapped in the film or unevenness of the film during application. The film must be thoroughly dry when sanding. Use 280 or 320 grit sandpaper or fine abrasive sponges. The better the sanding, the smoother the final surface will be. At the end, sand with a cotton cloth.
6. Applying the final coat of varnish or paint
Finally apply a coat of varnish or paint. If by this point you have found that the brush is not the right one, change it. You don't want a bumpy, hairy surface from the brush. Dilute the hairspray according to the directions on the packaging, so that it doesn't clean, but also doesn't streak. Apply very carefully as this is the top coat. You can straighten out any mistakes just by buffing, but it's hard to do for a beginner and you may get shinier surfaces than you want.
Recommendations
- Wipe each time by wiping with a cloth. Dust reduces adhesion and spoils the appearance of the film;
- Never shake the dusting cloth near the wet film or in the space where you are going to paint. Dust is the biggest enemy of varnish or paint films;
- Only color if you are going to apply varnish. This is transparent and you can see the color and design of the wood. The paint is opaque and staining becomes unnecessary. You can only do this in the distressed effect, when partial sanding gets to the undercoat;
- Do not force dry. The film may remain soft inside. With water-based varnishes it can happen that the water remains in the film and gives an opalescent appearance. It will disappear over time, but for a while it will not look pleasant;
- Do not place wet objects in strong draughts. The film will peel off and form 'waves';
- Do not apply thick coats. Better 2-3 thin coats than one thick one. Thick layers give rise to stresses in the film which can crack over time;
- The chalky paints, the Annie Sloan type, must be covered with wax or varnish. Otherwise they do not set and are not resistant to moisture and scratching.
I promise to complete this guide if I find I have missed anything. It can also be completed with your questions. Leave them below, in the space provided, and I promise to answer each one.


Hi,
If the surface has been oiled (it's a laminated oak top) can it still be varnished?if so, is it the same steps or is it a different process?
Thank you
Hello!
The oil is the final coat, the surface can be left as it is, there is no need for varnish coating. However, if you want to varnish, you can only use varnish based on white spirit (petrosin, gas), turpentine or alkyd varnishes. Water-based varnishes or varnishes based on organic solvents (nitrocellulose, polyurethane, etc.) cannot be used. Such varnishes are also resistant outdoors.
Before application, sand the surface (as if the wood were unpolished) to increase the adhesion of the varnish. If the wood is saturated with oil it will absorb very little varnish and will have poor adhesion. Sanding will increase the absorption and therefore the adhesion. Apply 2 thin coats, with sanding in between (for a pleasant to the touch surface).
The oiled countertop can also be coated with wax. Apply a thin layer of furniture wax with a cloth, then polish with a soft cotton cloth. The surface will acquire a very pleasant silky sheen. However, it stains when exposed to hot water and hot springs (hot cup of coffee), alcohol and is not resistant to the outside.
All the best!
Hello, although I sanded the wood of the chairs, then cleaned them with thinner, one of them, the color migrates, more precisely the white paint (water-based) becomes yellowish. I sanded lightly and the first layer of paint, what did I do wrong?
Good evening!
Doesn't seem to have done anything wrong. The color could be from the bathing in the pores of the wood (if it's a repainted chair) or the tannin in the wood. The water in the paint dissolved them and made them migrate to the surface. In these cases insulators are used. These are clear, thinner, hardening products that penetrate deep into the wood and lock the tannins and whatever else is there inside.
I think the insulation is now done with the first coat of paint. The second coat should still be yellowing.
All the best!
Good evening. I'm going to paint a desk made of pale wood. I was thinking of oskar water-based paint, but I'm afraid that the work surface will scratch over time. What could I use for better resistance? I've read about colourless varnish. Does it work over white paint? Thanks for your answer! Beautiful evening!
Hello!
First of all you need to make sure that the paint adheres to the melamine chipboard. As far as I know, Oskar has such a paint.
Varnish can be applied over paint, but it is important that the products are also compatible with hard varnish. Not all varnishes are hard. It is possible that the paint is even harder. Floor varnish has very good hardness. There are water-based floor lacquers with very good hardness. You will need to sand the painted surface lightly to ensure adhesion between the two coats.
It's good to know that the varnish will easily change the colour of the paint due to the yellow tint it has.
Before varnishing it is good to see how hard the paint used is, what it is recommended for. If it is recommended for furniture and no other protective coating is required, the paint should not be varnished.
All the best!
Hello,
I have a lacquered kitchen countertop but the craftsman left a bunch of imperfections ( holes )
My question is how could I cover all these irregularities
I'm thinking of giving a coat of epoxy resin but I don't know if it's right
Maybe the craftsman didn't seal the pores of the countertop before applying the varnish (by the way with what product the wood pores are sealed)
Hello!
There are touch-up putties, in different colours, with which you can repair defective surfaces.
If the lacquer that the countertop was made with is not hardened, the resin might affect it. And in order to have adhesion the lacquer should be sanded. Generally varnish is applied over the resin, but you can check the compatibility between varnish and resin in a hidden area. If nothing happens, you can pour the resin. Sand beforehand to have adhesion between coats.
The pores are closed with pore-filling primer or by applying several thin, successive coats of varnish. On wood with large pores (walnut, oak, ash), the surface should be checked 1-2 weeks after the finish has been applied. During this time the varnish "falls" into the pores and they become visible again. By using a hardening varnish (polyurethane, water hardenable) this phenomenon can be avoided.
All the best!
What baths followed by varnishes do you recommend for an indoor staircase? Thank you.
Hello!
You can use ordinary, simple (containing only solvent and solvent, no added resins), water-based and organic solvent-based wood stains. It is important that the wood is thoroughly dry when applying the varnish. Use special varnish for parquet, otherwise the steps will scratch easily.
If the indoor ladder is fitted, I recommend using water-based products. There are also very hard, water-based parquet varnishes. This will get rid of unpleasant odours.
All the best!
Hello!
I have a concern.
I want to paint an oak furniture that is already lacquered. I know that the furniture needs to be cleaned, sanded, dusted and then degreased, after which I can apply the coat of paint (I was thinking of using Oskar water based). My question is: how can I clean the furniture if it gets dirty? Would I have to wax it to be able to do that?
I should mention that I want the furniture to have a matt appearance.
Thank you!
Hello!
Once the water-based paint dries and hardens, it is no longer water-soluble so you can clean it like any other furniture.
To prepare it for dyeing you must first degrease it by washing it with a cloth dampened with water and dish soap. After wiping it with a clean cloth and letting it soak, sand it with 280 or 320 grit sandpaper or a fine sanding sponge. Sanding should be done no more than a few hours before painting (3-4 hours) so that the paint adheres.
To have matt furniture you need to buy matt paint.
Regular paint, such as Oskar's, does not need to be waxed. There are several kinds of water-based paint. Only the chalky kind has to be fixed with wax or varnish because otherwise it has no resistance. Oskar paint can also be waxed, but only if you want to. Wax gives it extra protection.
All the best!
https://revistadinlemn.ro/2020/10/29/ce-trebuie-sa-stii-daca-vrei-sa-revopsesti-mobila-sau-usile-de-lemn/
Hello,
I have a new ladder that has already been installed in my new house. Builder
he couldn't wait any longer. The steps are bought ready-made and are beech. I need to stain them in a cappuccino shade (even if it comes out darker but it should be in the shade) because that's what the floor tiles in the living room are like; I've tried about 6 types of varnishes, baths, lacquers but almost all of them turn pink or reddish because that's what beech is like. What's not pink is something else but I still don't get the desired shade.
Against the steps I want to make them white.
I need help.
Thank you!
Good evening!
The reddish colour of the beech will influence the colour of the berry. It is virtually impossible for the red of the beech not to be reflected in the colour of the wood.
The only solutions would be to bleach the steps and then stain them to the desired colour, or to stain with a more diluted cappuccino paint so that the result is a semi-coated wood.
The first solution is common in factories working with beech, but it is not very simple and you should call in a specialist. Bleaching variants can be found in the link below. In the case of the second, it is not complicated, but the finish will not be as transparent as a varnish-coated berry. If you don't mind that the wood is less visible, this is the simplest solution.
Good luck!
https://revistadinlemn.ro/2016/11/04/lemn-cu-pete-sau-prea-inchis-la-culoare-se-rezolva/
Hello,
I read your article and if water based paints are used it says it lifts the wood grain more.
Can you tell me more about this?
Thank you!
Hello!
Wood loves water and when it finds it, it absorbs it. When it absorbs water, the wood's chopped grain, i.e. that which results after the wood has been turned into planks, beams, veneer or other elements, swells and the end of it rises. Water-based paints have water in their composition which is, as I said, absorbed by the wood. After the paint dries and hardens on the raised grain of the wood, the raised grain remains hard and the surface becomes rough to the touch. To make it smooth again sanding is done between coats. Fine abrasive sponges or abrasive paper with a grain size above 240 are used for this operation under these hardened fibre ends and the surface becomes smooth again. Sanding is light, surface sanding only to remove these roughnesses. The phenomenon happens when the first coat of paint is applied because after that, at least in theory, the paint no longer comes into contact with the wood.
Without this sanding, it is difficult to achieve a smooth and pleasant to the touch surface.
Absorption also occurs in solvent-based products, but to a much lesser extent.
I have included below a link to other articles that may be helpful.
All the best!
https://revistadinlemn.ro/2021/07/01/am-aplicat-3-straturi-de-lac-dar-suprafata-continua-sa-fie-aspra-cum-sa-fac-ca-nu-mai-zgarie-sa-fie-fina/
https://revistadinlemn.ro/2017/01/16/ce-este-si-de-ce-este-importanta-slefuirea-intre-straturi/
Hello. I'm just starting out and want to know the exact steps for finishing. What I start with and what I finish with and here I mean primer, bait and varnish....
After sanding the wood with the sanding sheet I apply the first time to get the final gloss. I mention that I do not want glass gloss. Something more rustic. But nice and elegant looking. You can apply only the bath and after the varnish.
Fold primer and after lacquering....
Or even all of them...
I want to understand the exact stages of finishing.
Thank you in advance!
Good evening!
After sanding, apply the filler, then the primer and finally the varnish. Sand the wood along the grain with 120, 150 or 180 grit sandpaper. Finer paper (over 240) is used for sanding the primer. After sanding the surface is roughened by wiping or blowing with air.
You can apply water-based or solvent-based bath. The water-based varnish penetrates the wood better and highlights the design. However, it lifts the grain more and dries more slowly. Raising the grain will mean more effort when sanding the primer to get a smooth surface. Solvent-based wood stain penetrates less into the wood, lifts the grain less and dries faster. The stain is more uniform but duller. The wood stain must be completely dry before applying primer.
The primer ensures flatness of the surface and good adhesion to the wood. Apply 1-2 coats, allow to dry and then sand. Use sandpaper min.240 for sanding. If a gloss varnish is to be applied, the sanding paper should have a grit min.400.
The varnish is applied at the end, after sanding and roughening the sanded surface. It is the varnish that gives the surface a pleasing appearance, gloss and resistance to scratching, abrasion, water, etc. Varnish is not sanded. To achieve perfect surfaces, glossy varnishes may need polishing. Polishing is done with abrasive pastes of min.1000 grit and special felt or microfibre discs.
For all the above information I leave below links to dedicated articles where the explanations are more elaborate.
It's good that you don't want high gloss. It's hard to achieve and doesn't go with rustic furniture at all.
You can only apply bath and varnish. Paint and varnish is not possible because varnish has no surface properties, i.e. it is not scratch and abrasion resistant, does not have a pleasant look and feel, and has no gloss.
Good luck!
https://revistadinlemn.ro/2018/12/06/colorarea-lemnului-recomandari-pentru-un-aspect-fara-pete/
https://revistadinlemn.ro/2020/09/17/10-trucuri-pentru-suprafete-din-lemn-perfect-finisate/
https://revistadinlemn.ro/2022/09/22/de-ce-se-ridica-fibra-lemnului-la-vopsirea-cu-produse-pe-baza-de-apa-ce-facem-ca-suprafata-sa-fie-redevina-neteda/
https://revistadinlemn.ro/2019/04/18/greseli-din-exces-de-zel-la-slefuirea-manuala-a-lemnului/
https://revistadinlemn.ro/2017/07/17/sfaturi-pentru-cei-ce-fac-mobila-in-stil-rustic/
Hello Mrs Mihaela Radu,
Could you please guide me in choosing products for painting beech wood stairs + balusters in white? I would like a paint as resistant as possible to mechanical shocks and to keep its colour (not to yellow) for years.
Do you think it is also necessary to insulate before applying primer?
Thank you in advance!
A beautiful day
Hello!
The most resistant to yellowing is solvent-based acrylic paint. It is a two-component paint with hardener, so it has good mechanical resistance. Increasing the percentage of hardener with 5-10% increases hardness. Do not exceed the maximum percentage because the paint may become brittle.
Another option is water-based floor paint with an anti-yellowing additive.
I recommend you buy the professional materials. You can find them at varnish and paint distributors such as Sirca, ICA (Lomilux), Sayerlack, Renner, Milesi, etc. You can find them in most major cities.
Beech is not a tannin wood so generally does not need insulation. If you are using water based lacquer my advice is to apply insulator as well. Water can dissolve dyes or other substances in the wood and the paint can change colour.
Good luck!