


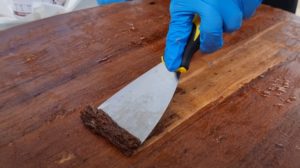
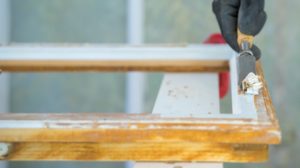
I had a conversation with someone who, after having converted a kitchen furniture, had a problem with the paint cracking on the wood and didn't know what had happened. Convinced that the paint was good, he thought he might have done something wrong. He described the technology to me point by point and that's when I understood how you can end up with a poor result by doing more than necessary in your desire to be as close to perfection as possible. In short, transformation involves 3 steps: cleaning down to the wood, hand sanding and repainting. The sanding of the wood had been done very carefully, in increments from 100 grit to 500. The paint was then applied in thin coats, waiting for the required drying time, and yet, after drying, the paint began to crack. What happened? Where is the mistake?
Sanding wood by hand
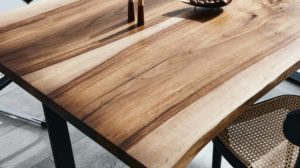
It is necessary to sand the wood before applying the stain and varnish (paint) in order to obtain a uniform color, to ensure that the film has good adhesion and that the wood has a pleasant grain, does not scratch to the touch.
Good adhesion means good varnish/paint absorption into the wood. Wood absorbs naturally through the fiber channels (visible in some species as pores), exactly where the water circulated when it was a tree. Where it absorbs best is where the fibers are sectioned. This is where the so-called fiber ends appear, where the liquid enters easily.
Sanding has this ability to open fiber ends. But, paradoxically, it can also close them, limiting absorption into the wood. How do we know whether we are opening or closing the fiber? By choosing the right abrasive paper or sponges to sand with.
Wood sanding paper grain
I won't go into the sandpaper in detail. I have done it on another occasion and you can find details here. I just want to point out that the numbers written on this paper have a meaning and are very important. By choosing the paper according to them you will get a quality sanding. The grit is represented by numbers from 40, 60, 80 to 400, 500, 600. The higher the number, the finer the paper and the less it scratches. The very abrasive paper with small numbers is used for wood, and the finer paper is used for sanding between coats of primer, varnish or paint.
The fiber ends open if sanding paper is used up to 180, maximum 220, and this is for the more loose and soft-grained, soft-grained wood species such as poplar. In hard species such as oak tree, we can stop at 150 no problem. Abrasive papers finer than that no longer have the power to break the fiber open. On the contrary, they will push the already open fibers into the wood, closing the absorption channels. The fine dust resulting from sanding with fine paper also contributes to the closing of the channels, which will only "grind" the wood fiber without opening it.
This is what happened in the case described. When the wood reached 500 grain, it was totally "closed", it could not absorb any of the paint applied. The film formed was in fact a paint droplet on top of the wood, trapped only from place to place. With no adhesion to the substrate, this very thin suspended layer immediately "cracks" at the slightest movement or touch.
Why progressive sanding
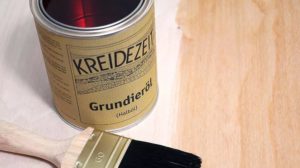
From the above, the question arises: so why is it necessary to sand progressively finer and finer? Weren't the fibers opened by 40 or 60? Why not stop there? Because the wood would absorb a lot and uncontrollably. In the case of stain, stains would automatically appear, and in the case of paint or varnish, the large amount absorbed deep into the wood means losses. Therefore, it is recommended that the first coat of the finish (after staining, if necessary) should be grund or the lacquer/paint should be more diluted. This will allow it to penetrate into the surface of the wood, grip the grain well and the resulting film to adhere.
By sanding the wood progressively, the first few grits break up the grain, and the next few close the grain a little so that absorption is more controlled. This also limits and reduces the size of the broken fibers, which will be loaded with varnish and will rise, giving a rough appearance after varnishing. If we stopped at 40 grit, these fiber ends would be very large. Loading them with varnish would result in real wood spikes that would be very difficult to smooth through sanding between layers. You would need to insist, maybe even use thicker paper, below the recommended thickness (240 and up), which will almost remove that first coat of varnish. Obviously, that means waste and "labor in vain".
In conclusion ...
Do not try to make the wood as smooth as possible because you will reduce the adhesion of the varnishes or paints used. Do not leave the sanded wood with only very small grain sizes (40, 60) because you will get a stained and dark wood or you will unnecessarily consume primer/lacquer/paint and sandpaper trying to get the smoothest and most pleasant to the touch surfaces.
I hope I have managed to explain what happened in this situation in a way that everyone can understand. If there are any questions or comments below. And if you know someone who would benefit from this information, share the article with them.


Hello, from what I've read, I've mostly taken in what NOT to do. Specifically, what are the exact steps? E.g.: sanding 40-60 grit, paint coat 1, sand xxx, etc. I want to re-paint some wooden doors. Thank you.
Hello!
From your question I don't understand if you want to apply the paint over the existing one or you want to clean the old coat down to the wood, then apply another finish. I'm trying to address, briefly, both situations:
1. Over existing paint. You must degrease the surface with water and detergent (wash it), then wipe well and let it dry. Lightly sand with 280 or 320 grit sandpaper, dust and apply new paint. Sanding is done so that the new coat of paint adheres to the old one. It is good to test beforehand if the paints are compatible. Check on a more hidden area. If it spreads well, without forming cracks or islands of paint, they are compatible. To avoid problems, use water-based paint. It is compatible with most types of varnishes and paints.
2. On wood. Remove the old layer by sanding with a sanding machine, pickling or by heating. Below is a link about removing old paint layers. When the wood is clean wipe gently with a cloth with thinner and let it dry. Then sand with 150 grit sandpaper (if the wood is hard - oak, ash) or 180-220 for softer wood (lime, poplar, fir, spruce). Dust and start applying the primer. After drying, sand with 280 or 320 grit sandpaper and apply the paint.Sanding between coats will help to obtain a smooth, smooth surface.
I have also attached a link with tips for finishing doors.
All the best!
https://revistadinlemn.ro/2017/09/15/cum-se-curata-stratul-vechi-de-vopsea/
https://revistadinlemn.ro/2017/08/16/sfaturi-pentru-finisarea-usilor/
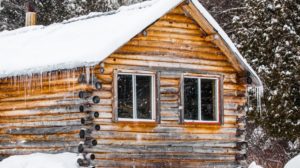
Hello. I would need some advice from you. We have a cottage in the country with old wooden doors and have decided to refurbish them. We blew off the old layers of paint with a hot air blower, and then sanded with 60 grit sandpaper, then putty knife and sanded again. Please tell me what to do next. I wouldn't want to ruin all that work. The doors I think I'll paint them super gloss white. Thank you!
Hello!
Indeed, it would be a shame to work. 🙂
My opinion is that you should sand the entire surface with a finer sandpaper (150 or 180, even finer) to have a pleasant surface to touch. Then apply 2-3 coats of paint, drying between coats.Drying time is depending on the paint used. If possible, sand the first coat after drying with sandpaper of min 400 if using gloss paint. You will get a very smooth and pleasant to the touch surface.
I think the very glossy paint is picky and hard to maintain. You can see all the hand marks and surface imperfections on it. I would use a semi-gloss or satin paint. It has a nice sheen and is much easier to maintain.
All the best!
Hello. Thank you for your reply. You told me to apply 2, 3 coats of paint with drying between coats. If I apply a coat of white primer, sand and then apply white satin paint is that ok? Or is there a secret to applying multiple coats of paint? Thank you very much.
It is very good with primer and paint. I was thinking you are a beginner and trying to find a simpler version. 🙂 As you say - a coat of primer, sanding and then paint - is the correct technology.
Good luck!
Hello, we would like to clad the steps of our home (which are now tiled) with laminated beech wood steps.Please let me know what the work steps are and what to give them. We would like the oak colour. Thank you in advance for your reply.
Good evening!
Oak steps can be finished separately and fitted afterwards or fitted and then finished. To minimise disruption it is best to have the steps finished elsewhere.
The steps must first be sanded very well because beech wood is difficult and stains easily. The last sanding should be done with 180 or 220 grit. Sand and apply the oak wood stain. I recommend solvent-based stain because the risk of staining is lower. You can find the stains in DIY stores. After drying, apply 2-3 coats of parquet varnish. You can use water-based or solvent-based varnish, applied with a brush or with stiff sponge pads. If the varnish is solvent-based, the trowel must have the solvent-resistant sponge. After the first coat of varnish has dried, sand with 320 grit or fine abrasive sponge to remove the raised wood grain and achieve a smooth, pleasing finish.
After finishing the steps are glued to the concrete staircase. It is best to remove the layer of tiles so as not to raise the step too high. Bonding should be done with moisture-resistant adhesive (D3 or D4).
The same technology is also used if the finishing is done after gluing the steps.
Good luck!
Hello. I have a pine table that has not been varnished or treated in any way. It has been sitting in the kitchen, next to the stove, and is stained with spilled grease.
I'd like to know if I can "recondition" it in the sense of if I could do something to remove the stains and possibly varnish it afterwards.
Does it need to be sanded? pickled? I don't know anything about it, and your answer would be very helpful. Thank you very much.
Hello!
If the surface is heavily coated with hardened oil that almost forms a film, a combined cleaning, sanding + pickling will be needed. Apply a stripper first because hardened oil is hard to remove otherwise. I leave below a link with types of stripper and how to use it. Caustic soda can also be used, but the method is more dangerous. After the oil has softened, remove it with a scraper or wire brush, after which the surface wiping thoroughly with universal thinner. Finally, the wood is sanded well along the grain with 150 or 180 grit sandpaper or a medium abrasive sponge. The wood will become clean and pleasant to the touch and can be varnished or painted.
Good luck!
https://revistadinlemn.ro/2022/09/08/cum-sa-cureti-cu-decapant-straturile-vechi-de-vopsea/
https://revistadinlemn.ro/2016/04/11/cum-trebuie-facuta-slefuirea-in-alb-a-lemnului-pentru-a-obtine-un-produs-de-calitate/