


I'm sure you've figured it out, here's an article in the Readers ask :). I get a lot of questions on this topic, as ladies are usually the ones who want to change the look of the interior of their home without spending a lot of money. Change helps, it gives the feeling of a fresh start, and if it involves some DIY, the satisfaction is even greater. In general, the furniture you want to change is older, perhaps out of fashion, but in good condition, so replacing it is not justified. Sometimes pieces of furniture are made of solid wood which makes them more precious in the eyes of their owners, hence the clear intention to keep them. They are, however, too old and outdated, and the transformation is intended to bring them as close as possible to modern style and design. These are pieces that, with a little effort, can undergo the most interesting and spectacular transformations.
There are many ways to change the look of your furniture, some with minimal effort and investment, others requiring more involvement, patience and talent. I'll take them one at a time.
Replacing knobs, handles and visible hardware
It sounds trite, but it can certainly make a change. In general, old furniture and the pulls - the handles - are the same color, making them lose their color and part of the whole. Replacing them with some in a contrasting color or modern shape can give a new face to the whole piece of furniture. They need to be chosen carefully because some simply don't match and spoil the final look. Changing is not difficult as these handles are generally screwed on.
Skating with colored wax
Colored waxes can bring a change without the need to sand or remove the old finish. Furniture simply needs to be cleaned by washing with water and dishwashing detergent or soap (find more information on how to do this here). After wiping and buffing, you can apply the wax with a soft cotton cloth, leave for 1-2 hours, then polish with a felt or cotton cloth. The change will not be radical because the wax will not completely cover the old color, but you will manage to give either a antique lookor a modern one, depending on the wax color.
You can find waxes in different colors, even green or blue, in DIY stores or at wood-finishing distributors. If you have the patience, you can make your own color using colorless wax and pigments. I have worked with Kreidezeit pigments that mix well with both wax and oil. To better incorporate the pigment you can heat the wax a little. Not very much because wax is usually a mixture of waxes and oil and can separate. Also remember that wax can be flammable. It is best to soak it for a while on a closed heat source (a radiator).
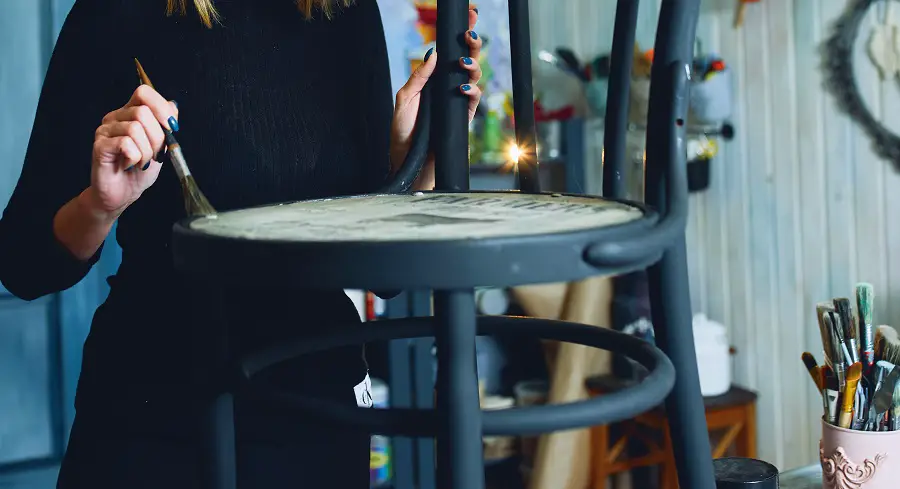
Simple painting
We've talked about refinishing furniture on several occasions. Find information here and here. There's also lots of information and tutorials on materials and ways to paint. The most popular are those with Annie Sloan creosote paints. Their advantage is that can be applied without sanding, even on glossy surfaces. Another advantage is that, using the same paint, you can paint upholstery, decorative cushions or walls. But it must be protected, otherwise it is not water-resistant. If the furniture is not intended to stand in damp environments, protect it with wax. If it is bathroom or kitchen furniture, it is protected with varnish to make it resistant to damp environments.
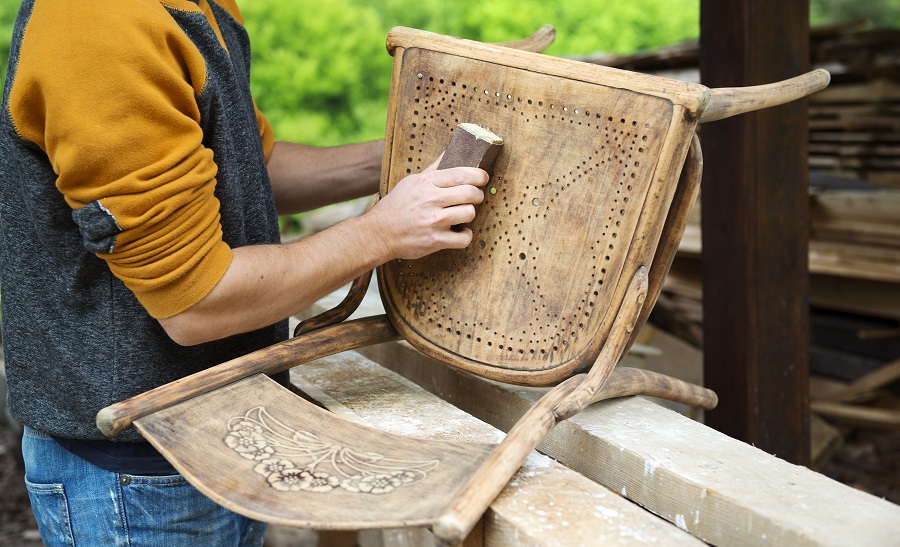
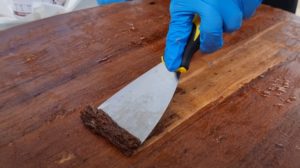
You can also use water-based (water-thinnable) paint, which is compatible with most types of varnishes and paints, except oil and alkyd paints, in which case you should use alkyd or oil-based paint for repainting. The advantage of using regular water-based paints is that you don't need another coat to protect them, and they are also resistant to high humidity. The disadvantage is that the old coat needs a little sanding (in addition to washing) to make it adhere. Sanding does not involve removing the old coating but creating very fine scratches on it to ensure adhesion between layers. Use 280 or 320 grit sandpaper or a fine abrasive sponge. After sanding, wipe the surface before painting to remove dust.
Painting with two or more colors
This is where imagination comes in. You can get very different, modern and cheerful furniture just by choosing the right colors. Wardrobes, coffee tables, bedside tables can be divided into several areas using paper tape (available in DIY stores. I got it from Hornbach). This type of tape peels off easily without leaving any marks. Paint each area a different color, and when you remove the scotch you will have totally different furniture. It will also be different if you paint each drawer a different color, or if you paint only the frame of the furniture a different color, keeping the drawers in their original color.
You'll get an interesting effect if you intertwine colors. For example, divide your imaginary wardrobe, without using tape, into 3 zones. In the center of each area, apply a color, say white, green and blue. Then start spreading the color with the paintbrush, from the center of the color stripe towards the next color. Spread from both sides so that the two colors overlap, but do not make them uniform. You will get a crossing area where the colors overlap.
It's very important to choose the colors so that their harmonious and interesting approach. You can "buddy" two colors by adding a small part of one to the other and vice versa, right out of the box, before they are applied. When placed side by side they will already have something in common and harmonize with each other. The quantity does not have to be large to avoid getting another color.
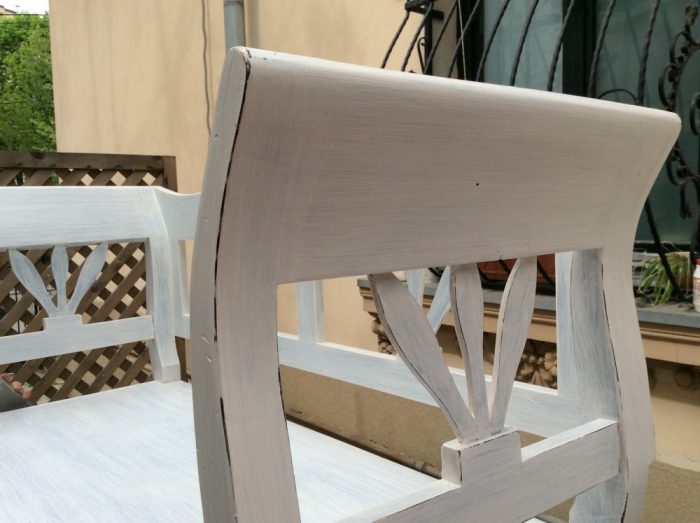
Painting and antiquing
This time dyeing can be associated with antiquing methods, the ageing of furniture. There are several such methods, here are just a few of them:
- Sand the edges so the old finish shows through. The method is called distressed and find more information on how to do it here.
- Skating with colored wax. Works very well on profiled furniture.
- Getting a marbled effect using a cotton wool swab and an acetone-based stain. The acetone will evaporate very quickly, before the color layer evens out. The remaining streaks will make the surface look like marble. But you'll need to fix the effect with a colorless wax or varnish.
- Distressed + patination. It's how to get furniture in the style shabby chic.
Painting + painting
Paintings on cupboard doors can bring a romantic or cheerful touch to your furniture. You can use your own talent or you can use stencils that you can find in DIY stores, paint shops or paint stores. Paintwork should generally be protected with a coat of varnish or wax. For stencils there are different transfer and fixing methods, depending on the supplier.
If you have an old piece of furniture in good working order, it's a shame to give it up just because you don't like the color anymore or because you want to make a change. You can make the change yourself, with minimal investment and little physical effort. Now that we're indoors so much, we really need something to help us get over the feeling of isolation. And painting furniture can be a very enjoyable hobby. If you've made up your mind but don't know where to start here some recommendations.
Don't forget! If you have changed the look of your furniture using other methods, share your experience with us. And if you have any questions or queries, leave them below in the dedicated space. I'll be sure to reply.


Hi,
Ah, I'm so glad I discovered you. I've started renovating the sugrafer and found a lot of cool ideas here. Super interesting. I've heard of Annie Sloan's Annie Sloan cream paints but wasn't sure how to use them, so after reading this article, I'm clear. Thank you so much. I will be a "loyal customer" from now on :)))))
Good health!
Thanks to us too!
Health and all the best!
Hello,
I purchased a Wild Oak TV dresser from Jysk, no gloss, based on the one on display. When unpacked the colour is much lighter, in contrast to the existing furniture. My question is:
What kind of paint should I use?
Thank you!
Hello!
If it's not wax-finished (it should say what kind of finish was used), you can use a low-gloss water-based paint. You can use any kind of water-based paint except chalky paints. The latter must be protected with a wax coating to resist.
You can also use coloured wax (antique oak, dark oak or walnut) to close the colour. Apply the wax with a cloth over the entire surface, leave to dry for 3-4 hours, then polish with a soft cotton cloth.
Good luck!
Hello,
I've been reading about refinishing furniture with Annie Sloan paint. But as you say it requires sealing. I have a question to you: if the furniture is lacquered, 40 years old furniture, what kind of paint besides Annie Sloan can I use, without using a sealer?
Thank you,
Elena
Hello!
You could use a nitro paint. Being so old, it is possible that your furniture was also finished with nitrocellulose. The advantage is that, in this case, there would be no need for sanding. The disadvantage is that the paint is solvent-based. You can check it on a hidden spot. If after applying nitro paint the bottom layer does not "bloom", i.e. does not swell and crack, you can cover the furniture in this way without the need for wax fixing.
Another possibility is regular water-based paint (not the chalky kind), in which case you'll need to sand the surface so that the paint adheres. If you don't, at the slightest knock or other mechanical aggression, the paint layer will peel off the old finish and can flake off the entire surface like a skin. Sanding creates the curls needed for adhesion. It is done with a fine abrasive sponge or sandpaper with 240, 280 or 320 grit.
Regardless of the paint used, you will need to clean the furniture first with water and detergent to remove the dirt accumulated over time. Find more details about degreasing in the link below.
All the best!
https://revistadinlemn.ro/2020/10/29/ce-trebuie-sa-stii-daca-vrei-sa-revopsesti-mobila-sau-usile-de-lemn/