


Primesc multe întrebări cu acest subiect – reconditionare mobila. Care sunt etapele? Ce se aplică întâi, grundul sau baițul? La ce folosește grundul? Ce lac să aleg? – sunt doar o parte dintre aceste întrebări. Pentru că este un subiect de interes m-am gândit să-l tratez mai pe larg. În plus, recunosc că va fi și mult mai simplu atunci când vor mai veni întrebări. Pun un link și am scăpat. 😉 Trebuie însă să vă spun de la început că nu este un lucru simplu și că, dacă nu ați mai făcut așa ceva până acum, începeți cu ceva mic și fără importanță. Astfel nu va fi o problemă dacă nu reușiți sau mai rău, dacă stricați obiectul. Cererile vin de obicei de la cei care vor să recondiționeze piese vechi de mobilier și cel mai probabil vor să facă acest lucru pentru mobila de suflet. Dacă sunt piese de valoare este mult mai bine să apelați la un specialist.
Când este necesară recondiționarea
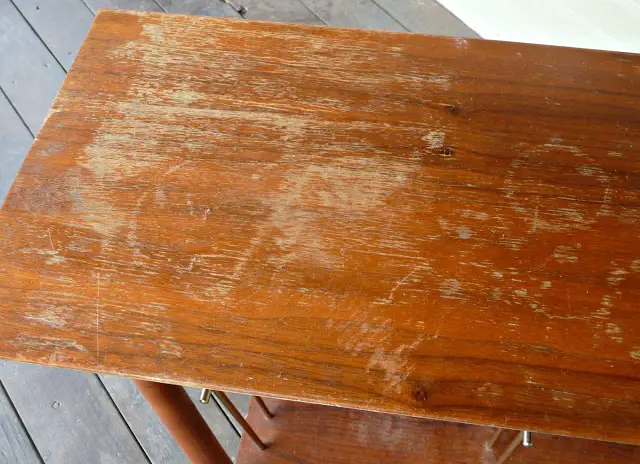
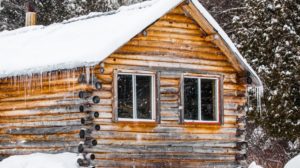
Oricât de bun ar fi fost lacul și oricât de bine întreținută mobila, în timp, tot apar zgârieturi fine sau mici defecte. Despre genul acesta de “avarii” superficiale și discrete am mai vorbit și puteți găsi câteva remedii simple aici.
Când zgârieturile sunt profunde, când lacul se scorojește din cauză că apa a băltit pe suprafață sau când apar decolorări ale lemnului sau ale baițului, intervenția este mai dificilă și implică mai multă muncă. Rezultatul final nu depinde doar de calitatea produselor folosite. Modul în care se parcurge fiecare etapă este foarte important, iar calitatea finală a lucrării ține în primul rând de corectitudinea muncii depuse și nu de faptul că ați cumpărat un lac foarte bun.
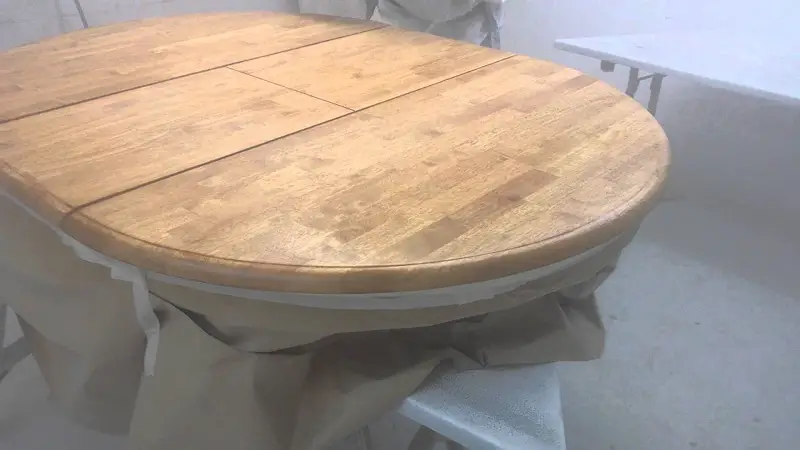
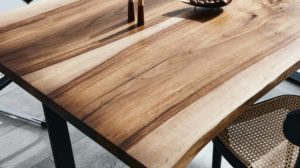
Pentru că pe blaturile de mese apar cel mai des zgârieturile sau petele am să mă refer la o astfel de recondiționare, dar etapele sunt valabile pentru orice fel de mobilier sau obiect din lemn. Voi alege cea mai solicitantă intervenție, aceea în care stratul de finisaj este îndepărtat până la lemn și refăcut. Și parchetul are parte de solicitări agresive, dar despre rașchetarea și finisarea lui am vorbit deja.
Scule și materiale necesare
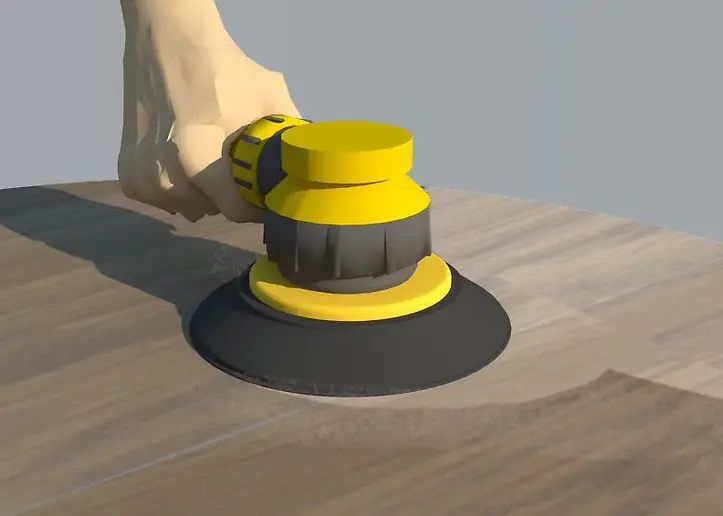
Dacă începeți o astfel de muncă ar rebui să aveți o mașină de șlefuit pentru că îndepărtarea vechiului strat de lac sau de vopsea nu este ușor de făcut numai prin șlefuire manuală. Trebuie să aveți hârtie de șlefuit cu granulație mai mare, pentru lemn, adică 150-180, chiar 220 și hârtie fină, pentru a șlefui între straturile de lac aplicate. Dacă veți aplica un lac lucios, hârtia folosită trebuie să aibă granulația 400 pentru a nu fi vizibile rizurile fine de la șlefuire. Pentru lac mat o granulație de 280 sau 320 este suficientă. Se pot folosi și bureți abrazivi – medii pentru lemn și fini pentru lac.
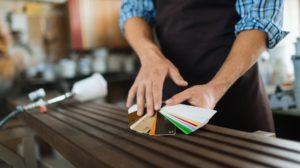
Veți mai avea nevoie de pensule/trafalet, cârpe de bumbac, baiț (dacă doriți colorarea lemnului), grund și lac. Alegeți produse pe bază de apă pentru a avea mai puține bătăi de cap. Țineți ambalajele acoperite când nu lucrați cu ele pentru a nu risca să ajungă impurități în ele sau a nu grăbi uscarea. Nu amestecați cantități mari de material pentru a nu avea pierderi. Sfatul nu este valabil în cazul baițului sau vopselelor (dacă pregătiți o anumită culoare). În acest caz preparați întreaga cantitatea necesară pentru a nu avea diferențe de culoare.
Sunt utile și bețe din lemn pentru a amesteca produsele în ambalaj, vase în care să puneți materialele dacă trebuie să faceți amestecuri, diluant pentru curățarea pensulelor sau pentru diluția lacului, mănuși de protecție (rezistente la solvent).
Etapele recondiționțrii finisajului
Îndepărtarea vechiului strat de lac sau de vopsea. Pentru a nu depune efort foarte mare folosiți mașina de șlefuit pe care montați hârtie abrazivă pentru șlefuirea lemnul. Aveți grijă să nu șlefuiți foarte mult când ajungeți la lemn. Mobila este de multe ori furniruită, iar stratul poate fi foarte subțire. Chiar și mobila foarte veche poate avea furnir. În acest caz, însă, furnirul este puțin mai gros. Dacă nu aveți siguranță cu mașina, atunci când ajungeți la lemn faceți șlefuirea manual. Așa veți avea mai mult control. După șlefuire îndepărtați praful cu cârpa de bumbac. Verificați cu mâna să nu aibă asperități.
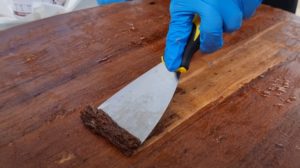
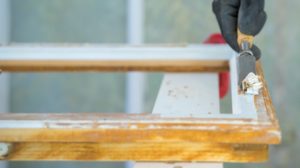
Un alt mod de a îndepărta vechiul strat lac este cu ajutorul decapantului. Cu pensula, se aplică decapant, se lasă să acționeze timpul recomandat de producător, după care se îndepărtează stratul înmuiat cu un țicling (o lamă de metal). Operația poate fi repetată de câteva ori. După îndepărtarea totală a lacului, suprafața se spală cu diluant și se șlefuiește.
Este etapa când se fac și eventualele reparații. Dacă mobila este furniruită si furnirul s-a dezlipit sau s-a rupt lipiți-l cu adeziv de contact pentru a nu trebui să-l prindeți în prese. Ștergeți imediat surplusul și șlefuiți zona. Dacă rămân pete de adeziv vor fi foarte vizibile atunci când aplicați baițul. Dacă lemnul are crăpături sau mici găuri pe care vreți să le reparați folosiți chit de lemn. Aplicați o cantitate puțin mai mare pentru că prin uscare volumul chitului scade. După uscare slefuiți pentru a aduce la nivel.

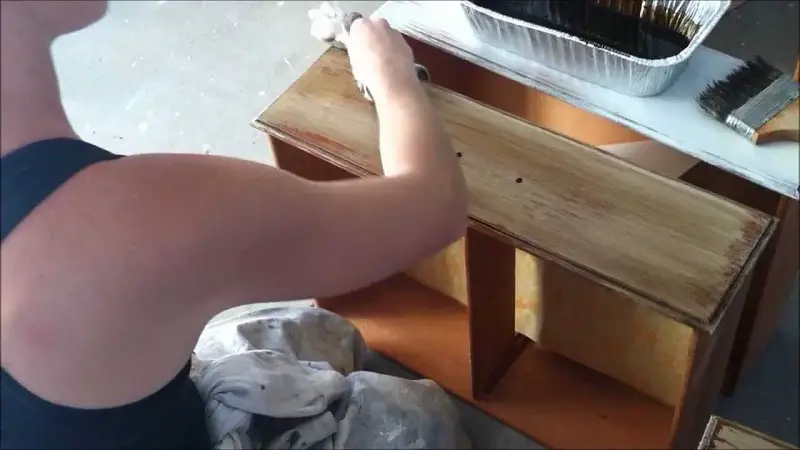
Aplicarea baițului. Dacă doriți ca mobila să fie colorată, dar fibra lemnului să fie vizibilă, folosiți finisarea cu baiț și lac. Dacă folosi,i baiț pe bază de apă fibra lemnului se va ridica puțin iar suprafața va deveni mai aspră la pipăit. Nu vă speriați. Veți rezolva problema după stratul de grund sau primul strat de lac. Aplicați baițul cu cârpa sau trafaletul pentru că puteți controla mai bine cantitatea și reduceți riscul apariției petelor. La pensulă, cantitatea aplicată poate fi mai mare la început. Dacă baițul este pe bază solvent folosiți un trafalet cu burete rezistent la solvenți. Pentru a nu obține o culoare prea închisă folosiți baiț mai deschis decât culoarea dorită și aplicați 2 straturi. Așa puteți rezolva și problemele de uniformitate.
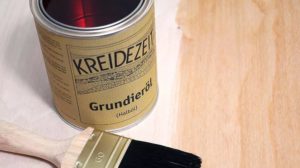
Aplicarea grundului. În mod normal, după ce se usucă baițul se aplică un strat de grund. Acesta asigură o aderență mai bună la lemn și încarcă mai bine (are rășină mai multă și acoperă mai bine). Sunt însă și lacuri care pot fi folosite pe post de grund. În general, sunt produse de bricolaj, făcute special pentru a fi ușor de aplicat. Dacă vi se pare prea gros diluați-l cu apă, dacă este hidrodiluabil sau cu solvent. Pentru cele pe bază de apă nu depășiți 5% pentru că va ridica mult fibra lemnului. Aplicați cu pensula sau cu trafaletul. Nu diluați foarte mult pentru că există riscul să apară scursuri care se îndepărtează greu după uscare. După aplicarea primului strat lasați să se usuce și șlefuiți ușor cu hârtia abrazivă fină. Veți îndepărta astfel fibra ridicată și eventualele imperfecțiuni de la aplicarea stratului de grund. După șlefuire desprafuiți cu cârpa de bumbac.
Aplicarea lacului. Lacul se aplică la fel ca și stratul de grund. Dacă folosiți lac și pe post de grund, aplicați încă un strat în aceleași condiții ca prima dată. Lasați să se usuce și vedeți dacă este suficient. Dacă doriți o peliculă mai plină puteți aplica încă un strat, fără șlefuire, după ce s-a zvântat primul strat (1-2 ore). Dacă lasați până a doua zi este bine să șlefuiți înainte pentru a avea o aderență mai bună. Dacă lacul este lucios lasați obiectul să se usuce într-un spațiu cât mai lipsit de praf. Praful este dușmanul lacului lucios. Se prinde în peliculă iar luciul accentuează defectul.
Pentru un aspect mai placut și o întreținere mai bună puteți aplica peste lac, după uscare, un strat fin de ceară. Lasați pănă a doua zi și lustruiți. Veți obține un luciu mătăsos foarte plăcut iar finisajul va fi mai rezistent. Din când în când (la câteva luni) repetați operația. Veți feri astfel suprafața de zgârieturi fine sau semne de la lovituri.
Mobila vopsită
Dacă nu vreți ca fibra lemnului să fie vizibilă sau defectele sunt mult prea mari și vreți să le acoperiți (pete, colorații) puteți folosi vopsea. Fibra lemnului nu va mai fi vizibilă, dar nu veți pierde desenul natural pentru că el se va contura sub vopsea (se vor vedea porii, fladerele). Desenul va fi cu atât mai vizibil cu cât stratul de vopsea va fi mai subțire.
În acest caz nu veți mai aplica baiț ci numai 2 straturi de vopsea, cu șlefuire între ele. Nu aplicați mai mult decât dacă este neapărată nevoie (vopseaua nu a acoperit bine suprafața și defectele sunt încă vizibile). Un strat gros de vopsea va face să “pierdeți” lemnul, iar suprafața va începe să arate ca una de plastic.

În concluzie
Recondiționarea mobilei nu este simplă, dar nici imposibil de făcut pentru o persoană pasionată de bricolaj. Este bine de știut că acest proces se numește recondiționare și nu restaurare. Restaurarea înseamnă mult mai mult și de ea se ocupă specialiștii. Dacă aveți o piesă valoroasă nu vă apucați să reparați micile defecte pentru că valoarea ei va scădea. O piesă veche de mobilier cu o mică zgârietură este mai valoroasă decât aceeași piesă reparată stângaci cu un strat de lac lucios sau altă intervenție nepotrivită.
Celor care se încumetă la aventura de a-și recondiționa mobila le urez succes!


Buna ziua, va multumesc pt articolele minunate!
Ati mentionat in mai multe randuri ca re-vopsirea, re-lacuirea lemnului se va face cu produse de acelasi tip ca cel existent deja pe lemn, adica pe baza de apa sau de solvent.
Dar vroiam sa va intreb daca peste lacul existent (fie pe baza de apa, fie de solvent) pe piese de mobila se poate da cu ceara. Adera ceara oare? As vrea sa folosesc ceara cu pigment pentru a da un finish mai mat si uniform pe mobila cu mici decolorari.
Va multumesc!
Buna ziua!
Si noi va multumim pentru ca ne urmariti.
Da, puteti da cu ceara peste lacul existent, fie ca este pe baza de apa fie pe baza de solvent. Este bine sa curatati mobilierul inainte de impuritatile si murdaria acumulate in timp. Adica sa-l spalati cu o carpa uda si sa stergeti dupa aceea. Folositi apa calduta si detergent de vase, apoi apa curata pentru clatire. Carpa trebuie sa fie foarte bine stoarsa. Dupa spalare, stergeti bine si lasati sa se zvante. Aplicati apoi ceara cu o carpa curata de bumbac. Luciul cerii apare in urma lustruirii. Cu cat lustruiti mai putin cu atat va fi mai mata. Lustruirea se face cu o bucata de pasla.
Mai multe informatii despre ceruire aveti in link-ul de mai jos.
Toate cele bune!
https://revistadinlemn.ro/2019/02/21/finisarea-mobilei-cu-ceara/
Va sunt foarte recunoscatoare pentru raspunsul extraordinar de prompt si de detaliat, imi este de mare ajutor.
Multumesc inca o data!
Dana
Buna ziua,
Cu cat citesc mai mult articolele dvs imi dau seama ca nu stiu nimic 🙂
Sunt “tamplar incepator” si domeniul in care ma simt cel mai nesigur este finisarea.. Foarte multe produse si optiuni, multe decizii… Am facut pt inceput cateva obiecte de mobilier pentru mine din lemn masiv (am un atelier in care sa zicem ca nu imi lipseste vreun echipament in mod special, dar nivelul de echipare e cumva semiprofesional) si ca orice incepator imi spun ca imi place culoarea naturala a lemnului, desi in sinea mea uneori as vrea sa il baituiesc, sa ii dau alte accente, fara a-l vopsi. Si aici incep detaliile..
Vroiam doar sa va spun ca apreciez ceea ce faceti, e unul din site-urile pe care le urmaresc constant. Keep it up!
Buna seara!
Multumim pentru aprecieri!
Daca aveti intrebari legate de finisaje, materiale si tehnici, va raspund cu placere. Apreciez foarte mult ca vreti sa va documentati in acest domeniu. Putini dintre “tamplarii incepatori” o fac. Multi considera finisajul foarte putin important.
Toate cele bune!
Felicitări pentru articol!
M-ar interesa cum pot salva o rădăcină de stejar foarte frumoasă. Pot trimite foto dacă ajută. Momentan sunt la faza de săpături și tăiere ramificații)
Mulțumesc!
Buna seara!
Multumesc!
Imi puteti trimite fotografii pe mihaela.radu@cesbrands.ro.
Dupa ce scoateti radacina din pamant, trebuie spalata si curatata, dupa care acoperiti toate ramificatiile taiate cu parafina sau un grund diluat. Lasati radacina intr-o zona ventilata, ferita de soare (un sopron, o magazie). Daca urmeaza sa o folositi ca scanduri, feliati-o inainte sa o puneti la uscat (se reduc tensiunile si riscul de crapare).
Mai multe informatii despre uscare gasiti in link-urile de mai jos.
Toate cele bune!
https://revistadinlemn.ro/2016/09/02/am-taiat-nucul-cum-il-usuc-sa-nu-crape/
https://revistadinlemn.ro/2019/06/18/umflarea-si-contragerea-lemnului/
https://revistadinlemn.ro/2017/07/03/uscarea-lemnului/
Buna ziua d-na Radu,
As dori sa refac niste usi mici de la o biblioteca 40×50 cm din PAL ,la care in timp s-a exfoliat suprafata pe care a fost aplicata o folie subtire de…ceva similar cu folie de melaminat.Interiorul usii este intact,lacuit si f bine pastrat.Ce ar trebui sa aplic peste acea fata care este deja la baza putin scorojita si umflata de umezeala.Culoare bibliotecii este castanie.
As aprecia o solutie simpla si aplicabila in atelierul de acasa.
Va multumec.
Cu stima, Cristian
Bună ziua!
Mi-ar fi de folos niște fotografii. Le puteți trimite pe mihaela.radu@cesbrands.ro
Probabil s-a desprind hârtia melaminată cu care a fost cașerat PAL-ul. În acest caz ar trebui să curățați bine suprafața pentru a nu rămâne resturi de folie. Trebuie îndepărtate toate pentru ca suprafața să fie dreaptă, netedă. Apoi șlefuiți întreaga suprafață cu un burete abraziv fin. După desprăfuire puteți vopsi PAL-ul, este cea mai simplă metodă. Folosiți o vopsea pe bază de apă, dar verificați înainte să aibă aderență. Pe suprafața PAL-ului a rămas un film subțire de adeziv care este posibil să nu fie compatibil cu vopseaua.
Mai multe informații aș putea să vă dau după ce văd fotografiile.
Toate cele bune!