


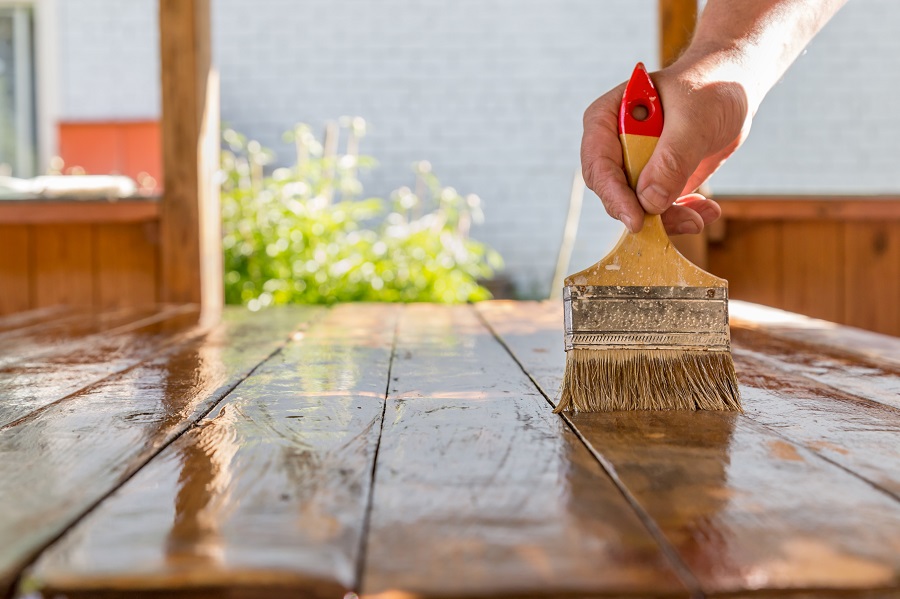
Nu de puține ori am întâlnit această idee că mobila va fi plăcută la atingere și va arăta bine doar aplicând straturi de lac succesive fără a face nimic altceva. Din păcate sunt și tâmplari foarte buni care tratează cu superficialitate finisajul pierzând din vedere că acesta, alături de design, este primul care se vede. Iar la finisaj se și simte, pentru că este suficient să atingi suprafața unui mobilier și el să te zgârie ca să renunți imediat la ideea de a o cumpăra. Acest lucru este valabil atât în cazul mobilei din lemn masiv sau panouri furniruite, cât și a celei din MDF. Pentru ca suprafața să fie fină și plăcută la atingere nu este suficientă șlefuirea lemnului ci trebuie făcută și șlefuirea straturilor intermediare aplicate. Cel care punea întrebarea de mai sus era începător și se temea că, dacă ar fi șlefuit, ar fi îndepărtat total stratul aplicat. Folosind materialele potrivite, nu doar că nu este îndepărtat total stratul de grund sau lac, ci el va fi plăcut și fin la atingere.
De ce apare suprafața neplăcută la atingere
Pentru a înțelege fenomenul trebuie să vedem ce se întâmplă înainte de aplicarea materialelor de finisare. Suprafețele sunt șlefuite pentru ca lemnul să arate bine și să fie plăcut la atingere, dar și pentru a deschide fibra astfel încât să poată fi absorbite materialele ce urmează a fi aplicate. De această absorbție depinde colorarea, aderarea (lipirea) straturilor de lac și protecția lemnului. Șlefuirea cu o anumită granulație a hârtiei de șlefuit ne permite să controlăm absorbția și astfel lemnul va fi colorat uniform, iar stratul de finisaj se va prinde de lemn și va rezista la agresiunile mecanice, continuând să-l protejeze.
Când absoarbe material fibra lemnului se ridică. Fenomenul este mai pronunțat dacă materialele sunt diluate cu apă (baițuri sau lacuri pe bază de apă). Apa face parte din ”ființa” lemnului și absorbția ei în profunzime este un lucru natural. Fibra ridicată se acoperă cu grund/lac/vopsea și devine rigidă după uscare. Pentru a redeveni fină suprafața se șlefuiește cu hârtie de șlefuit mai fină (vezi mai jos), potrivită pentru astfel de materiale. Nu se face șlefuirea după baiț decât dacă producătorul recomandă acest lucru. Baițurile simple sunt sensibile, iar șlefuirea poate îndepărta culoarea.
Un alt motiv pentru care se face șlefuirea este îndepărtarea prafului înglobat în peliculă sau a bulelor de aer formate. Și acestea se simt la fel de neplăcut când atingem suprafața. Praful este dușmanul declarat al finisajului. Produsele de finisare care fac peliculă – grunduri, lacuri, vopsele – nu se usucă instantaneu, iar în timpul în care rămân ude, particulele de praf se așază și sunt înglobate. Praful înglobat în ultimul strat de lac sau vopsea se îndepărtează prin polișare. Informații despre această procedură găsiți aici.
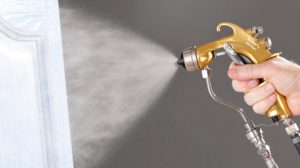
Bulele de aer din peliculă apar mai ales în cazul materialelor de finisare care se usucă repede și nu lasă timp aerului să iasă. Aerul apare în procesul de aplicare (aer de la pulverizare, cel dintre perii pensulei) sau din porii lemnului. Dacă porii lemnului sunt mari și lacul aplicat este viscos, fenomenul este foarte vizibil. În timpul procesului de uscare aerul tinde să iasă și avansează spre suprafață. Între timp lacul se usucă și se formează mici ridicături în peliculă, deranjante la atingere, dar care se îndepărtează prin șlefuire.
Șlefuirea între straturi se face și pentru a îndepărta efectul de coajă de portocală. Chiar dacă nu este sesizabil la atingere, suprafața lăcuită nu are un aspect plăcut, iar defectul este cu atât mai vizibil cu cât lacul este mai lucios. Prin șlefuire defectul se îndepărtează, suprafața devine plană și astfel luciul lacului se vede plăcut.
Cum trebuie făcută șlefuirea între straturi
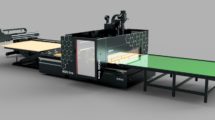
Șlefuirea între straturi se face cu hârtie abrazivă cu granulație de minimum 240. Pentru rezultate cât mai bune se recomandă hârtie de șlefuit cu granulația 280 sau 320, dacă lacul sau vopseaua finală sunt mate și peste 400, dacă sunt lucioase. Cele mai bune rezultate se obțin dacă este șlefuit fiecare strat intermediar. Finisajele profesionale se fac cu 1-3 straturi de grund înaintea stratului final de lac sau vopsea. Grundul se șlefuiește mult mai ușor comparativ cu lacul pentru că acesta din urmă este strat final și este făcut să nu se zgârie. De asemenea, un strat de grund are o grosime mai mare decât unul de lac permițând o șlefuire intensă și obținerea unor suprafețe cât mai plane și mai lipsite de defecte. Așa se obțin în fabricile de mobilă acele suprafețe perfecte, foarte plăcute la atingere.
Produsele din magazinele de bricolaj sunt făcute pentru a fi aplicate cât mai simplu considerându-se că vor fi folosite acasă, pentru proiecte personale. De aceea, de multe ori producătorii nu au sisteme cu grund și lac, ci un singur produs, lac sau vopsea, care se aplică în 2-3 straturi succesive. Asta nu înseamnă că straturile de lac intermediare nu trebuie șlefuite. Pentru a obține suprafețe cu tușeu plăcut șlefuirea între straturi este obligatorie. Tot pentru simplitate, în astfel de magazine se găsesc bureți abrazivi care nu au, ca hârtia abrazivă, un număr ci sunt grosieri sau fini. Pentru șlefuirea straturilor intermediare se folosesc bureți abrazivi fini.
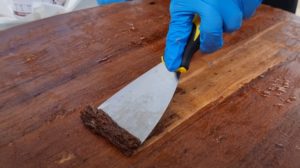
Șlefuirea suprafețelor intermediare se face intens și doar după ce uscarea este completă. În urma șlefuiri trebuie să rezulte un strat fin alb (colorat, în cazul grundurilor colorate sau al vopselelor) și hârtia nu trebuie să se încarce, să apară o substanță gumoasă care să se prindă de ea. În acest caz înseamnă că materialul nu a fost bine uscat. După șlefuire, praful rezultat se îndepărtează cu o cârpă uscată și moale.
Șlefuirea manuală poate fi făcută și cu mașini de șlefuit. Sunt mașini care fac șlefuirea prin mișcare de rotație sau au mișcarea paralelă cu latura mașinii. Din punctul meu de vedere, cele din urmă sunt mai potrivite, mai ales pentru un începător. La celelalte este posibil să rămână vizibile urmele de la șlefuire sub formă de cercuri. Se folosește hârtie de șlefuit cu aceeași granulație ca mai sus.
De modul cum este făcută șlefuirea, atât a lemnului cât și a straturilor intermediare, depinde calitatea finală a peliculei de lac sau vopsea. Ignorând aceste etape nu veți putea obține obiecte pe care să vă facă plăcere să le atingeți. Șlefuirea este un capitol foarte important al finisării lemnului și este bine ca înainte de începe treaba să vă informați asupra greșelilor care se fac la finisarea manuală și cum se aleg materialele abrazive pentru șlefuirea lemnului. Dacă aveți completări, întrebări sau neclarități lăsați-le mai jos, în spațiul dedicat. Vă voi răspunde cu siguranță.


Adaugă comentariul