


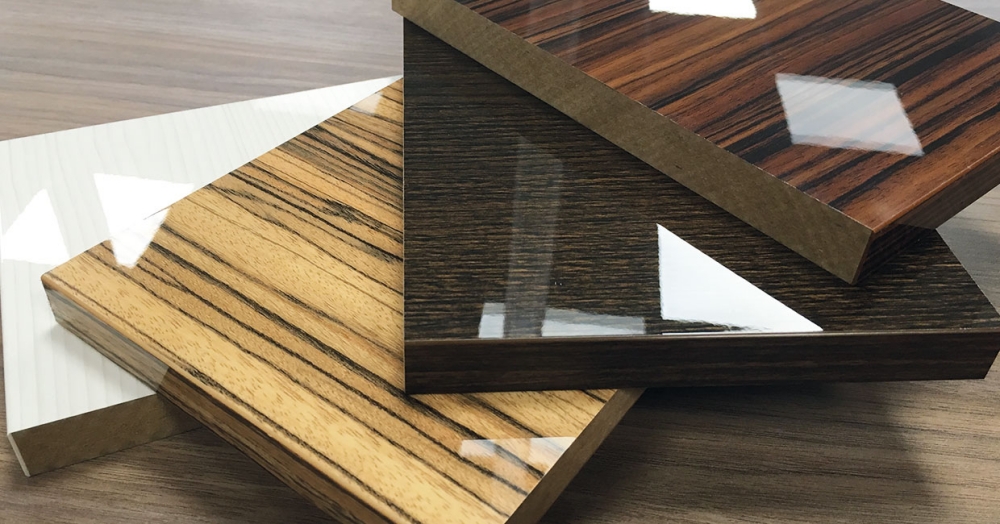
Să obții acel luciu perfect, în care imaginile din jur se reflectă ca într-o oglindă, este una dintre încercările finisajului suprafețelor din lemn sau MDF, chiar și în fabrici cu experiență. Luciul nu ține doar de calitatea lacului ci și de multe alte condiții care trebuie respectate. Fiecare condiție are ponderea ei în obținerea suprafeței lucioase perfecte și una fără cealaltă nu se iese ce trebuie. Nu sunt adepta luciului și atunci când mi se cere sfatul, nu de puține ori recomandarea mea este finisajul mat. Pentru că finisajul lucios este și foarte greu de întreținut nu doar de obținut. Dar trebuie să recunosc că au fost situații când luciul era atât de potrivit și perfect ales încât m-a cucerit. De aceea, cred că ar fi utilă o listă a condițiilor ce trebuie îndeplinite pentru a rezulta o suprafață cu un luciu perfect.
1. Locul unde se face finisarea trebuie să fie fără praf și cu o temperatură adecvată
Cel mai mare dușman al luciului este praful. Nu se poate obține un luciu oglindă și o suprafață plăcută la atingere dacă în spațiul unde se aplică lacul există mult praf sau se fac prelucrări mecanice ale suprafețelor din lemn. Particulele mici de praf prinse în peliculă se văd mult mai mari, ca niște mici cratere, pentru că sunt amplificate de lacul lucios.
Daca ai un atelier, găsește un spațiu separat în care să faci aplicarea lacului, diferit de cel în care se fac prelucrările mecanice. Dacă nu este posibil, aplică lacul într-o altă zi decât cea în care s-au făcut prelucrările și după ce ai curățat atelierul îndepărtând resturile de lemn. Udă cu apă pe jos pentru că apa atrage particulele de praf din atmosferă. Nu începe vopsirea imediat ce ai făcut curățenie. Lasă praful să se așeze peste noapte, iar dimineața udă din nou pe jos.
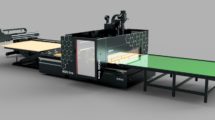
Celor din fabrici le recomand cabinele de pulverizare presurizate. Pulverizarea se face în spații închise în care există o presiune puțin mai mare decât cea exterioară. Astfel, particulele de praf din exterior nu sunt atrase în interior. Uscarea peliculei se face tot în aceste spații pentru că lacul este vulnerabil atât timp cât este ud. Cabinele pot fi cumpărate sau pot fi amenajate spații în care recircularea aerului să fie astfel calculată încât să existe tot timpul o mică suprapresiune în interior. Schimbarea volumului de aer din incintă nu trebuie să se facă rapid pentru că apar curenți care produc mici valuri în pelicula udă, valuri ce vor influența luciul final.
Și temperatura este importantă. Temperatura optimă de lucru este între 18 și 20°C. Nu va fi o tragedie dacă temperatura este puțin mai mare sau mai mică, dar dacă lacul este aplicat la 10 sau 35°C, nu veți reuși să obțineți suprafețe perfecte. Țineți cont și de faptul că această temperatură nu se referă doar la atelier ci și la lemn sau lac. Degeaba sunt 20°C în atelier dacă lemnul sau lacul este adus din depozitul neîncălzit chiar înainte de a începe aplicarea. Un lac sau o vopsea rece nu se vor întinde bine pe suprafața lemnului sau a plăcilor derivate din lemn și nu vei reuși să obții luciul dorit.
2. Suprafața pe care se aplică grundul și lacul/vopseaua trebuie să fie foarte bine pregătită
Înainte de a aplica finisajul pregatește foarte bine suprafața. Trebuie să fie foarte bine șlefuită, fără denivelări, găuri sau alte defecte. Nu uitați, luciul amplifică orice defect. Dacă aplicarea se face pe lemn masiv sau plăci furniruite, șlefuirea trebuie făcută la final cu hârtie abrazivă nu foarte grosieră pentru că rizurile rămase după șlefuire pot deveni vizibile cu un lac lucios deasupra. Puteți finaliza cu hărtie 180 sau 220, chiar 240. Șlefuirea mai fină poate duce la o scădere a aderenței grundului.
După șlefuire, se îndepărtează foarte bine praful rămas cu o cârpă. Dacă se folosește o suflantă, nu aplicați grundul în spațiul unde a fost suflat praful fin de lemn. Dacă folosiți cârpe ude, nu folosiți apă dacă veți aplica materiale pe bază de solvent ci solventul grundului.
Dacă urmează să aplicați finisajul pe panouri de MDF, asigurați-vă că aveți un panou de calitate, dens și fără mici orificii care elimină aer când grundul este absorbit. Acest aer rămâne prins în peliculă și formează mici găuri în peliculă, greu de îndepărtat la șlefuire. Folosiți izolator pentru zonele frezate – se va absorbi mai puțin grund și fibrele de lemn din panou se vor ridica mai puțin, făcând mai ușoară șlefuirea.
3. Stratul de grund nu trebuie să fie foarte subțire, iar șlefuirea trebuie să ducă la obținerea unei suprafețe foarte netede
Pentru a avea un luciu de oglindă, lacul trebuie să fie aplicat pe o suprafață foarte netedă. Pentru a obține o astfel de suprafață grundul trebuie să fie foarte bine șlefuit. O șlefuire bună se obține dacă se fac mai multe treceri cu hârtia de șlefuit pe suprafața grunduită. De aceea este nevoie de un strat dur și mai gros de grund. În general se aplică 2-3 straturi de grund de bună calitate. Sunt domenii (cum este cel al sicrielor, unde luciul este o cerință de bază) unde se aplică și 4 straturi de grund.
Cei care obțin suprafețe foarte lucioase folosesc grunduri poliuretanice sau chiar poliesterice pentru că sunt dure și au corp mare (substanța solidă care rămâne după evaporarea solventului). Nu se aplică un singur strat foarte gros ci mai multe subțiri. În straturile groase se acumulează tensiuni și există un risc mare ca ele să crape.
Șlefuirea se face cel puțin după primul strat de grund – pentru a îndepărta fibra ridicată – și înaintea aplicării lacului. Ideal ar fi să se șlefuiască după fiecare strat de grund. Prin șlefuire se îndepărtează imperfecțiunile peliculei (efectul de coajă de portocală), particulele de praf prinse la suprafață și micile cratere rămase din cauza aerului prins în interior. Nu se folosește hârtie abrazivă sub 400 pentru că micile zgârieturi care apar la șlefuire vor fi vizibile prin stratul de lac lucios.
4. Lacul ales trebuie să fie cu luciu înalt și de bună calitate
Lacurile de bună calitate nu se usucă repede și se întind foarte bine pe suprafața grunduită. Timpul de uscare este mai lung tocmai pentru a-i da timp lacului să se așeze pentru ca suprafața să fie perfect netedă și reflecția luminii totală. Nu forțați uscarea lacurilor lucioase, nu veți obține un produs de calitate.
Luciu înalt înseamnă un grad de luciu peste 90, chiar 95 gloss. Găsiți aici informații despre clasificarea lacurilor din punct de vedere al gradului de luciu. Lacurile lucioase de bună calitate au și o foarte bună transparență care accentuează acea senzație de luciu perfect.
5. Pentru un luciu profund stratul de lac trebuie să fie mai gros
În general, recomandarea la finisare este să se aplice mai multe straturi de grund și doar unul de lac. Lacul este cel care dă calitățile superficiale ale lacului – duritate, rezistența la zgâriere, la abraziune, la lichide calde sau reci, la pătări și un singur strat de lac este suficient pentru a da suprafeței aceste calități.
La finisajul lucios, însă, se recomandă aplicarea a 2 straturi de lac, la interval de 30-45 minute între ele, fără șlefuire. Se obține astfel un strat mai gros de lac care dă finisajului profunzime. Dacă lacul are și transparență foarte bună, efectul este de mare liniștită foarte limpede și foarte adână. Luciul și profunzimea va pune foarte bine în evidență desenul natural al lemnului.
În cazul MDF-ului vopsit, pentru a obține o astfel de profunzime, peste vopsea se aplică un strat de lac lucios transparent. Pe lângă acest efect, lacul asigură și o foarte bună protecție. În cazul unor zgârieturi fine va fi îndepărtat doar lacul nu și vopseaua, iar defectul va fi foarte puțin vizibil.
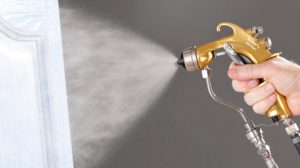
6. Utilajele folosite trebuie să aplice cantități uniforme și să înglobeze cât mai puțin aer în peliculă
Aplicarea materialelor de finisare se face de obicei cu pistoale de pulverizare. Prin această metodă se introduce aer în peliculă. Uneori acest aer nu are timp să iasă și rămâne prins în peliculă dând un aspect rugos și stricând luciul. Cu cât se folosesc sisteme de aplicare care înglobează cât mai puțin aer cu atât finisajul va arăta mai bine.
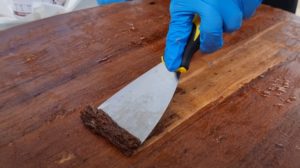
7. Uneori, chiar dacă se respectă toate regulile, tot este nevoie de polișare (lustruire)
Nu este ușor de îndeplinit toate condițiile de mai sus. De multe ori, în ciuda eforturilor depuse, imaginile nu sunt reflectate perfect de suprafețele obținute sau mai rămân mici particule prinse pe suprafață. Se poate încă ajunge la perfecțiune prin polișare, prin lustruirea suprafeței cu ajutorul unor paste abrazive foarte fine.
Despre modul cum se face polișarea găsiți detalii aici. Ceea ce vreau să subliniez este că vă trebuie ceva experiență pentru a obține suprafețe de foarte bună calitate. Nu este imposibil de făcut și nu vă trebuie cursuri speciale pentru a face așa ceva. Perfecționarea vine, însă, în timp, după ce ați făcut operațiunea de câteva ori și ați prins micile secrete.
Se pot spune multe despre finisarea lucioasă și riscul de a mă pierde în amănunte este mare. De aceea prefer să mă opresc aici. M-aș bucura dacă ați lăsa în spațiul dedicat toate întrebările la care nu ați găsit răspuns sau toate neclaritățile. Promit să răspund fiecăruia dintre voi.


Multumim pentru articolele detaliate si pline de indrumari!
Va multumesc si eu pentru ca ne urmariti!
Super articole, inclusiv acesta! Si o intrebare: pentru MDF, ce marca de vopsea si lac recomandati? Multumesc anticipat pentru raspuns
Buna seara!
Pentru a avea rezultate bune folositi produse profesionale. Adica grund si lac de la firme precum Sirca, Ica (Lomilux), Sayerlack (Golda), Milesi, Renner, Remmers, etc. Contactati distribitorii acestor produse si cereti indicatii de aplicare. Daca le respectati, rezultatele vor fi deosebite.
Succes!