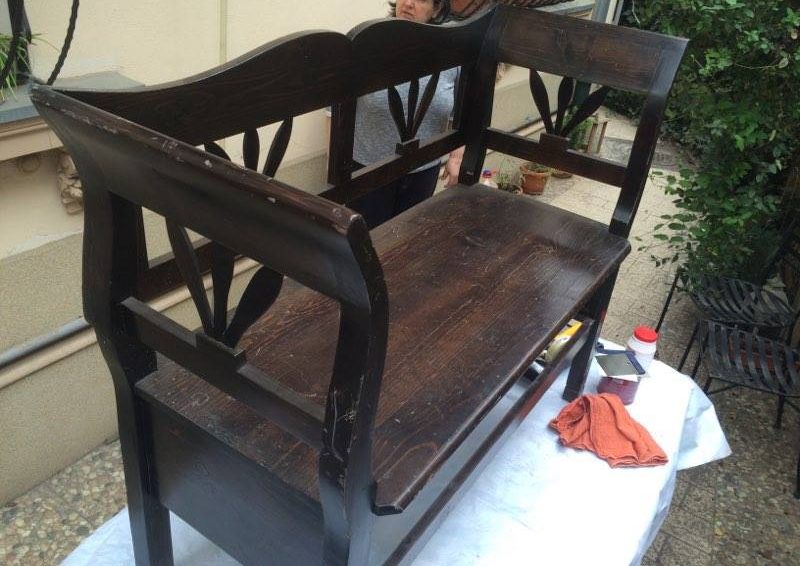
Years ago I bought a bench made of resinous with an antique walnut finish. Last year in the fall, we made changes in the house and decided the bench would be a much better fit outside, along with two stumps for side tables. The problem was that the indoor finish on the bench would not stand up to the conditions outside with rain, wind and sun. The wooden bench remained outside, covered with a tarpaulin, until last week. But for some time now, influenced by a postI thought it could do with a facelift as well as exterior protection.
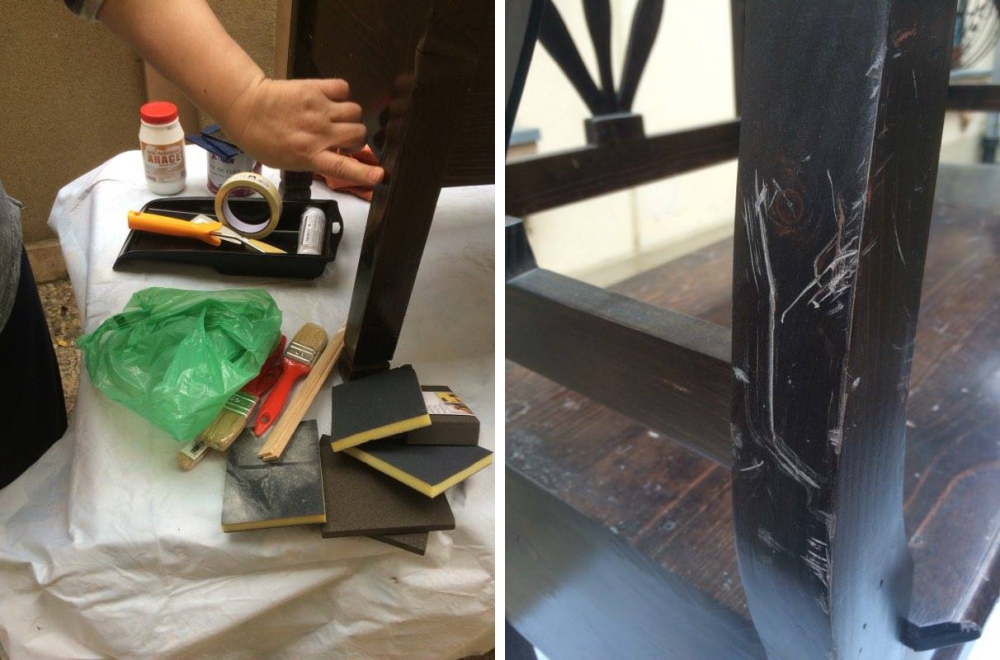
So I got to work. I prepared the necessary materials (abrasive sponges, cloths, brushes, varnish and white paste), called my colleagues (Florin - finishing specialist and Anamaria - photographer and operator) and we got to work.
I knew exactly what the bench was going to look like - a slightly creamy white, rustic chic. The full white lacquer coating came with two advantages. I could benefit from exterior protection without the need for complete stripping and I could use the original walnut color of the bench for the rustic chic effect.
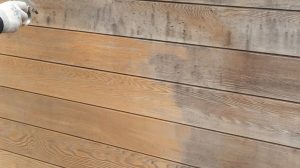
The exterior waterborne varnish is compatible with the nitro finish used in the past to finish the bench, but the bench had to be sanded and degreased very well to get adhesion. Over the years it has been cleaned with products such as Pronto and to avoid craters because of the wax in such products, it was sanded with medium-grit abrasive sponges and 240-grit sandpaper.
After sandingThe bench was stripped with clean cotton cloths.
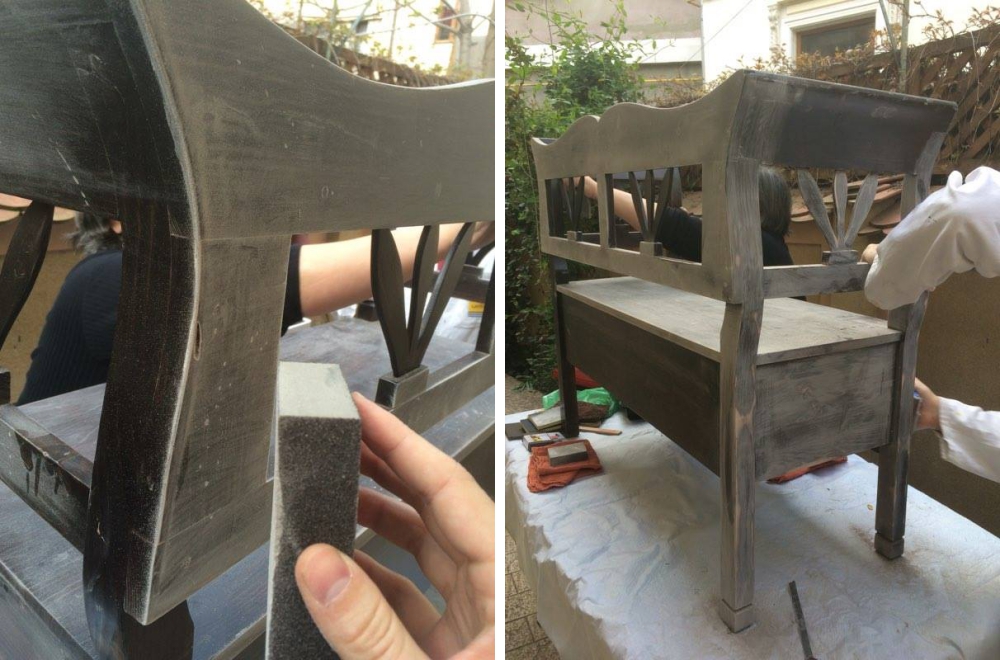
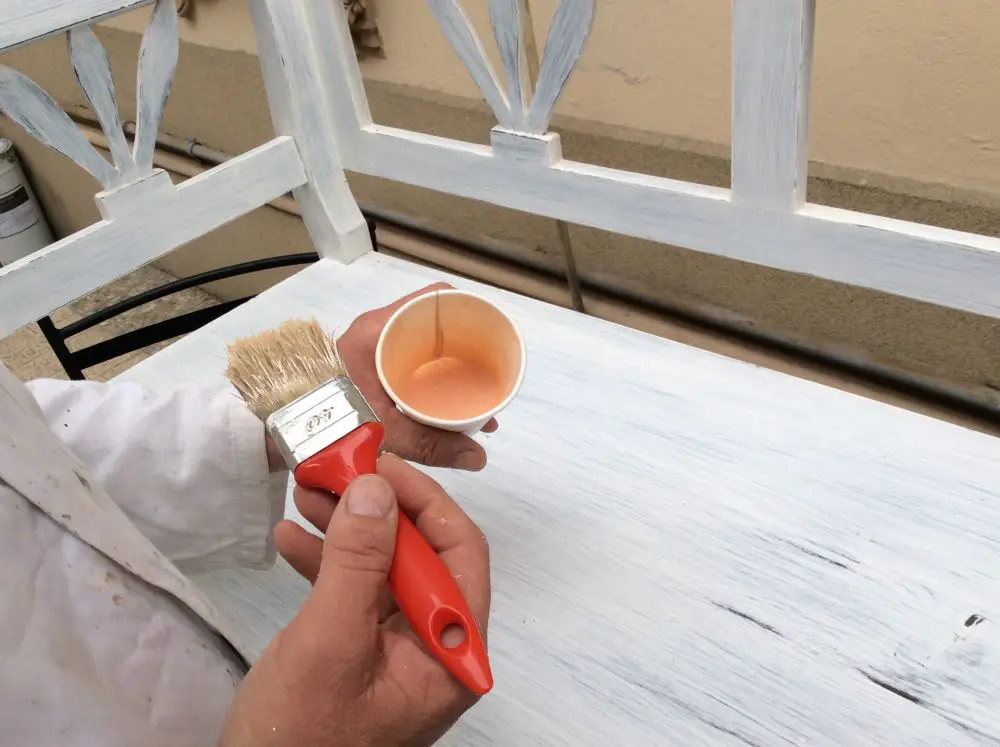
As I said, I wanted the bench to be cream and white without having a specific color in mind, like RAL or NCS. I got the color by putting white paste in the colorless varnish because the exterior varnish has a pinkish color due to UV absorptions and slightly changes the white of the paste. It is a very viscous varnish with very high thixotropy. It is formulated for vertical spray application and 10-15% dilution with water was required for brush application.
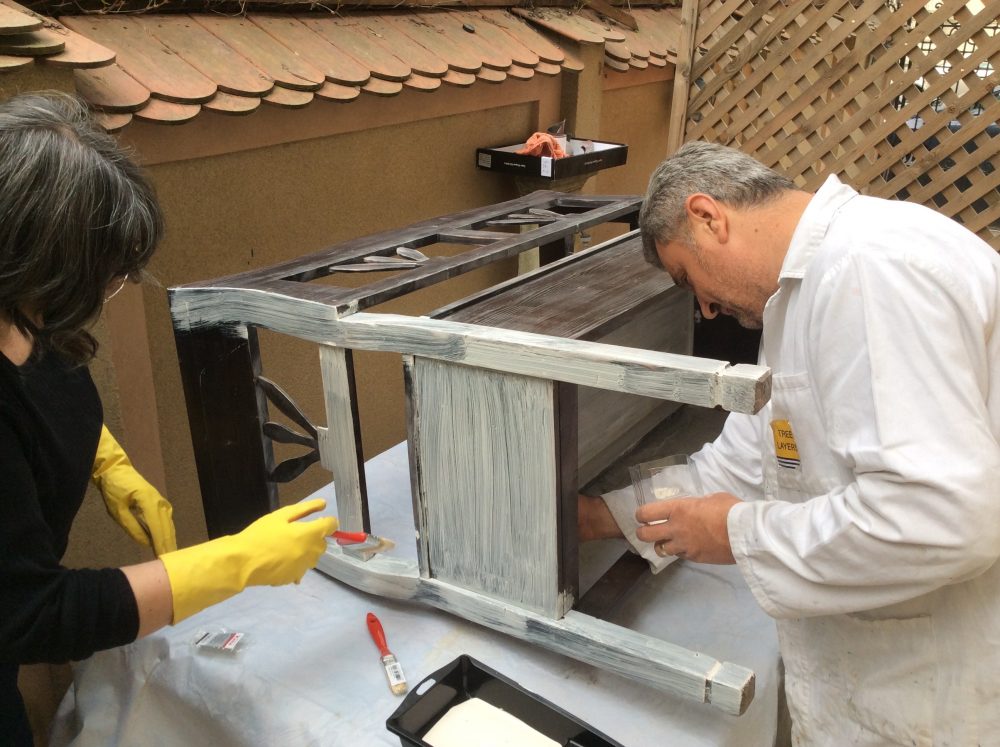

As the brush application of one coat was not enough to cover the walnut color of the bench, two coats were applied, without sanding between them and with a first coat of less than an hour, the light wind helping a lot. For drying the second coat I waited more than 2 hours. The next operation required drying in depth.
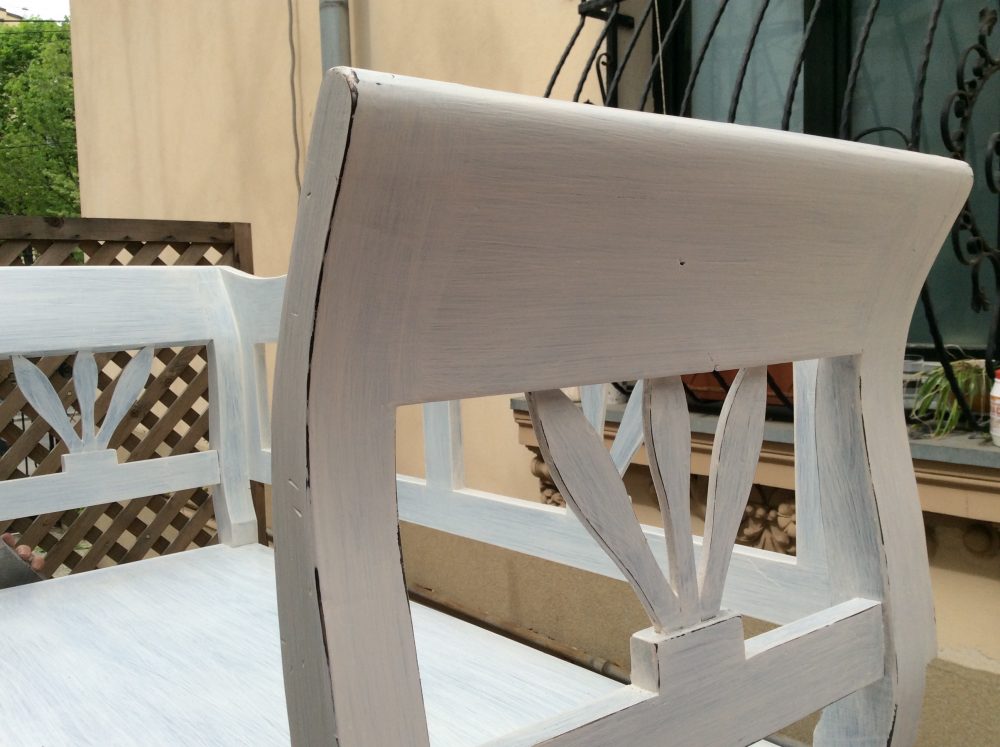
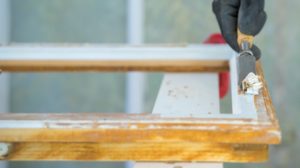
To get to rustic chic we antiqued The bench that is, I sanded it around the edges, through the places where it was supposedly used the most, until I got to the walnut colored layer. Used 120 grit abrasive sponges to more easily remove the colored layer.
Sanding should be done carefully and as naturally as possible. For example, for handles and other rounded areas where the hand is usually held, sanding should be done in circular motions, imitating natural movements, as in the video below.
The sitting areas (seats, backrests, edges) are supposed to be the first to lose their color, as they are intensively used. This is where sanding is done more intensively, taking continuous care to ensure a natural look.
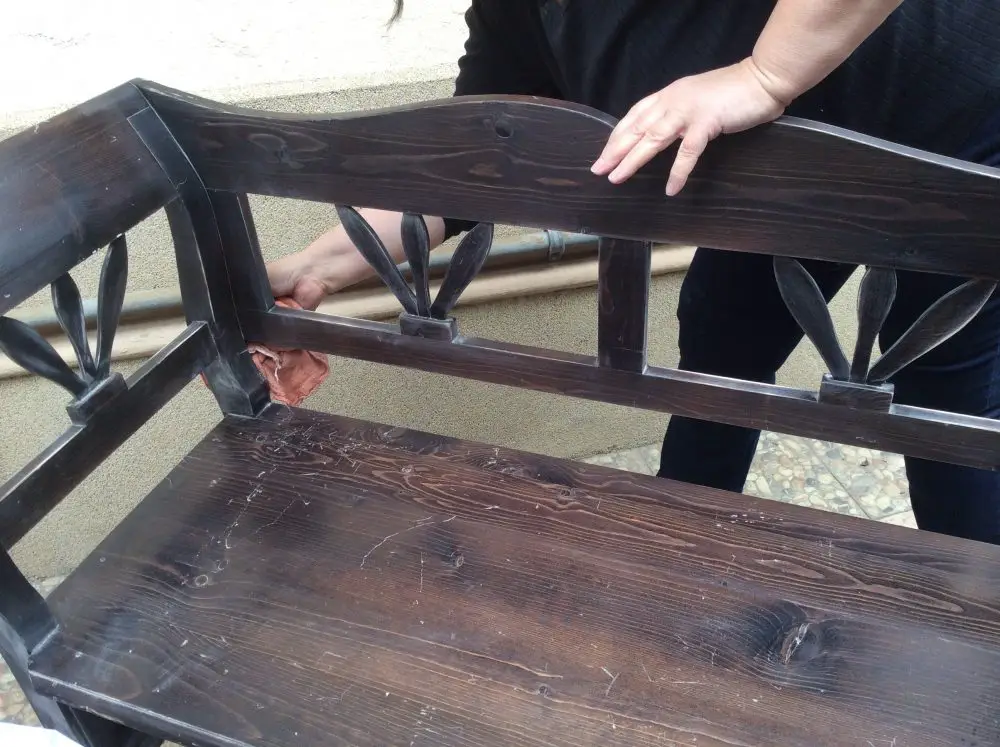
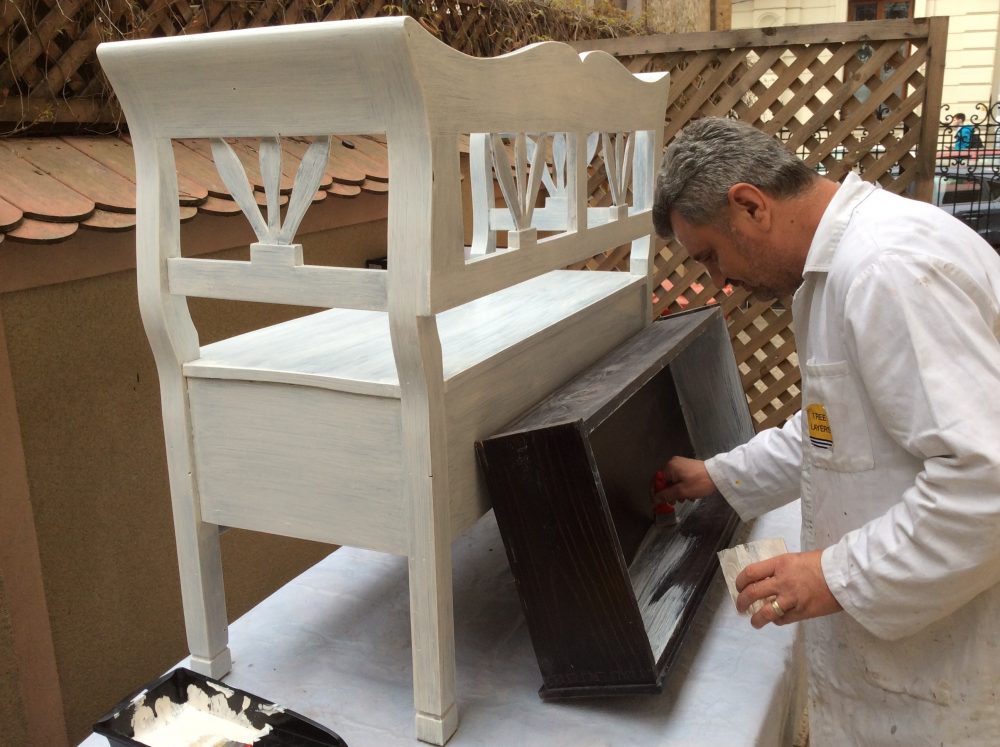
After antiquing, a light sanding with 320-grit sandpaper was used to remove any roughness and two coats of clear exterior varnish were applied with a brush.
The varnish is needed to protect the rustic effect and for exterior protection. The application was done in the same way as for white varnish, with a flash time between coats of 45-60 minutes.
After all these operations and a day's work, the bank looked like this.
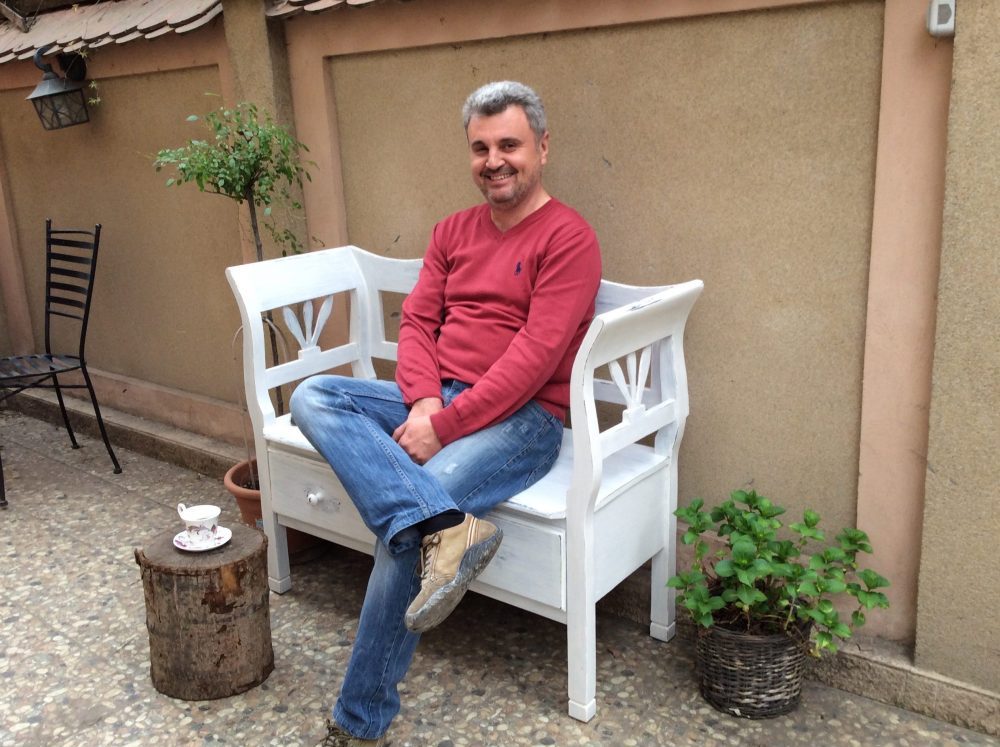
I was very happy with the result and as you can see, I'm already preparing my place for my morning coffee. What do you think, was it worth the effort?


Very nice result. The rustic chic or more appropriately shabby chic style is an ideal solution for redecorating old pieces of furniture, damaged on the surface. Depending on your preferences, you can continue the result with floral printed napkins, decoupage or painting the surface with the desired decorative motifs, flowers, landscapes.
[...] is greater the more obvious the effect. You can also find the technique to achieve the effect here. The method is used to make shabby chic objects [...]
Your bench looks great! But I have a technique problem, I can't apply the paint evenly without streaks. I have a good, soft brush, I spread the paint with the velvet brush for uniformity, all in the direction of the grain, maybe the paint is too thick, maybe I don't get enough paint on the brush... maybe after more practice I'll succeed... and I'll also try with clear primer before the paint
Try diluting the paint more. But some materials are made not to flow, they are thixotropic. This property has the advantage that you won't get any spills on the piece, but also the disadvantage that it doesn't spread very well. With a very smooth, straight surface trowel, you can eliminate brush marks.
And indeed, experience helps. 🙂
Good luck!
What white paste is it? I was thinking toothpaste but I'm sure that's not what it's about. Thanks
Do not recommend toothpaste. You might get something else entirely. 🙂
I'm referring to the coloured pastes used to make the paints. When paints are made (by hand or with mixer machines), they start from a base to which coloured pastes are added, according to the formula of each colour. These pastes are mixtures of pigments, mineral or organic, in different resins, depending on the nature of the paint. I am referring to such a white paste, which has titanium dioxide as its main pigment.
All the best!