


The operation of parquet floor scraping is quite complex and is best done by specialists or people who are not at their first project of this kind. It involves more knowledge about wood sanding massive, ways of repairing wood defects, but also of wood finishing (staining and varnishing). Machines are also used to achieve good results and you need to be able to operate them. The following tips are for those who have floors at home that can be scraped (wood parquet, laminate flooring, floorboards) and would venture to do this operation themselves.
What kind of flooring can be refinished
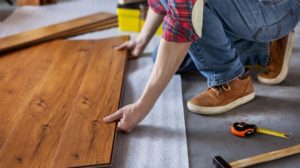
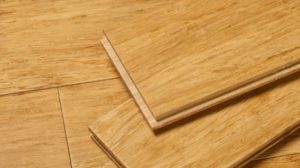
Roughening means removing the damaged layer of varnish applied to the floor, but also part of the wood flooring. Therefore, in order to be refinished, the parquet must be solid wood or laminate.
Solid wood flooring can undergo several refinishings over time without any problems. It will lose thickness with each operation, but not so much that it can no longer be used.
With laminate flooring things are a little different. The number of scratches it can withstand depends on the quality of the flooring. This type of flooring has a thick veneer (a blind) glued to plywood or mdf. The blind can be thicker or thinner. The thicker one will withstand 2-3 scratches while the thinner one will withstand one scratch at most. In the case of thin blinds, there is a risk that the scratch will reach the backing to which it is glued.
Tackling is a fairly radical operation and we need to know when it is necessary
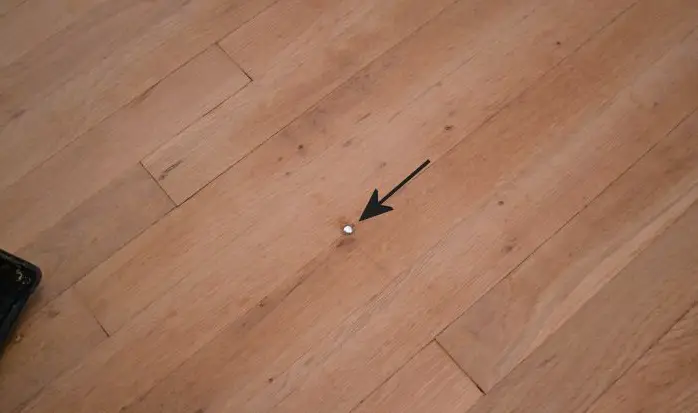
The parquet is subjected to all kinds of aggression on a daily basis, leaving behind signs. It can be scratched when pieces of furniture are moved or marks can remain after a heavy object is dropped. These are just two examples of problems that can occur. When scratches and dents are superficial, there is no need to repair them. It is sufficient to sand the varnish layer until the defect is removed. If the scratch is fine, there is no need to varnish the surface afterwards. It can only be waxed and possibly polished.
Attention, in that place the varnish layer thins and is no longer as resistant. Over time, bigger problems can occur here, which will eventually lead to the floor cracking.
There are situations where scratches or dents not only damage the varnish layer but also the wood. Or when deep scratches cause moisture to reach the wood and stain it. In these cases, it is necessary to patch the wood. Basically, in all cases where the wood has been damaged in one way or another, it needs to be stripped.
Stages of the scrapping process
The planing itself is the process of removing the lacquer and a thin layer of wood. The operation itself involves several stages, as the actual patching is always followed by repairing defects and refinishing the floor. No one just aims to get the wood floor clean without protecting it again. So refinishing has become synonymous with the whole process of removing varnish and top coat from the wood, grouting the defects and refinishing.
1. Checking and identifying defects
If the need for patching is not obvious (blackened floor, lack of varnish on large areas, large and visible cracks in the varnish film) a check of the entire surface is made to see if the scratches and dents are deep. If they are superficial, repairs are made. If they are not, the paint is repaired.
2. Patch the parquet
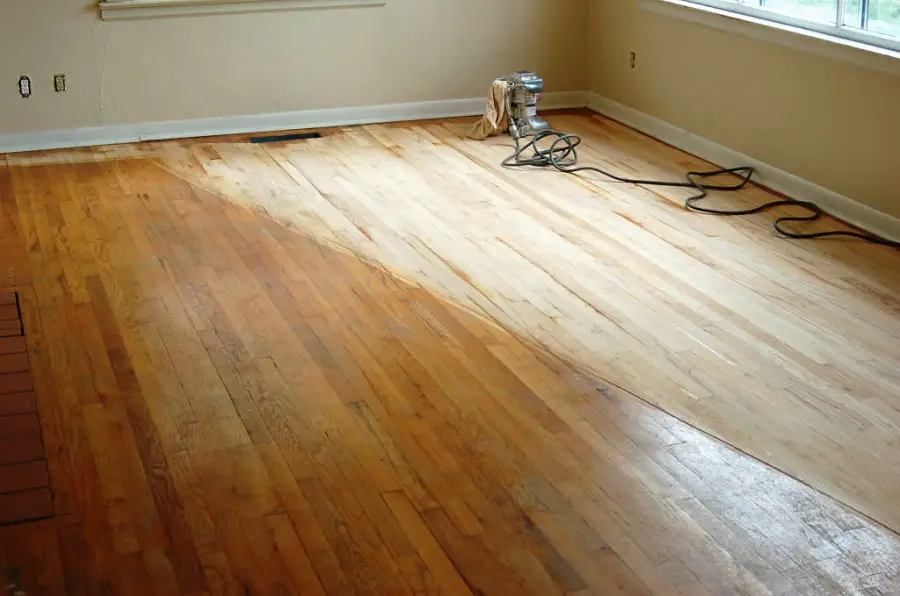
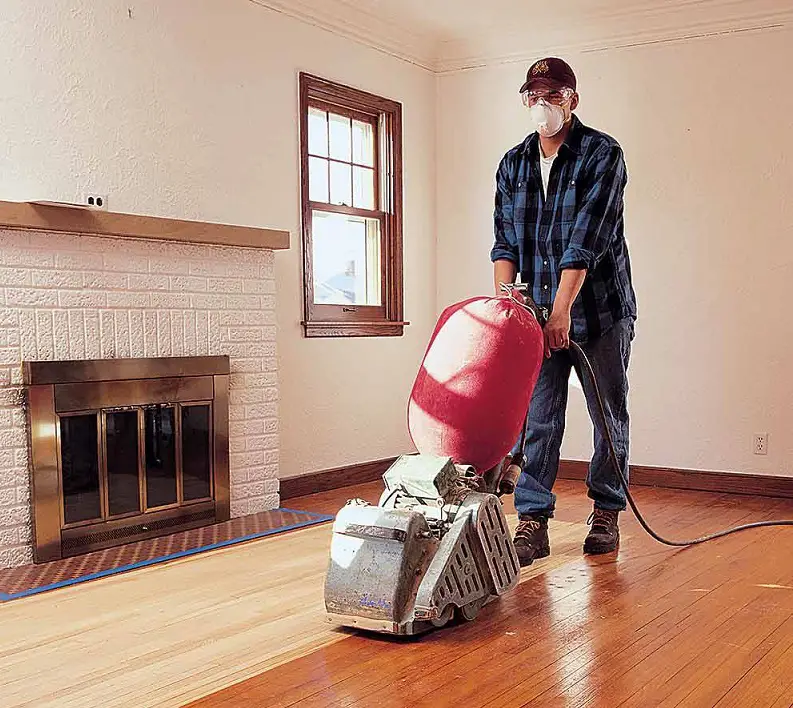
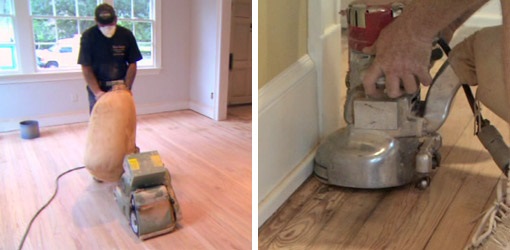
In the past, scraping was a problem and involved a lot of hassle and, above all, a lot of dust. It was often done by hand and this led to a lengthy process.
There are now bellows scrapers for dust collection so the operation is much easier to do. Especially as you don't need to buy one - there are companies that rent them.
The floor is evenly sanded over the entire surface of the floor until the surface stains and scratches are removed. Do not attempt to remove small, deep holes because you are removing a lot of unnecessary wood. These can be repaired. Don't push too hard in one place because a dent will form. Try to remove the layer of wood as evenly as possible.
Before you start raking remove the skirting boards so you can get underneath them. With an ordinary machine you will not be able to rake the edges (around the wall). But there are special machines for this, even for very hard-to-reach places.
The general recommendation is that the machine sandpaper should be 80 grit. However, I have found sources that recommend 36 and even 20 when it comes to an old, badly damaged floor. If such coarse grits are used, it is best to make a final pass using a finer sandpaper.
3. Repairing defects
When the wood is clean and free of major defects a check of the entire surface is done (major defects mean rotten, decayed or moving parquet for which I advise you to call a specialist). If there are holes, they are repaired with wood putty. When repairing, put a larger quantity of putty on because the putty will dry out.
If you want to coloured (sticky) Check the flooring to see if you have a putty that stains. If not, stain the wood first, then repair the defects with colored putty.
After the grout has dried, sand it until all the excess is removed and you are level with the rest of the floor.
4. Surface preparation for priming and varnishing
After all defects have been repaired, the entire surface is sanded with 150 or 180 grit sandpaper. The operation is done in the same way as blank preparation of furniture. Rotary sanders can be used for sanding. This sanding is needed to remove the high wood grain that occurs after using coarse grain. Otherwise, the raised grain becomes filled with filler and when it dries it becomes hard and difficult to remove. The end result will be a floor that scratches, snags and tears the floor.
5. Vacuuming and dust removal
This is a very important step because otherwise the lake will have no grip or will look ugly. The sanding of the putty and the preparation in white results in a lot of fine dust that "hides" especially in the corners. It must be vacuumed out very thoroughly. After vacuuming, wipe the entire surface thoroughly with a cloth. If you use a damp (not wet) cloth, do not apply varnish immediately. Allow to dry. Do not start finishing until you are satisfied that you have removed all the dust and the wood is not wet.
6. Grinding
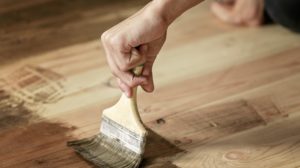
For good adhesion to the substrate and easy sanding between coats, apply primer first and then lacquer. There are also lacquers that can be used as primer, but they sand much harder.
Apply the primer with a trowel, brush or squeegee, whichever is easiest for you. If using solvent-based varnish, check that the trowel sponge is solvent-resistant. However, I recommend using water-based products. They're more expensive, but you get rid of the smell problem in the house. And you won't have problems over time because water-based floor varnishes are very durable.
After application allow to dry and then sand the entire surface with 280 or 320 grit sandpaper. If you want a glossy floor, sand between coats with at least 400 grit. Otherwise the fine scratches from sanding will show through because the gloss lacquer brings out all the flaws. It is also quite hard to maintain so I recommend a semi-gloss varnish.
Wipe off the resulting dust thoroughly with a cloth before applying the next coat.
If you wish, you can apply a second coat of primer following the same steps as for the first.
7. Varnishing/waxing/oiling
The application of varnish is the same as for primer. There are specialists who recommend applying one coat of primer and 2-3 coats of varnish. I am of the opinion that it is better to applied 1-3 coats of primer (with or without sanding in between, but mandatory sanding before varnish) and a single coat of varnish.
Instead of varnish, a layer of wax. However, you should be aware that parquet is more difficult to maintain this way and should be re-treated at least once a year.
Instead of primer and varnish can be used oil for floors. If the flooring is hardwood with a beautiful design, oil will highlight it and look great. Special oils protect well, but the floor will need refinishing more often than a lacquered one.

Carpet maintenance. How to prolong its life
As you have seen, parquet patching is not easy and involves some discomfort. That's why it's best to postpone it as long as possible. In order to achieve this and still have a beautiful floor, it is best to follow a few rules:
- Do not walk on the floor with shoes that could scratch the floor (spikes, spikes, very sharp heels)
- Don't let water splash on it. If for some reason it gets on it wipe it off immediately.
- If you discover a scratch, try to repair it locally as soon as possible.
- Ask for it at least once a year.
- If fine beads, gritty material or other such materials have fallen on the floor, do not step on them. They will imprint themselves into the flooring and that will become a vulnerable spot.
- Do a sanding and resurfacing once every 10 years, even if it seems like it wouldn't be in dire need.
- Try to look at the floor as furniture. It needs much the same treatment.
I repeat what I said at the beginning. Repainting is complicated and it is best done by specialists. If you are, however, one of the very skilled and skilled and you are undertaking such work I hope the advice will be of help. Good luck!


On the wood shower, does the same technique apply?
Yes, use the same steps. But beware of gaps that may appear between elements. The elements are bigger in the case of the shower and the variation in time can be quite large. I put in my attic shower going by the hand of the person who sold me the wood, without checking the moisture. Within a year it dropped so much you could stick your hand between the elements.
After cleaning the lake and the blackened wood, tap the shower again or, if it is glued, fill the gaps with wood. Bring the added wood to the same level as the rind. After the same sand the entire surface and finish.
Good luck!
Thank you for your answer!
how much material goes into these procedures? I'm trying to make an estimate of materials needed for a 70 sq.m. area of flooring. Thank you.
Hello.
The consumption of primer or varnish, when applied with a trowel, is 100-120 g/sqm/coat. Add 10-20% losses. Wax can be applied at 70-80 g/sqm.
All the best!
Good evening! I read with pleasure your articles. Regarding primer and varnish for parquet, could you recommend me products that do not smell? I understand from the article that they are water-based, but which ones? Thank you for your answer.
Hello.
Yes, it is water-based products. Such a water-based floor varnish, from ICA (Italian brand of finishing products) can be found in the Clever.
Product information here
All the best!
Hello, I read with great interest your article which I found very useful. I want to refurbish my bedroom floor, which was laid (new) in 1975, then just refinished a couple of times [once in about the late 80s (possibly with patching), and then again for sure in 2008 (just 2-layer paluxing with the cheapest classic palux)]. Now it's kind of peeled off the palux in places, scratched and looks very ugly, so it needs patching. I intend to scrape it with first 80, then 120 abrasive discs attached to the grinder and then palux it. I would like to ask you if in this case, before applying the waxed floor varnish (from Kober company) it is absolutely mandatory to roughen the floor, or this is an optional additional operation that is only aesthetic? And then, you say that it would be good (as a maintenance measure for the floor) to wax it at least once a year. Will that be done on my floor after refinishing (i.e. patching + paluxing), or is that waxing only good to do on older floors if you don't want to patch them yet? Thank you respectfully. Mirela from Timișoara.
Good morning!
After the scratch coat you must apply at least 2 coats of protection (varnish or primer and varnish). The varnish being waxed, you should not be able to apply 2 successive coats (unless the manufacturer says otherwise). If this is the case you should apply a coat of primer and after drying, you will have to sand the entire surface with an abrasive disc of min 240. If the lacquer is glossy the sanding should be done with a sanding disc of min.400. The primer must be the one recommended by the manufacturer to be compatible with the varnish (usually written on the label of the varnish box) or a polyurethane primer.
If the manufacturer says that successive coats of the same varnish can be applied, then there is no need for primer, but sanding between coats is necessary to have a smooth, fine surface and for adhesion between coats.
Wax is applied to protect the lake. It is not compulsory to apply it, but it will keep the surface of the lake scratch-free for a much longer time. Wax should be applied at least once a year, with a rag, on the whole surface. It is good to do it at a general cleaning, after the floor is washed and wiped (it must be well wiped).
Good luck!
Thank you very much for your answer. May the Good Lord reward your kindness and good sense! It may be routine information for you, but for us it is worth a lot. With kind regards for your help, Mirela ACHIM.
Good morning,
I'm Mirela ACHIM from Timișoara and only on Sunday, April 28th, at 4:30 pm, I finished the whole floor in its last layer of palux [it took me 3 hours to finish the 455 planks, i.e. 13 rows x 35 planks/row (approx. 15m2), to brush them manually with palux]. The floor is made of solid oak wood, stained in brown shades of classic parquet. (My mother said we had it laid by Germans, back in the '75s, since our tower block).
Although initially sanded by hand with a polisher (with all the resulting dust, more like the atomic winter look of Chernobyl :-D), the floor came out very nice (sure, when it reflects strong sunlight, on some of the blades you can see a bit of the striations left by the polishing disc, but that's it, the operation was done for free by me, with some operating mistakes ). I would never do anything like this again, or even with a grinder, but I wanted to get out as cheaply as possible, although I didn't get out any cheaper than if I had paid a qualified operator!
I've described below, roughly, the steps I went through (following some of the application instructions specified by the manufacturer, as well as the advice of a "multi-skilled" neighbour-mason - i.e. he's a bit of a jack-of-all-trades, not a professional parker, but still very experienced in the field - he was out of town for a month, just when I wanted him to help me). I also gave you the exact manufacturer's specs on the product box (you're a chemical engineer, and I thought that might help you with some conclusions).
And this is because I have 2 questions for you:
1) Despite multiple sandings with increasingly fine sanding discs and abrasive papers, however, even after the fourth layer of palux, when touching some of the blades with the hand, some fine grains can still be felt, the craftsman claiming that these are most likely due to the response of the wood fibre to the composition of the palux, as some air bubbles were probably created when applying the palux by brushing, which is true, because this is what happened. I would like to ask you if or how we could have prevented the formation of those grains or if something can be done to remove them? Have I made a mistake in any of the steps I have outlined below? I was thinking that after the 80/40 grit discs I did not go with 120 grit over before the first coat of palux, but between coats I still went with 120. Or maybe I shouldn't have used the roller at all, (since even though it was velour, typical for palux, the manufacturer still only specified brushing or spraying palux, not roller application). Otherwise I don't understand exactly why those air bubbles still formed after three coats of palux already applied! The craftsman said that there can be no more lifting of the wood fibre after applying so many coats of palux and that I can't expect even the final coat of palux to come out smooth-perfect like furniture, as furniture can be sanded and varnished with up to 9 coats, which I couldn't be bothered to do for parquet!!! Other explanations he didn't have either. He said this often happens to him too. What do you think?
2). I bought my carpet yesterday from the link below:
https://diego-romania.ro/covor/covoare-moderne/moderno-mix-covor-665940-green-665940-green/?ean=5996285154345
The craftsman said that the carpet is ok as long as it's not rubberized on the back, as it is entirely woven, even on the back (like the classic one). Ok, I understand there's no rubber allowed. But the shop operator asked me if I wanted silicone anti-slip mesh, (you can see it in the bottom left picture, in the carpet link) to keep the carpet from sliding on the floor and probably protect the floor, maybe letting it breathe better, in case the floor "feels suffocated" by the carpet texture. The craftsman didn't know what to tell me about silicone. What do you think? If it's not allowed to be rubber on the floor, silicone is allowed, because to me, silicone still feels like a softer kind of rubber, doesn't it? So, I haven't bought the net yet, until I hear from you. The netting is not absolutely essential for me, unless I find that the carpet does not stay in place at all, but slides annoyingly. It was only today, 10 days after the last coat of palux, that I set out to start refurbishing the room and laying the carpet.
DESCRIPTION OF THE STEPS WE HAVE TAKEN:
1) Manual grinding with a 115 cm diameter grinder, with abrasive discs attached to the backing, most of them with grit No 80, and No 40 only on the last two rows of blades; wiping with a dry cloth; vacuuming;
2). Roll sanding of layer 1; hand sanding (without polisher) with 120 disc, straight along the length of the blade; wiping with dry cloth; vacuuming; wiping with wet cloth; drying min. 1h;
3). Roll layer 2; hand sanding (without grinder) with 120 circular disc (imitating grinder) along the length of the blade; wipe with dry cloth; vacuum; wipe with wet cloth; dry min. 1h;
4). I sanded layer 3 with the roller; it came out awful! incomparably rougher than layer 2! and some parts where I accidentally pressed a bit harder with the grinder when sanding, looked a bit blurred as if the roller hadn't gone over them!; so I did: hand sanding with sandpaper (not grinder disc!) grit 240/280, then 320 and then 400, straight along the length of the blade (took me 9h!); wiping with wet cloth; vacuuming; re-wiping with wet cloth; drying min. 1h;
5). Final layer 4 sanding by brushing lamella by lamella, by hand, exclusively along the length of the wood grain on the lamella; came out near perfection [however, on some lamellas, with those fine little grits, former air pockets when brushing (on the roll, incomparably more were made, as far as I noticed on the initial layers!)].
MANUFACTURER'S SPECIFICATIONS:
LAC CERAT KOBER PARCHET MONOCOMPONENT INCOLOR SUPERLUMINATED, DURABLE (4L pt. 56 m2)
DESCRIPTION: The product is a one-component alkyd-urethane resin-based varnish for the protection and decoration of wood floors and floors of various wood species, as well as furniture and wooden parts. The opalescent appearance of the liquid product is due to the wax contained in the product.
Advantages offered: scratch, water and impact resistance (shoe heels) due to wax content. Lead-free. High gloss. Good adhesion to substrate.
APPLICATION CONDITIONS: The product should be conditioned at 15-30°C and homogenised in the original packaging. Ambient temperature: 15-30°C. Relative humidity: max. 70%. Do not apply to untreated wood. Do not work at temperatures below 5°C.
APPLICATION INSTRUCTIONS: Sand the surface with sandpaper (120 grit) along the wood grain, ensuring that the surface is dry and wax-free. Remove dust by wiping with damp cotton cloth. Application is by brushing or spraying in 2 coats. After 12-16 hours after the first coat, sand and apply the second coat. If wood protection against fungi is desired, it is recommended to apply IG 5200 series extra protective varnish (colourless or coloured - when staining of the substrate is desired) as the first coat. After 6 hours apply the first coat of varnish L5310. It is recommended to apply in thin coats at the maximum consumption indicated on the packaging. The varnish can be applied as such or diluted to a maximum of 4% with thinner D551. The surface can be worn down 3 days after the last coat has been applied.
SPECIFIC CONSUMPTION: up to 14m2/litre/coat.
CONTENTS: 2-Butanone oxime (CAS-96-29-7); Cobalt bis(2-ethylhexanoate (CAS-136-52-7)); Naphtha (petroleum), hydrotreated heavy naphtha / Naphtha (petroleum), hydrodesulfurised / Naphtha solvent, medium aliphatic (petroleum) (CAS-64742-88-7), hydrocarbons, C9-C12, n-alkanes, isoalkanes, cyclic, aromatic (2-25%).
EU VOC limit g/l: cat.A/i 500 (2010). VOC Product, max. g/l: 500.
The manufacturer has certified Quality and Environmental Management Systems.
DETAILS on http://www.kober.ro
Sorry, I had forgotten a third question: whether I am allowed to use the classic furniture spray for weekly stripping of the floor, as I understand that mopping is not recommended. Thank you very much.
Hello!
You have put some effort, both in the reworking of the parchment and in the presentation of the whole process. 🙂
Let's take them one by one:
1. The basalts arise from the air caiza embedded in the film. In the first row, the air comes out of the wood brushes. The varnish dries too quickly and doesn't have time to come out of the film. You should dilute the varnish with a slower thinner (retarder, as it is called). The film will dry a little slower, but it gives the air time to come out. For subsequent coats the air comes out of the application process. In factories it is frequently encountered when spraying. In your case it is because of the trafalet. You would have needed one with a very smooth and hard surface (the hardness would not release air by pressing). With the brush it came out better because you brushed carefully. Problems occur with such applications.
You have used very coarse grit in the sanding, bonding of the vermilion and varnish. Only the one used at the end was the correct one. You should have sanded the wood with 120/150 at the end and used 280/320 grit paper between the coats of varnish. The last coat of varnish should be sanded with 400 grit paper so that the fine sanding lines are visible in the case of a glossy varnish which accentuates the defects.
2. You can use silicone mesh to avoid problems. Nothing will happen. Silicone is a "friendly" material in this case.
3. I don't agree that you can't use water to wash the floors. You still have to make sure that the water is not in excess and that it is very well dried. It is the best way to clean surfaces, including lacquered furniture. When washing the floor the mop must be wrung out very well, so that it remains only damp. Wipe the whole surface with it, without fear. Then use a dry mop, or a dry cloth, to wipe it clean. The floor will be clean and will not be damaged. Do not use aggressive cleaning agents. Dishwashing detergent is very good, it is "softer". In the water with which you clean the floor, put a product for the maintenance of the floor (there are common products for wood maintenance). It contains synthetic wax and protects the floor well. For maintenance you can wax the whole surface once every 1-2 years. Apply wood wax with a soft cotton cloth and then polish with a clean cotton cloth.
I hope this has been helpful.
All the best!
Hello,
Thank you again respectfully for your very helpful comments which you have given me with much patience and dedication. I somewhat suspected that they would also rightly refer to errors in polishing.
Giving my film back, I also became a little more aware that I had rushed into the renovation, the parquet refurbishment being only a major stage in the complete renovation of the room: floor, walls, door, windows, furniture.
I also remember that on one of the sanded (interpalux) layers I left the sanding for the next day, which I only read about today in your article of 16 Jan. 2017 about sanding between coats, that it is not at all advisable, quote: "It is not good to leave a long time between sanding and application (e.g. from one day to the next) because during this time the "uncovered" layer comes into contact with the air, hardens completely and we end up exactly where we started".
I was not familiar with this magazine, but googled the topic "about parquet patching" and your article came up as the first search result. I didn't then have enough time to browse virtually other similar articles.
But I am very glad to benefit from the information you publish in this magazine, as an experienced professional expert, whose advice, tailored to each case presented, I have seen that they give concrete results in practice, not only in the theoretical-didactic sphere.
With special gratitude for your help,
Mirela ACHIM
(it's just a pure coincidence of surname and name with the respectable Mrs. Professor at the Faculty of Construction/UPT)
sport to work to scratch it with the flexul....in the end you will have only scratches and bumps!!! stop trying to do everything yourself. call someone with professional machines for scraping!