


Transforming old furniture with Annie Sloan Chalk Paint is no longer news to many of us. We've seen how a simple piece of furniture, or on the contrary, a complicated and heavy one, can be transformed into pieces of furniture that fit in perfectly with your new home decor. The final act of the transformation is waxing. Annie Sloan Wax is more than just a wood wax. It can be applied to any surface protected with chalky paints. There are also coloured waxes with which you can achieve interesting effects on furniture, but also directly on wood. Let's take a look at each of them, their role, application techniques and what interesting effects can be achieved using them.
Transparent wax for protection
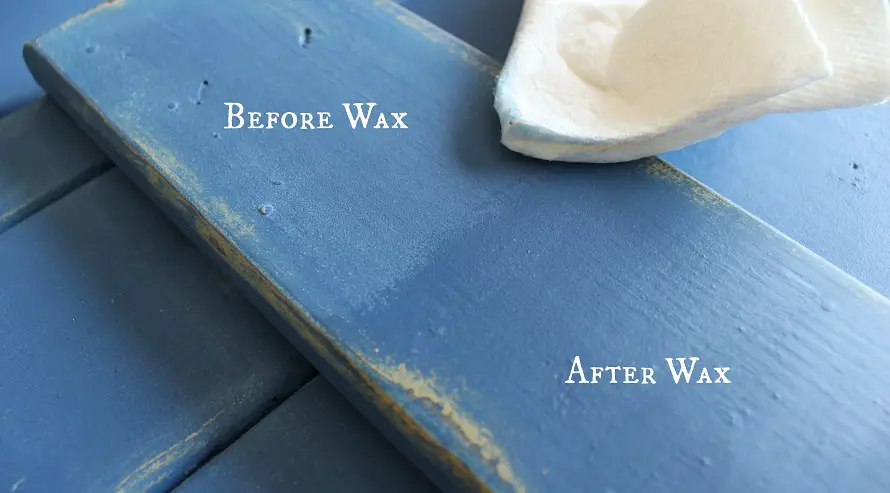
After using Annie Sloan paints for a transformation it is mandatory that the surface is sealed with transparent wax. Chalky paints cannot remain uncovered because they tend to absorb water and are not very resistant to damage. Wax protects the surface and makes it resistant to the daily use to which a piece of furniture is subjected. In addition, it 'brightens' the colours.
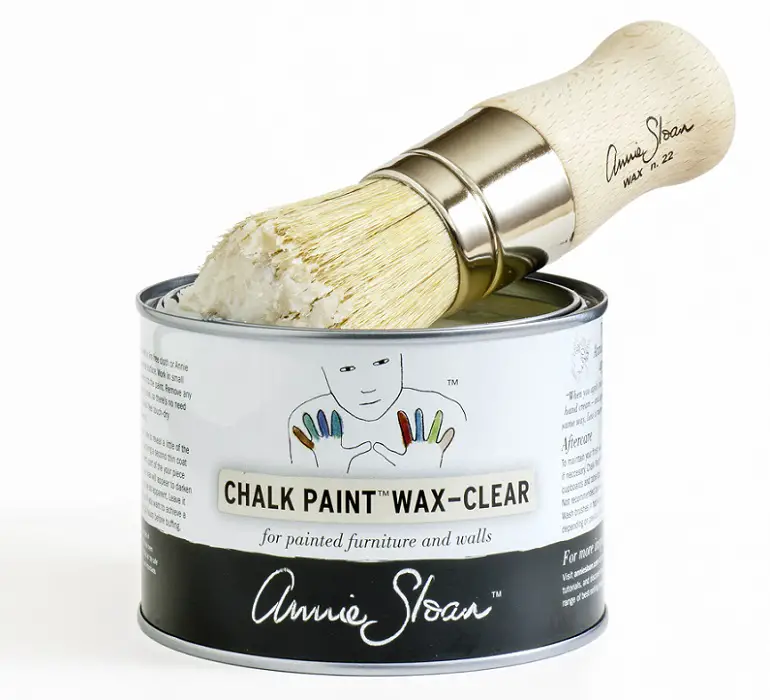
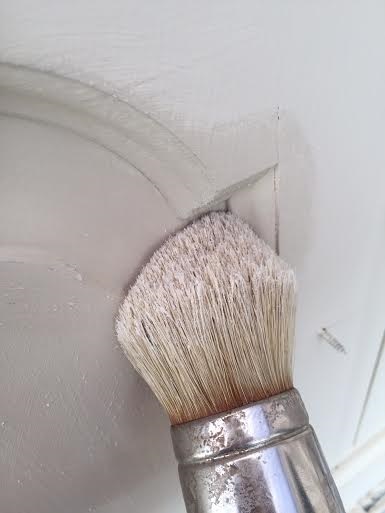
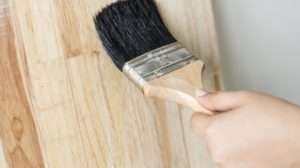
Wax to be applied after the paint has dried and the necessary sanding of certain effects has been done (distressedApplication can be done with a soft cotton cloth or brush. Annie, after many years of practice, has invented a very effective brush for applying waxes. In fact the Annie Sloan system, so effective and simple to use, is the result of direct practice.
Annie Sloan is not a manufacturer inventing paints in a laboratory but an artist, a designer, who has developed products specifically to solve problems encountered in practice. This is how wax brush. It can be used to apply wax to any corner and the quantity can be dosed. It is a very good investment for the final quality of the furniture, especially as it is also very durable.
Wax is applied in a thin layer, the excess is removed by wiping with a cloth and then polished. You don't have to insist because you don't need a shiny spackle. What you want is a silky sheen that is pleasant to the touch.
It is good to apply 2-3 coats of wax, especially on surfaces such as table tops. The protection will be much more effective. Apply the next coat after the first one has dried, i.e. after min.24 hours, and the technique is the same.
For deep drying the wax needs 2-3 weeks. Furniture can be used during this period, but with much more care. It is best not to put cups of hot liquids directly on the waxed tops during the period needed for complete drying. After 3 weeks the wax layer is completely hardened and the furniture can be used normally.
What you need to know when using Annie Sloan Clear Wax
- Wax is best applied at a temperature of 20-22ºC. It spreads better and you can apply a thinner coat without having to remove the excess;
- spread the wax very well so that it can be absorbed thoroughly. It's just like applying cream to your hands. A larger amount goes into the skin harder;
- work on pieces not the whole piece. You'll have both better rework and much better results. Apply wax to a small area, wipe, then move on. Finally, polish;
- if you need superior resistance - very wet environment, countertops that need to withstand high physical or chemical aggression - use varnish, not wax;
- do not apply varnish over wax because it has no adhesion. Use either varnish or wax;
- finally wash the brush with water and detergent.

Annie Sloan White Wax
With coloured skies you can achieve very interesting effects. A special wax worth treating separately is white wax. It can be used both over darker colours and directly on wood.
White wax can be applied to any colour, not just dark ones. Over white the effect is almost invisible, so there is no point. On the other hand, when applied to grey, beige or cream, it gives the effect of a weathered surface, of the ageing of paint layers or of several layers applied over time on top of each other.

On dark colours the white wax also brightens up with a "washed white" effect. It looks like an old object has been varnished to freshen it up. It is even more interesting if the piece of furniture to be transformed has carvings or grooves. Wax remains in the profiles giving the impression of depth.
White wax can also be used directly on wood. Here you can see the white wash effect even better. The more structured the wood, the better the grain is highlighted. The wax is applied to the wood and then wiped off, so that it remains in the grain, in the recesses and imperfections of the wood.

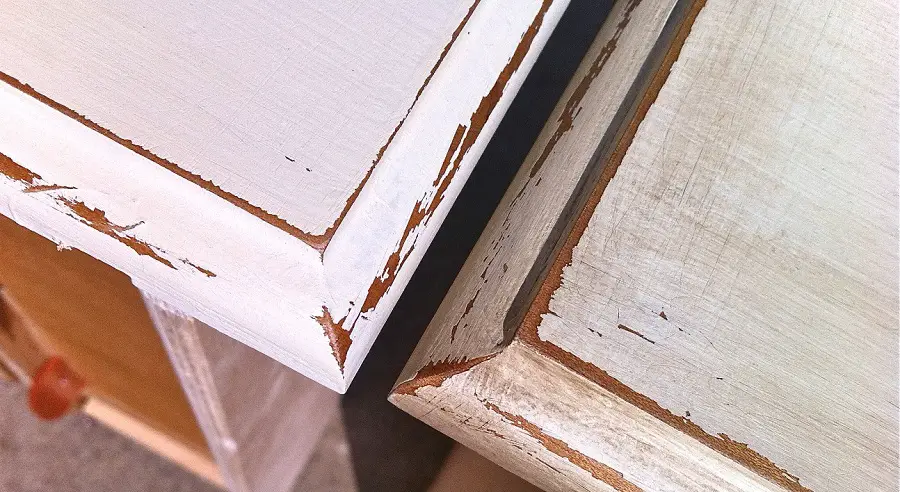
Dark or black wax
Dark wax is used for patination. There are 2 versions, black and dark walnut. The coloured wax is applied on top of the clear wax to make it easier to remove and to keep the surface as evenly coloured as possible.
It's not hard to apply, but you need some experience to get the desired effect. In short, the way to work is as follows. First apply the colourless wax and then immediately apply the coloured wax. It is necessary that the colourless wax is not dry. If you start wiping immediately, very little dark wax will remain on the surface, so the result will be a slightly "smudged" surface. The longer it is left on, the more visible the effect will be.
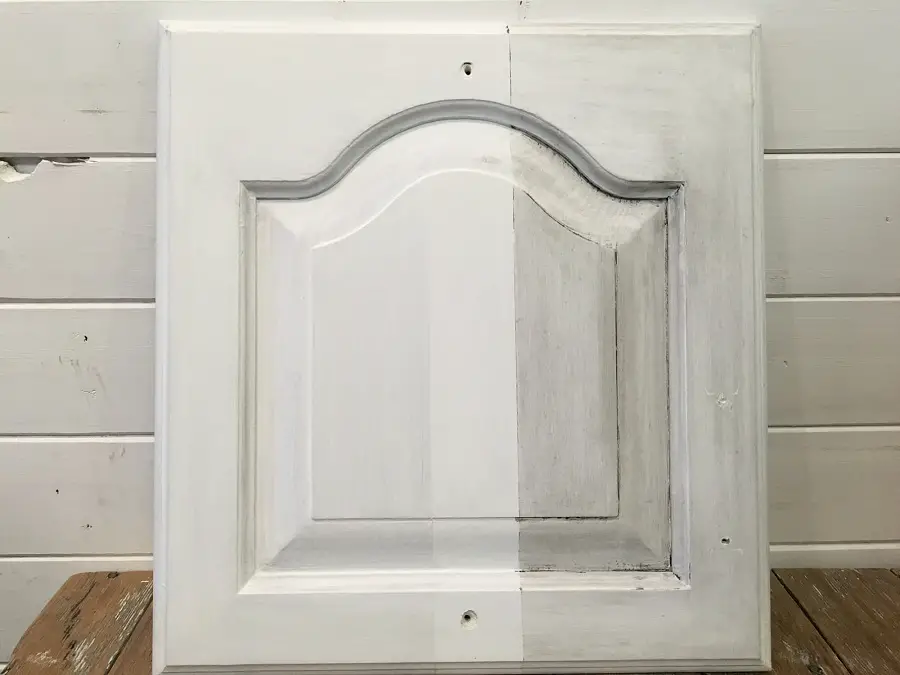
photo source: iloveecochic.com
This makes it all the more important to work in sections. For the least visible effect the wax should be removed in 20-25 sec. If you work on a large area you will not be able to respect this time and the effect will be much more visible than you want. If you work on small areas, there will be time for removal and at the end, if you want more uniformity, you can work on the whole surface.
If you haven't managed to remove the wax quickly enough and the colour is too dark, don't panic. Apply a thin layer of colourless wax on top and then wipe off. The colourless wax will also train the coloured one and that's how you'll reach the desired intensity.
The right brush contributes to a good result
When you decide to start working with coloured wax, it's good to think about the brush. It's much easier to work with and you'll achieve the desired result more quickly. And if you have to work with profiled furniture it will be much easier to control the amount applied. The Annie Sloan brush has a special design that allows it to get into tight, hidden places and deposit a smiliar amount of wax to that on straight surfaces.
Working with wax doesn't have to scare you, even if it is coloured. You need to start working by applying to small, simple surfaces. That way you will get a "feel" for how to work. In fact, this is how you work with Annie Sloan products. You start by getting to know them, then you feel them and finally you discover how many wonderful things you can do with them. If you are thinking of starting an Annie Sloan experience you have here the list of distributors in Romania. I hope you find it useful. Distributor in Târgu Mureș, Kamandalu Art&Craft, has also prepared a surprise for you. If you use the code 0304 (zero-three-zero-four) you will get a discount until the end of April on both in-store and online products. Good luck and good luck!


Hello, I have to recondition a table that I will have to decap and I thought to paint it. Can I apply wax over the paint and if so what is the process?
Thanks for all the advice you give us?
Good evening!
Yes, it can. The paint must be very well dried. Apply the wax with a rag or brush. If you have applied too much, remove the excess with a rag. Let it dry for 24 hours and apply another coat. Leave it 2-3 days to dry and then polish with a soft cotton cloth. You will get a silky sheen with a pleasant sheen and paint protection.
All the best!