


Have you noticed the white, round marks left by wet glasses or hot coffee cups on bedside tables or table tops? Have you spilt your glass of brandy, cognac or whisky and when you went to wipe the table you found that the lacquer was left on the napkin? The table had nitrocellulose varnish - nitro, as it's often called - on top of it, the most commonly used furniture finishing material 40-50 years ago. In the meantime, new, much stronger and safer finishing materials have appeared, but nitro varnish continues to be used because of its ease of application and warm, pleasant appearance. What is the history of nitro varnish, how it is applied to achieve beautiful surfaces and how problems that arise from misuse of furniture can be solved, read on.

Nitro varnish has revolutionised the finishing of furniture, musical instruments and the automotive industry
The first step on the road to the nitrocellulose lake was to obtain nitrocellulose. Alexander Parkes treated cotton cellulose with a mixture of nitric acid and sulphuric acid in 1862 to produce nitrocellulose, an unstable and flammable substance. It was originally used as a substitute for gunpowder, but later formed the basis of celluloid, the raw material for photographic film and film reels for the cinema.
In 1921 Eduard Flaherty, a DuPont employee, dissolved nitrocellulose in a mixture of solvents to make nitrocellulose varnish. The resulting liquid could be applied by spraying, and after the solvents evaporated, the wood or metal to which it was applied was protected with a tough, elastic film. A sufficient quantity of pigments could also be incorporated into the varnish to produce various coloured paints. It was the invention that revolutionised the car industry.
Until the advent of Duco paints - the name for DuPont's nitro paints - cars were painted with a natural Japanese lacquer, Japan Black. It was resilient, it adapted very well to the workflow, but it was black and the color could not be changed. In fact, Henry Ford, the American manufacturer who democratised the car by making it accessible to ordinary people, used to say that Cars could be ordered in any colour as long as it was black. Duco was diversely coloured and dried much faster than Japanese lacquer, so it was quickly adopted by the Ford company and remained the paint of choice until the 1960s.
Nitro varnish, later improved with resins and plasticisers, became the main finishing method also for furniture or musical instruments. Until the advent of oils, waxes and shellac were the main materials used to protect wood against water, dirt and mechanical aggression. Nitro varnish was very similar to shellac in appearance, but easier to apply and more resistant. Like cars, furniture and musical instruments were finished with nitro almost exclusively until the 1950s and 1960s. Even after the advent of high-performance varnishes, classical guitars and violins continued to be finished with nitro varnish for a long time in Romanian factories.
The advent of catalyzed varnishes, which are much more resistant, and water-based varnishes, which are safer due to the lack of solvents, as well as the strict rules introduced in factories due to fire risks, have led to a reduction in the use of nitro varnishes and even their total replacement in some factories.

An easy to apply and very nice looking, but not very resistant varnish
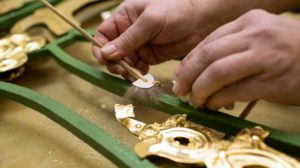
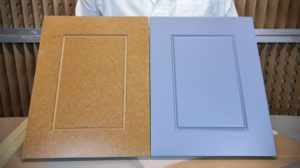
Nitro varnish is simple to use because it doesn't need catalysts or other substances to cure. As with shellac it is resins dissolved in solvents. The film is formed by the evaporation of the solvents and the resin becomes solid again. The plasticisers in the composition make the film more elastic, reducing the risk of cracking. The varnish can be matt or glossy, depending on an adjuvant in its composition. This is called a wetting agent and determines by quantity gloss level of the lake. The colour is warm and pleasant, yellowish brown, tea-like. Unfortunately, over time the colour becomes more yellowish, as nitro varnish is less resistant to light. This is most easily seen on softwood because it combines with the change in colour of the wood.
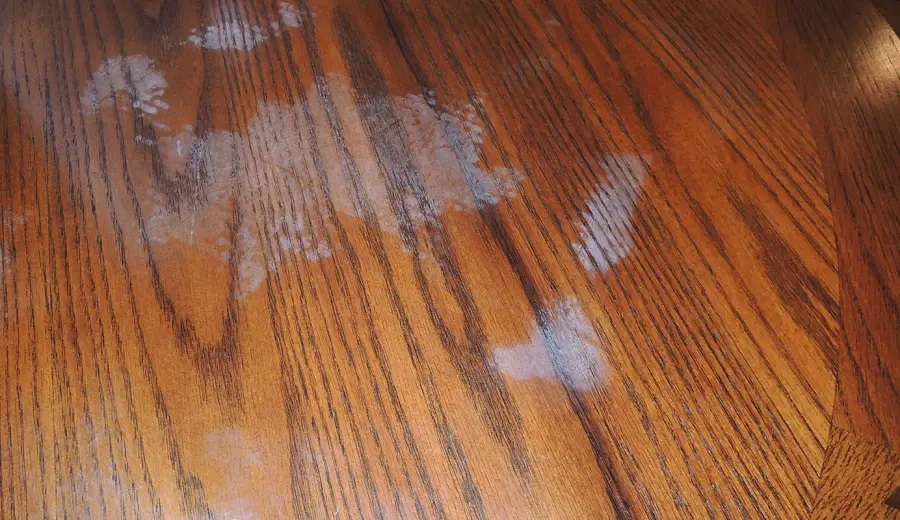
The adhesion of the nitro varnish layers to each other is very good. When the next coat is applied, the solvents soften the previous coat and thus stick very well to each other. The end result is a very uniform film with no risk of the layers peeling off. The ability of the thinners to soften the dry varnish layer also has negative effects, as the film is not resistant to alcohol, spirits and other organic solvents. Their action will lead to whitish spots, loss of gloss and softening of the film.
Do NOT apply catalyzed solvent-based varnishes such as polyurethane varnishes over nitro varnish. As above, the solvent softens the nitro varnish, but does not have enough time to get the full amount out before the polyurethane varnish hardens. The solvent left inside turns to vapour and pushes the polyurethane lacquer film formed on top, which gives way from place to place. In common factory parlance it is said that the lake blooms. The phenomenon is explained at length here.
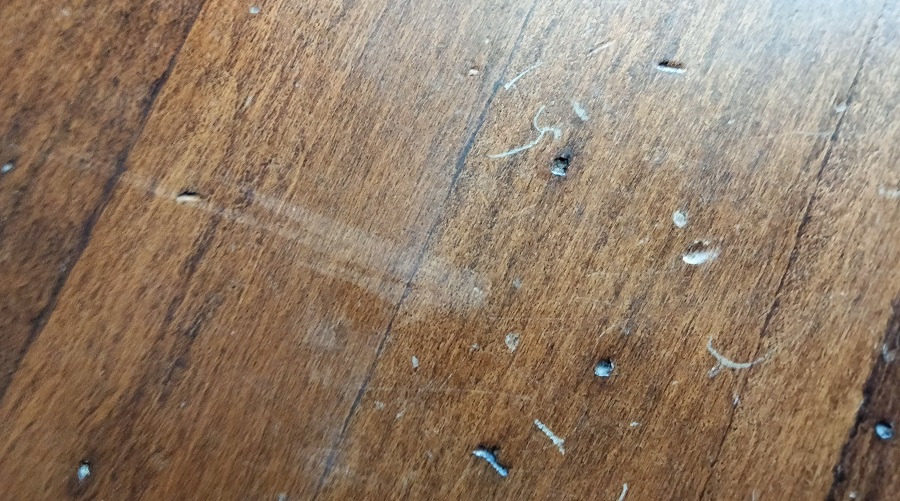
Because the film is not formed by a chemical reaction, as in polyurethane varnishes, polyester, acrylic or water-based, its resistance to scratching, abrasion or staining is low. Cold water that remains for a longer period whitens the film, and steam, hot water or the continuous presence of drips and drips can bleach it. Red wine, coffee, cold or hot coloured drinks can stain nitro varnish film. The varnish scratches easily, even with abrasive cleaners, scuff marks remain and abrasion resistance is low and not recommended for floor finishes.
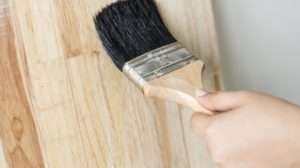
The varnish can be applied by brush, trowel, spraying or pouring. For DIY projects, brush or roller application with a solvent-resistant roller is recommended. Viscosity differs depending on the method of application, with thinner varnish required for spraying and thicker for brushing or pouring. The high solvent content makes the varnish flammable and the odour on application quite pungent. Application should be made in well-ventilated areas and it is advisable to avoid storing large quantities of varnish in unventilated areas for fire protection. The solvent smell of furniture finished with nitro varnish persists for another 3-4 weeks because complete, thorough drying is a lengthy process.
What problems can occur and how to fix them
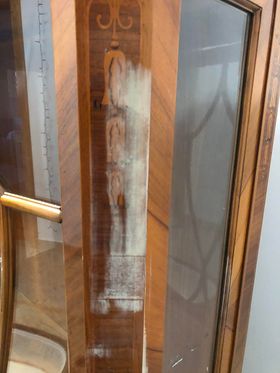
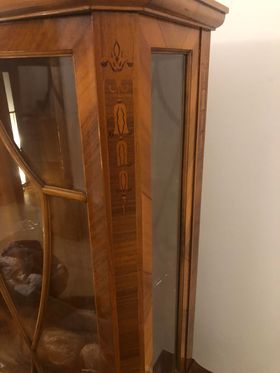
The good news is that the film can be repaired as easily as it can be damaged. If the film whitened without bleaching, operate with a heat source, a hair dryer or an iron. The white area occurs because of water getting into the film and the heat helps it come out. If you use an iron, place a folded tablecloth or thinner blanket and iron over 3-4 times, then lift the blanket so the steam can escape. Wipe the surface with a soft, dry, clean cloth and repeat. It may take 3-4 repetitions until the white area is completely gone. Easier is with the hairdryer. The furniture below, bleached by the water drained from the flowers held above, has been remedied with hot air. Methods for remedying white stains also find here.
Small holes or fine scratches can be blurred by sanding with very fine paper or with a mixture of solvents commonly called equalizer. More volatile solvents such as butyl acetate or butyl alcohol are used. The levelling agent is sprayed finely over the film, after which the soaked film is levelled with a roller or a smooth, solvent-resistant pad. If it cannot be sprayed, the leveller is applied directly with the pad used for levelling. If sanding is preferred, fine abrasive papers with grits from 800 upwards or abrasive pastes and felt discs are used. Do not over-abrasive to avoid changing the gloss of the surface. It is advisable to work over the entire surface to obtain a uniform film without bumps.
Unless the berry underneath the film was affected, big holes are repaired by dripping nitro varnish into them. Allow to dry and if necessary, sand the surface to level it and apply a fresh coat of varnish. The repair may only be visible if the varnish is very glossy.
Deep, deep scratches and peeling film needs to be sanded away. Sand with 220 or 240 grit sandpaper until the scratch disappears or no more flaking varnish is visible. If an area has been heavily stressed and bumps appear, the surface should be levelled. Finally, apply a new coat of varnish.
I hope you find the information useful. As usual, additions are welcome. And if you have any questions or queries, please leave them in the space below. I'm sure I'll reply.


Hello,
I reconditioned an old ash desk and treated it with a coat of linseed oil. Can I now varnish it again. Thank you.
Hello!
Only with alkyd varnish and only if the wood is not saturated with oil, i.e. you have applied several coats until the wood has absorbed nothing. If it is saturated, the alkyd varnish cannot grip the wood (it has no adhesion) and will peel off (flake) very quickly.
Allow at least 6 months to elapse before coating with alkyd varnish.