


Whenever I have had the opportunity - visits to factories, written articles, recommendations in finishing material technologies - I have said and repeated that a good white sanding (i.e. of the wood before the finish is applied) solves many of the problems in finishing. Unfortunately, some defects are not visible in white and therefore there is a tendency for the operation to be treated superficially. Defects will however become visible on the first application of a finishing material. At this stage, however, the repair is much more difficult and expensive.
Why white sanding should be done
White sanding is a very important step in the finishing process. Its main objectives are:
- surface calibration,
- removal of scratches, tears, pencil marks, adhesive residues and other surface defects,
- removal of roughness due to moisture,
- ensuring adhesion between the surface and the following finish coats,
- reduction in the consumption of finishing material,
- obtaining quality furniture.
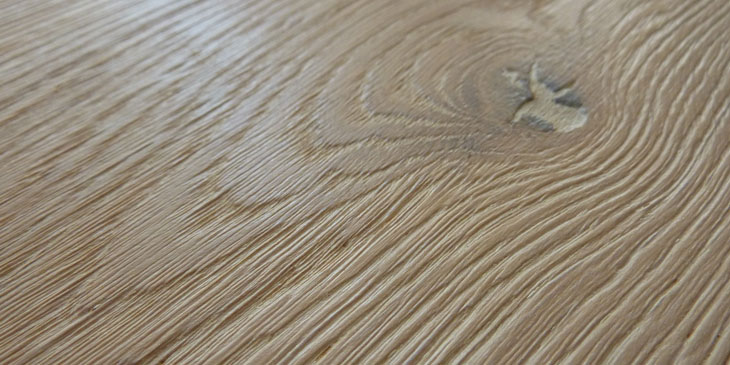
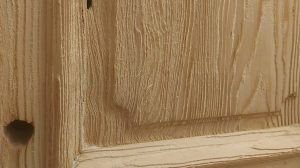
Sometimes special sanding techniques are used to bring out the wood's structure and natural beauty. Structuring wood oak flooring is one example.
Incorrect sanding is often the cause finishing defects observed on the finished product. The attention paid to the blank preparation of the wood substrate is inversely proportional to the number of defects occurring during finishing.
Materials used for sanding wood
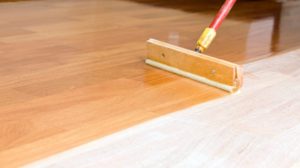
Sanding is mainly done with abrasive strips. It can be done manually or mechanically, depending on the equipment and the specifics of the wood pieces. A sanding belt consists of a base (paper, fabric or a combination of the two) to which abrasive grains are glued.
Common surface tapes have either a combined paper and fabric base or only fabric. Those used for profile sanding have an elastic textile base.
The abrasive material bonded to the tape can be natural or artificial. Artificial abrasives are tougher and have a wider use. Choice of abrasive material depends on the purpose for which the abrasive tape is used. The most common abrasive materials used are aluminium oxide (corundum), zirconium and silicon carbonate.
Abrasives are shredded, sorted by size and bonded to the backing. Depending on the number of grains per square inch the belt is given a number representing its fineness (40, 80, 150, 300, 400, etc). The higher the number, the more particles, the smaller the size. A small number of particles means coarse grinding, a large number means fine grinding.

Correct use of abrasive tapes
In mechanical grinding, abrasive belts are mounted on machines, on rollers and stretched to create a certain tension in the belt. For quality sanding the tension does not have to be very high. The higher the belt tension, the lower the abrasive quality. To avoid stretching of the belt and to increase the belt life, the tension should be reduced after the sanding process is finished.
Before being placed on the sanding machine rollers, the direction of the belt must be checked. The correct direction is indicated by the manufacturer with an arrow drawn on the back of the belt. The speed of the abrasive belt should be in accordance with the properties of the sanding surface and the belt manufacturer's recommendations.
It is not recommended to achieve fine sanding by very frequent changes of the belt grain during sanding cycles. As it is not possible to sand a very rough wood directly with 220 or 240 grit paper, the following passes are recommended: 60-100-150-220 or 40-80-120-180-240.
Massive deposits of dust on the belt (clogging) lead to poor sanding. Dust settles between the abrasive particles and cancels their effect. The wood is no longer sanded but rather smoothed. So-called mirrors can appear in these places, which no longer absorb the finishing material, resulting in reduced adhesion and stains. It is recommended to apply the finishing materials immediately after sanding as the adhesion to the substrate will be much better.
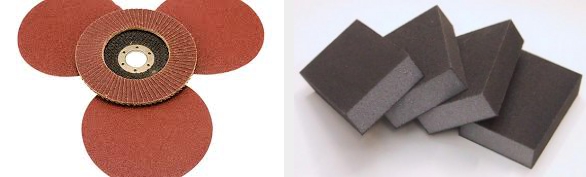
In addition to abrasive belts, discs, sponges, abrasive brushes or similar materials can be used for sanding.
A lot can be said about white sanding. The approach so far has been industrial, with many recommendations on sanding machines. How to choose abrasives or why it is important sanding between layers you can find out from other articles.
I hope you find the information useful. As usual, additions are welcome. And if you have any questions or queries, please leave them in the space below. I will certainly answer


[...] How to white sand wood to obtain a quality product [...]
[...] level of granulation in part. It is sufficient if 3 different grain sizes are used (see also here). Also, the sandpaper should be replaced after the recommended time of use or [...]
[...] the colour. How to sand to avoid defects can be found here. But there are also situations where, no matter how well the wood is sanded, stains still appear. It is [...]
[...] arising during assembly can be remedied when sanding in white. It is the place determined to obtain a quality finish. Careful sanding of [...]
[...] at the risk of repeating myself, I will tell you again that the most important stage of finishing is white sanding. A well and correctly done sanding greatly reduces the risk of sanding defects [...]
[...] For DIY projects the application of the bath is generally done with a brush, cloth, brush, trowel or sponge. When the amount applied is small (cloth and sponge well wrung out, brush well shaken) the stain will be superficial, more uniform and without showing up the pores or the natural pattern of the wood. If a larger amount is applied, then the wood absorbs more and its pattern is brought out. In this case, there is a risk of staining due to increased absorption at the stain starting point (where the stain-soaked cloth or brush is first applied). An even, but pore-marking stain is obtained by applying the excess bath and then wiping off the excess with the cloth, first in circular movements, then in straight strokes. The uniformity of the staining depends very much on how the white sanding has been done. [...]