


I've been using the phrase "splicing in teeth" lately when talking about how a piece of wood can be "extended". It's a widely used method so I think more should be said about it. About other joints such as the swallowtail is much more talked about, perhaps because it is more spectacular and used a lot by those who see woodworking as an art. But finger-jointing, although used to make important blanks such as massive panels and lamellar beamswhere the strength requirements are very high, is not so promoted. But now its time has come.
Wood joints fall into two main categories: demountable and non-removable joints. I don't think I need to spell out what each one means, the names are as self-explanatory as possible. Each category has a variety of ways to make the joint. The tooth joint falls into the category of non-removable joints, and is considered the most stable joint in length. It is not only a match of two pieces of machined wood, but also involves the glue whose qualities influence the performance of the joint. A finger-jointed piece of wood is stronger than one of the same size but in one piece, because the tensions in the wood are eliminated. As a result, the wood no longer twists or bends and the risk of cracking is eliminated because weak, defective areas have been eliminated.
I told you it is the most stable and strongest joint in length. But why is it stronger than one made on flat ends? Because, with the advent of splicing teeth, the way of bonding is totally changed compared to butt bonding:
- the contact surface becomes much larger,
- the bonding is not done on the end of the fibre but parallel to the fibre.
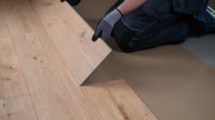
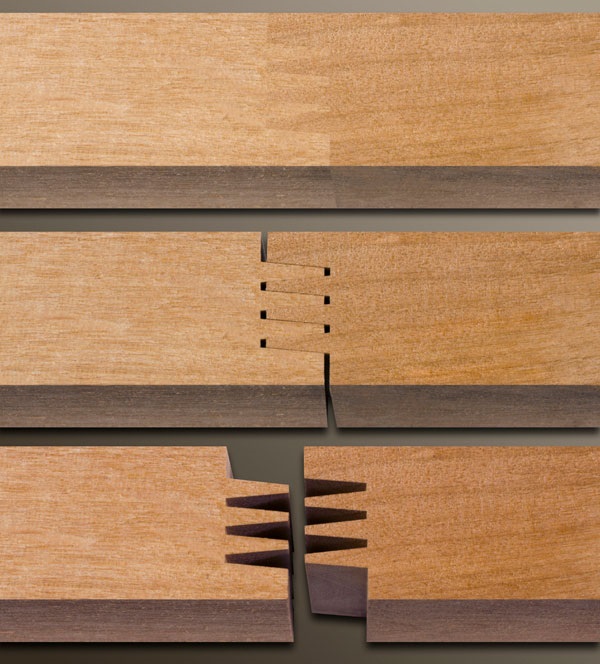
The pieces of wood to be joined are machined at the ends so that a zigzag profile appears that makes you think of teeth (or fingers, in English the joining is known as finger joint- finger joint). The teeth of the two ends must match perfectly to achieve a quality bond. If one side has longer teeth the glue will not have room because they will force the dent. This will result in a weak bond that may fail. If the teeth are shorter there may be holes in the glue line or a larger build-up of glue with an ugly appearance.
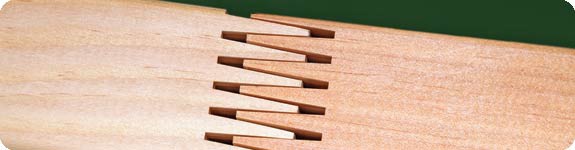
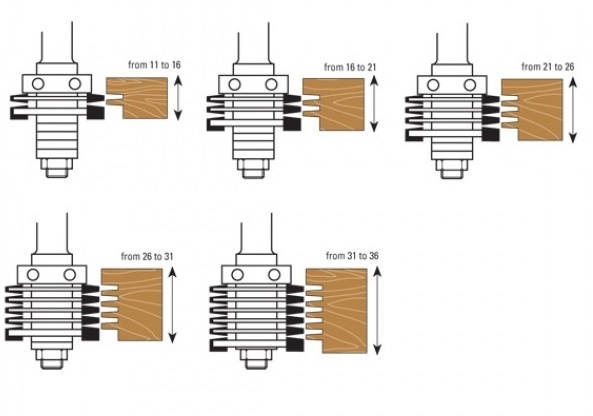
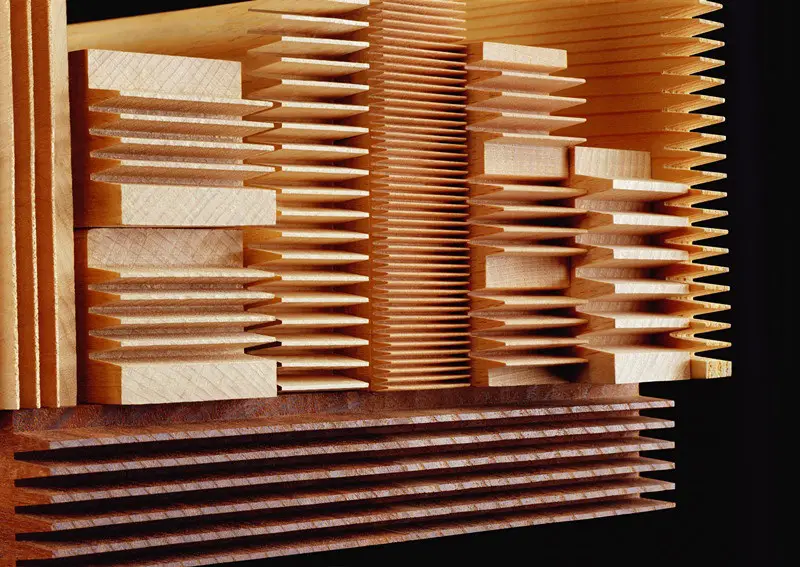
The geometry of the joint is very important and that is why it is now made with high precision tools (milling cutters). It is quite difficult to do by hand, a deviation of a tenth of a mm can result in a failed joint. Teeth can be made longer or shorter, thicker or thinner, depending on the cutter used. It is good to know that a joint with longer teeth is stronger than one with shorter teeth, just as one with thinner and more teeth is stronger than one with thicker and fewer teeth.
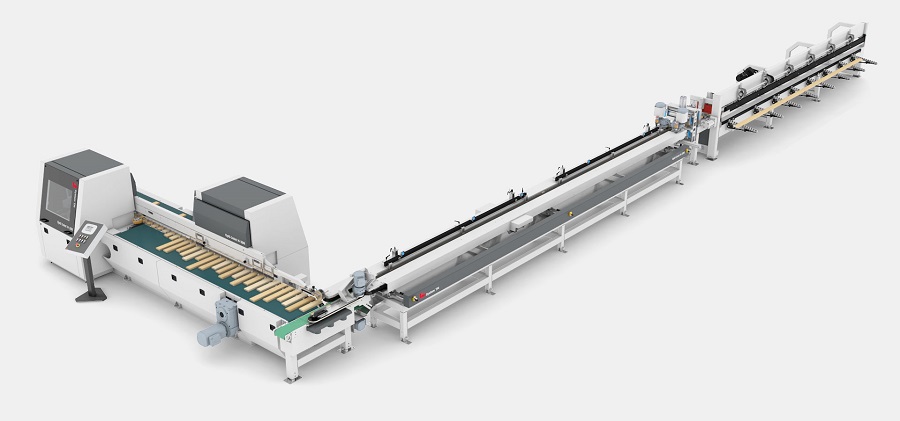
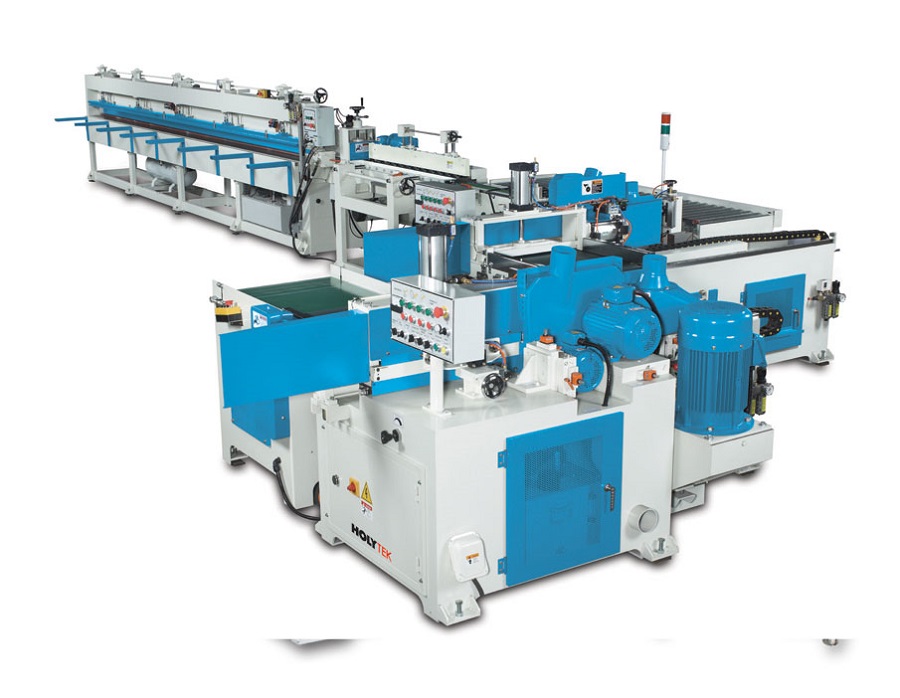
In factories where solid wood panels or laminated beams are made, joining pieces of wood to make long elements is part of the production process. That's why there are special, sometimes automated, lines that do this. The stages of such a process are as follows:
- choice and preparation of material
- tooth formation
- application of adhesive
- aligning and pressing the ends of the elements
- adhesive curing
Choice and preparation of material involves removing wood defects and straightening the ends for milling. Prior to this stage the wood is dried to an equilibrium moisture content of 10-14% depending on requirements, after which it is milled to size.
Tooth formation is, as I have already told you, the most important stage. Choosing the wrong profile compromises the bond and strength of the panel or beam. The length of the teeth is different depending on the requirements of the finished product, those for beams being much longer than those for panels. The teeth are made with milling machines performance with very high accuracy.
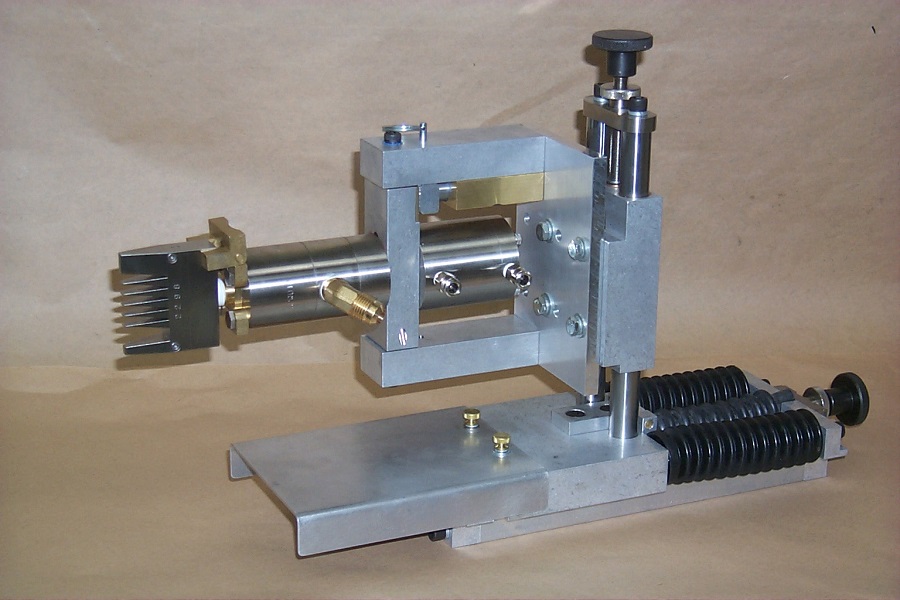
Adhesive application can be done with various devices. For example, an applicator that reproduces the profile of the heads can be used. Adhesive is placed on it and then passed over the profiled heads, the adhesive being transferred to the teeth. Nozzle devices similar to spray guns are also used. As the profiled end passes through the nozzle a quantity of adhesive is released and deposited on the teeth. Regardless of the method the amount must be very well controlled. Too small a quantity leads to a bond that can come loose. The amount of adhesive should be slightly more than that covering the 2 ends so that when they are assembled and pressed to fit perfectly, the excess adhesive will come out. This ensures that the glue line is continuous.
The adhesives used in the industry are generally melamine-urea pharmaldehyde or resorcinic. They must ensure a secure and moisture-resistant bond. These adhesives cure when hot. PVA (polyvinyl acetate), a cold-curing adhesive, can also be used. PVA is widely used in small factories or workshops.
To make the joint,adhesive-coated ends must be aligned and pressed. The operation is very important because if the pieces of wood are not correctly aligned, crooked elements can result. Also, if the pressure exerted on them to join them is not high enough, there may be gaps inside the glue line, weakening the strength. To eliminate such problems special machines.
The last stage is adhesive curinghot or cold, depending on its nature.
Tooth joints can also be made between pieces of wood of different species. Switching from one colour to another is really interesting. They can also be used for other wooden objects, not just panels (chairs, tables, furniture, doors, windows). As a curiosity, in the past it was used to join wooden elements in the first cars. And now there are still wooden elements finger-joined to luxury cars.
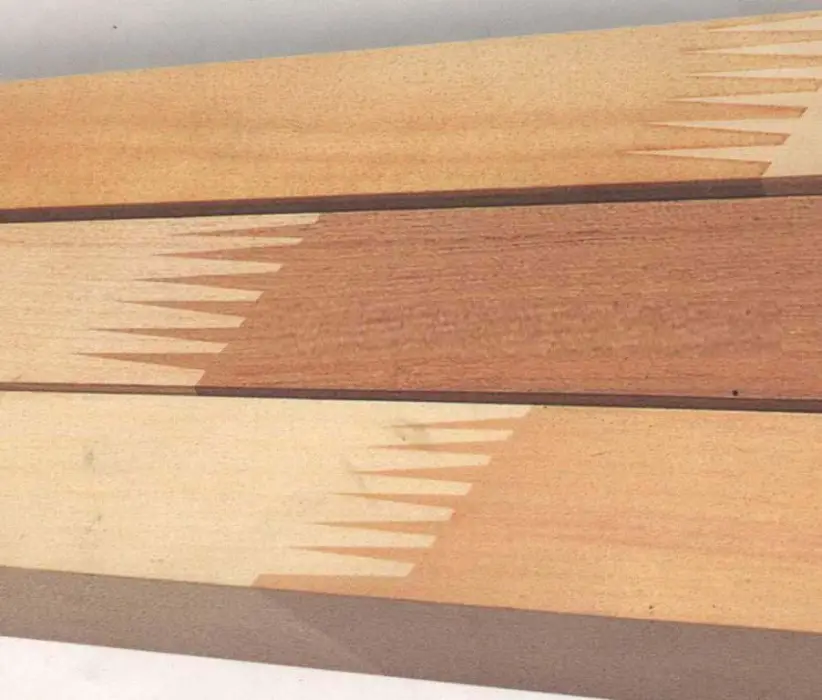
The glue line is very discreet and transparent or slightly brownish. There are no incompatibility problems when finishing, as panels or beams can be stained and varnished or oil treated. Finishing materials should be chosen according to where the joined products will be used, indoors or outdoors.


Add comment