


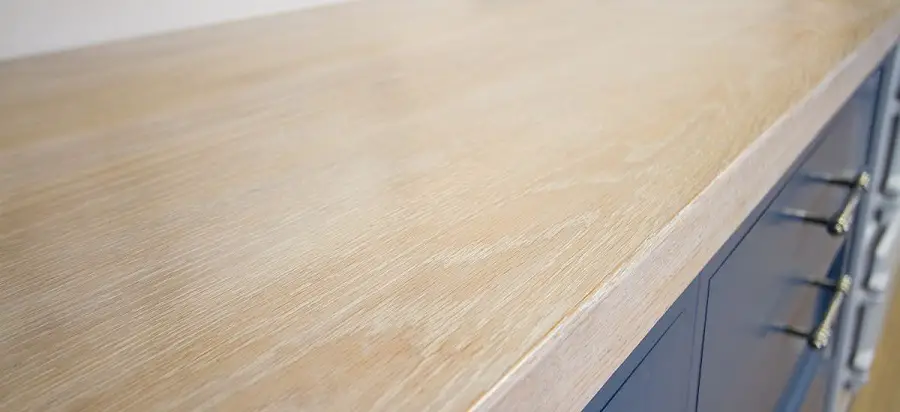
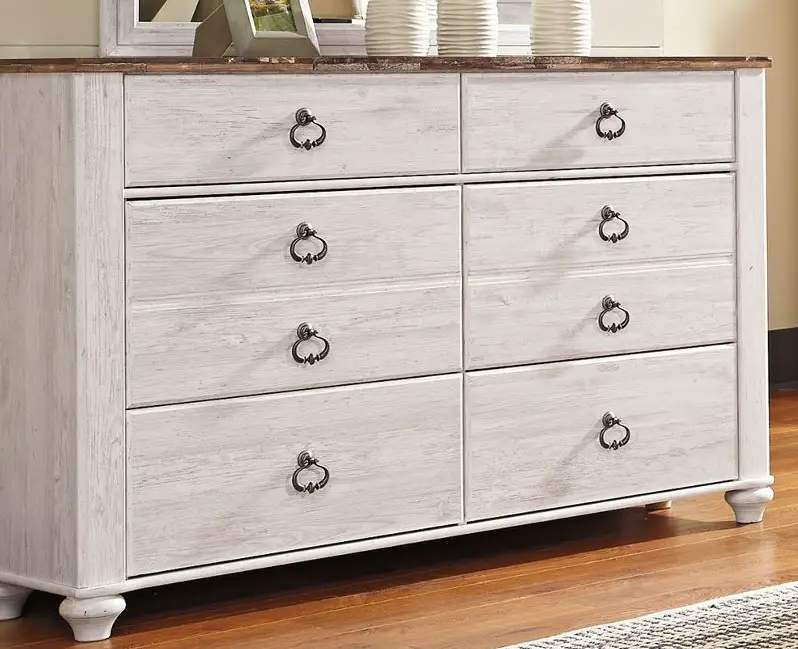
A whitewash finish, or whitewash as we already call it, uses white not to cover the wood but to enhance it even more. Lately there seems to be a passion for this finish, being chosen for furniture as well as parquet or wood cladding. Probably out of a desire to have a bright interior without hiding the wood many prefer this kind of finish. The finish can also be used to transform old pieces of furniture, giving them new life. It looks great on reclaimed wood, and the contrast between the dark colour acquired over time and the fresh white is much appreciated.
Characteristics of a whitewash finish
The term white washed finish is used for several types of finishes. They all have in common that the white does not completely cover the wood. A white washed finish is also considered to be one in which the entire piece of furniture is covered with a semi-transparent white coating, but also one in which natural wood design is marked by a white bath or patina. If you want the furniture or flooring you order to be white washed it is best to exemplify with a photo. Otherwise you may be surprised because the difference in techniques makes the final look very different.
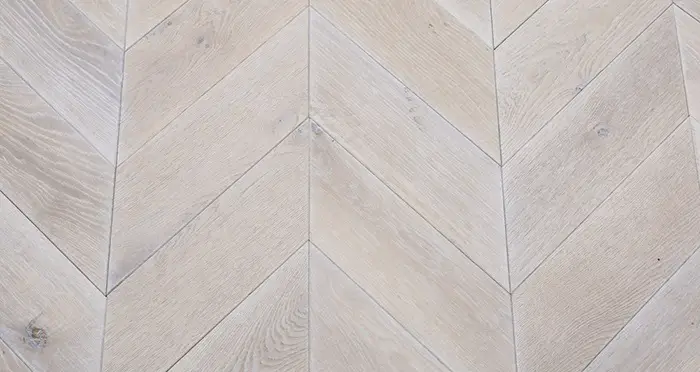
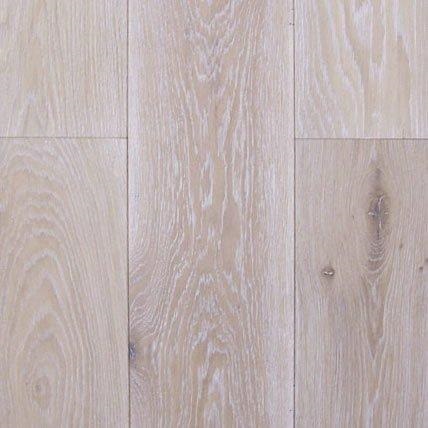
The most common choice for parquet is to mark the pores and the natural pattern of the wood. The long elements of oak, frasin or other large-pore essences go well with this finish. The appearance is pleasant and bright. So well has this type of finish caught on that it is also used as a print (design) for laminate flooring.
For furniture the washed effect is often used to the limit with efect distressed. Sometimes they are even confused, as there is no very clear demarcation but more of perception. A distressed finish done evenly over the entire surface of the furniture can look very much like a whitewash finish.
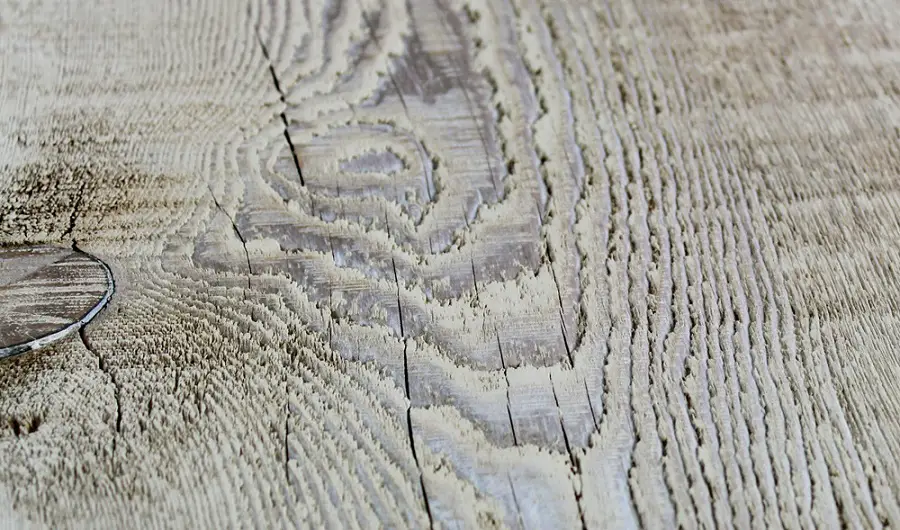
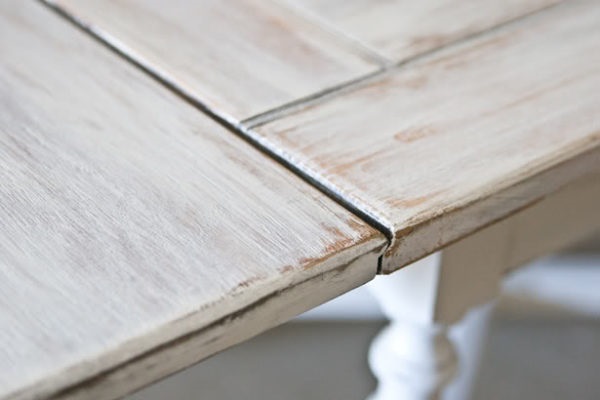
The effect is best highlighted by the flader cuts of the wood, where the annual rings create that cathedral-like design as it is still known. In poreless wood such as resinousThe different absorption in the latewood and earlywood areas of the annual ring gives the difference between wood hidden under the paint (earlywood, which absorbs more) and visible wood (latewood). The effect is visible immediately after staining, but looks better if a light sanding is done.

Materials used
Best behaved skates or paints. The varnishes generally stain the wood, failing to achieve the contrast between coated and 'clean' wood. One can try with even-toned woods followed by sanding, but it is better to use a paint.
The main problem with the effect is the transparent product with which the final coating is made. There are few materials that manage to keep that clean white at the end. Many of them give a yellow or cream tint, more or less pronounced, which displeases those who want that bright, clean white.
Those who prefer waxes and oils should know to look for those that don't change colour, as these products generally yellow. Oil of The flax in the content (present even in the composition of the skies) turns yellow over time and changes the appearance of the finish. There are also skies that retain their natural colour wood or finish. As for oils, there are even semi-transparent white oils that protect while creating the white washed effect.
The lacquers that retain their effect best are those ofsolvent-based acrylics or some of the water-based ones. The recommendation is that the gloss of these varnishes should be low, as the finish is not one of those that look good when glossy. It's a finish that comes into rustic category and rustic, as I said, has nothing in common with aggressive gloss.
Techniques and tips for achieving the whitewash effect
There are different ways to achieve the whitewash effect, the end result is different. Of these 3 are the most commonly used. Let's take them one by one.
1. Staining with a semi-transparent paint
It's not one of my favorites because I don't like the end result. It is, however, a favourite effect of others because it is simple to achieve. Basically, a paint is used that does not completely cover the wood. No sanding or other artifice is needed to achieve this effect.
The recommendation is to apply 1-2 coats of clear primer before applying the paint. This allows sanding between coats to obtain smooth surfaces with a pleasant tint. Finally apply a coat of white semi-transparent paint. To achieve the desired degree of transparency use a normal white paint which you dilute 1:2, 1:1 or 2:1 with thinner (or water, if water soluble). It is not good to go too far with the dilution because you will get a very fluid paint, difficult to apply. If you want more transparency, use semi-transparent paints or a uniforming varnish over which you apply a transparent varnish.
Too little dilution may result in total coating of the wood and you will need sanding. In this case the effect will be different and we will deal with it immediately. But you won't get that uniform semi-transparent white veil-like coating covering the wood.
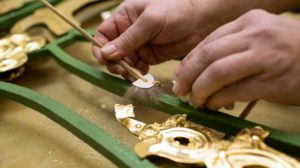
2. Using white skates
It is the recommended method for marking pores and natural wood grain. It is best to apply the patina over a coat of primer. This way you can sand to a surface that is pleasant to the touch and also control the amount of patina applied.
Patina is applied to the dried and sanded primer with a brush, trowel or spray gun. After drying it is sanded. The patina will remain in the pores and areas of wood where absorption is higher. The effect is very interesting and it is possible to obtain discreetly patinated surfaces (in the pores and on the outline of the flanges) or to have a fairly balanced proportion between coated and clean areas.
The effect obtained must be protected with a layer of wax or transparent varnish.
3. Painting followed by sanding
It is the method that is very similar to distressed. The difference is that in distressed the aim is to achieve the effect of the passage of time, of a layer of paint destroyed by use, whereas with whitewash there is a partial covering of the wood, as if the lime applied to a wooden surface had been washed away by rain.
Best achieved using white paint. To avoid working too hard to remove it, you can make a slightly higher dilution than a normal application. Application can be done with a brush, trowel or spray gun. After drying sand the wood along the grain removing more or less paint depending on the desired effect. Finally the surface is protected with wax or varnish.
The method can also be used if you want to change the appearance of an old piece of furniture. The condition is that the furniture is in the natural colour of the wood. This is the only way to achieve the whitewash effect. On furniture that has been painted or with the wood stained in dark colours, the distressed effect is achieved.

Conclusions
Whitewash or white washed finish brightens up rooms and highlights the natural pattern of the wood. Depending on the method used, different results are achieved. The effect should be achieved on wood in its natural colour, not stained. Protect the effect with varnishes or waxes that do not yellow so that the colour does not change to cream or yellowish. Do not use glossy varnishes as the effect falls into the rustic category and gloss does not 'blend' well with rustic.
I hope the recommendations I have made will be helpful to you when deciding that a whitewash finish would be a good fit for your home.


I just made a wine bottle rack for someone who wanted it rustic white (I usually use the rosewood shade bath).
I used Kober's matte white paint, then gave it a coat of varnish.
The result exceeded my expectations... I even plan to furnish one of the rooms of the house I bought in the country exactly like this.
Thanks for the advice in the article.
Glad to be of service.
Good luck with your country home furniture! 🙂
Bunaziua!
In looking for some information on refinishing a hardwood floor, I found these great articles that I was inspired by. The color of the wood is light(beech I think) and I would like to whitewash it. Do you think it would come out well? I've been looking for that white patina paint but can't find it, can you recommend me a place where I could find your recommendations on the steps to follow?
Thank you very much! You do a wonderful job! 🙂
Hello.
Thank you for your appreciation.
The finish also works well on light-coloured wood. The wood has a yellowish tinge and this finish whitens it. I even made a finish like this these days using colourless oil in which I put 20% white pigmet. After drying I applied a coat of colourless oil for protection. If you want such a finish you can use floor oil and white titanium pigment. You can find them by clicking on the link below.
If you don't want to use oil, you can try a white, hard-wearing floor paint, which you can dilute more and apply a thinner coat, After drying, apply a coat of colourless floor varnish (water-based because it is less yellowing). You will get a creamy white shade because of the varnish on top. Another method would be to apply a first coat of diluted 25-30% floor varnish and after drying and sanding, apply a coat of semi-transparent white paint or diluted white paint. The paint must be scratch resistant and suitable for parquet.
You can find skids at woodworking supply stores or paint shops. But it is more complicated to use on a large surface like parquet. After application the patina should be sanded and it is difficult to get an even surface.
All the best!
https://iscusit.revistadinlemn.ro/ulei-interior/22-ulei-rezistent-pentru-podele-kreidezeit.html
https://iscusit.revistadinlemn.ro/acasa/96-710-pigment-pentru-ulei-ceara-tencuiala-kreidezeit-175-g.html#/51-culoare-galben_ocru
Hello, I want to buy some wooden floors (resinous) with which to clad a wall and paint them white washed as in this article. What are the exact steps and do you have any recommendation of some paint ?
Thank you
Good evening!
I'm thinking of 2 options!
1. Ceara alba. Considering that it is panelling and does not need a very good mechanical resistance, it can be used. Before application sand the surface very well to make it smooth and pleasant to sand. The sandpaper should be at least 180, but 220 or 240 is better. Apply the first layer of wax with a cotton cloth, leave it for 30-40 min, then wipe off the excess with a clean cloth along the grain. Leave to dry until the next day. Repeat if necessary. Finally you can polish to a silky sheen. You can also try white oil (without polishing at the end).
2. White water-based paint. Before the white paint apply a coat of colourless primer. Use a water-based product and try to use the same brand to avoid incompatibility problems. Apply the primer, let it dry, then sand with a fine abrasive sponge or sandpaper 280 or 320. Sand and apply the white paint in a very thin coat, normal coat or a 1:1 mixture of white paint and colourless primer. Choose the option depending on how coated you want the wood grain to be. It is best not to dilute the paint with water because it loses its properties and lifts the wood grain a lot.
Good luck!
When thinning water-based paint, what can we use besides water?
Sorry, I saw above that you can use colourless primer to thin the paint.
Hello! Very useful your article! I'm thinking of applying the whitewash technique to a ceiling made of fir wood ( 20 mm thick floorboard 140 mm wide with feder-nut laid over beams, classic). I'm going with the idea of applying a water based wood primer, then sanded, followed by a coat of white paint which will then be finely patinated (wiped off, otherwise I don't understand ) then 1-2 coats of protective varnish. Please can you tell me what quality materials I could use? Transparent wood based primer I found at OSKAR, then paint, I am looking for a water based one that will not yellow over time, qualitative. For the last 1-2 coats of varnish, I'm looking for a water-based, qualitative one that won't yellow the white shade. I know that pine wood turns yellowish-orange over time, and I want this maturing of the wood to not become too noticeable over time, while at the same time its grain remains visible. Please can you recommend me some materials in the category of quality paints and varnishes suitable for this technique. Thank you very much for your help!
Good evening!
If you have primer from OSKAR use their paint as well. Water-based varnishes yellow less than most solvent-based varnishes. Another recommended varnish in this case is acrylic solvent varnish. It's very resistant to yellowing, but since it's an already installed ceiling it's better to use a water-based product.
I'm thinking that, being the ceiling, it's pretty hard to finish them it would be better to simplify things. Have al directly apply a primer or white paint, thinned 25-30% with clear primer, I would sand lightly for effect, then apply clear lacquer. It's ceiling, 2 coats are enough.
Take care that the colour becomes less intense after drying. Lighten a little with the varnish. Do not dilute the white paint too much.
All the best!
Thank you very much for your reply! I will follow your advice in completing the project. Have a nice day!