


Wood antiquing is my favorite subject. But I don't think it was news to anyone anymore. I love writing about this topic and sharing with you the knowledge I have gained from many years of working with wood finishing products. For those less familiar with the term, antiquing wood means artificially aging it. It is done with special techniques and products that can be applied either directly to wood or to already finished furniture.
Most people interested in antiquing want to change the look of a piece of furniture they've had for a while. The fact that it is already old is an advantage in this case, because the furniture certainly has some signs of the passage of time: dents, chipped edges, scratches, etc. If there are no such signs, they can be made with very simple tools:
- a bag containing screws and nuts of various sizes. You hit the furniture with it from place to place
- a piece of chain with larger links. And it's also used to hit furniture
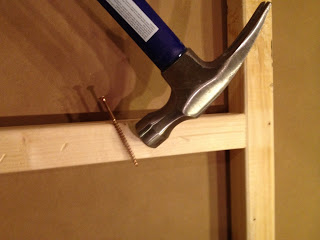
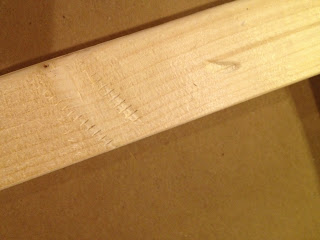
- a screw and a hammer. Make marks on the wood as in the pictures below
- a file or scraper with which to cut and mark the edges
- a round-headed hammer with which to gently tap furniture
- nails of different sizes randomly hammered on the back of a brush. It is used to make curry holes
Virtually any blunt object can be used to leave the impression of time passing. In fact, the antiquing process is very much a matter of imagination and the tips are merely indicative. From them everyone can make their own tools.
The same tips are also used when making furniture that needs to look old from scratch. In this case the markings are made from the beginning, before the finish is applied, on the wood in white as they say. After finishing, these marks will look as if the furniture has been knocked around over time and bevels have appeared.
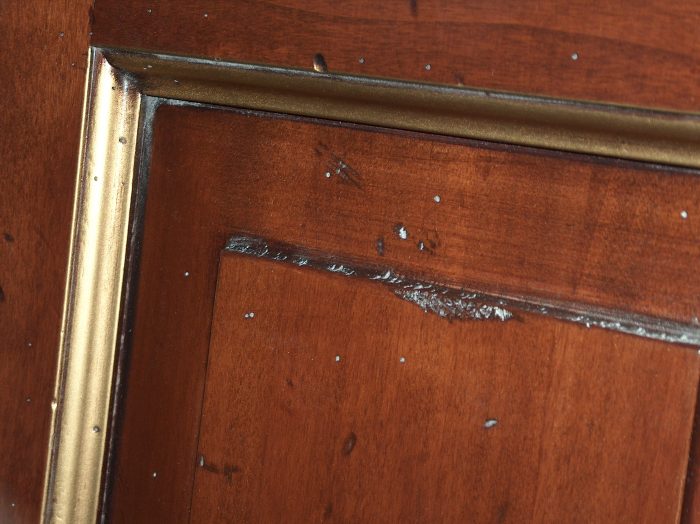
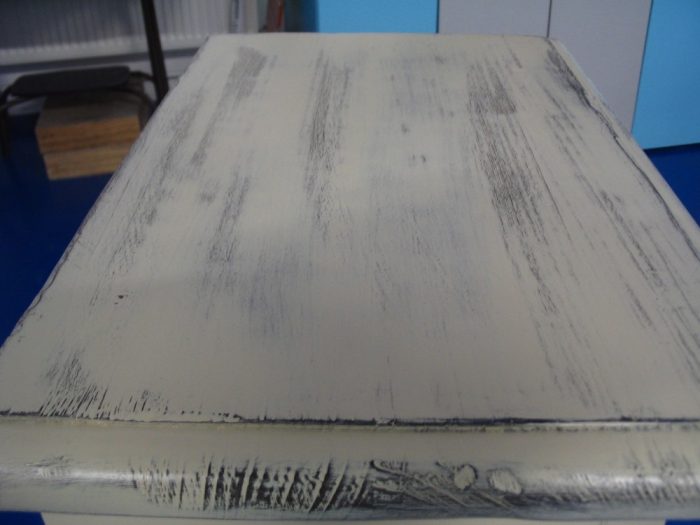
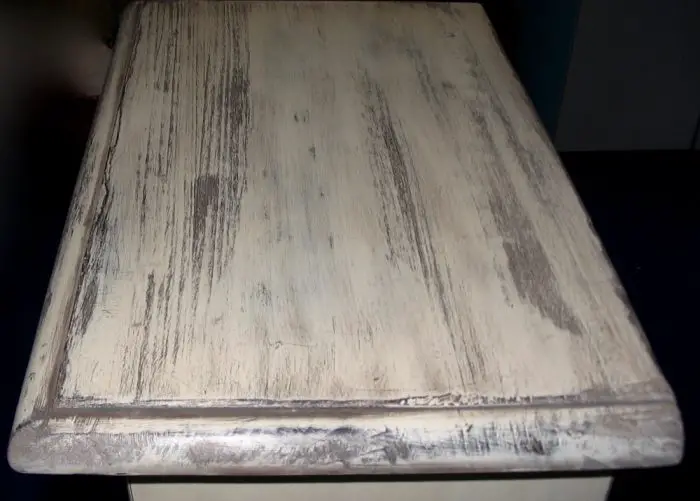
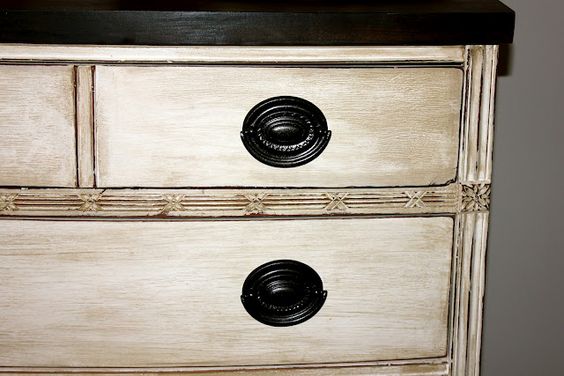
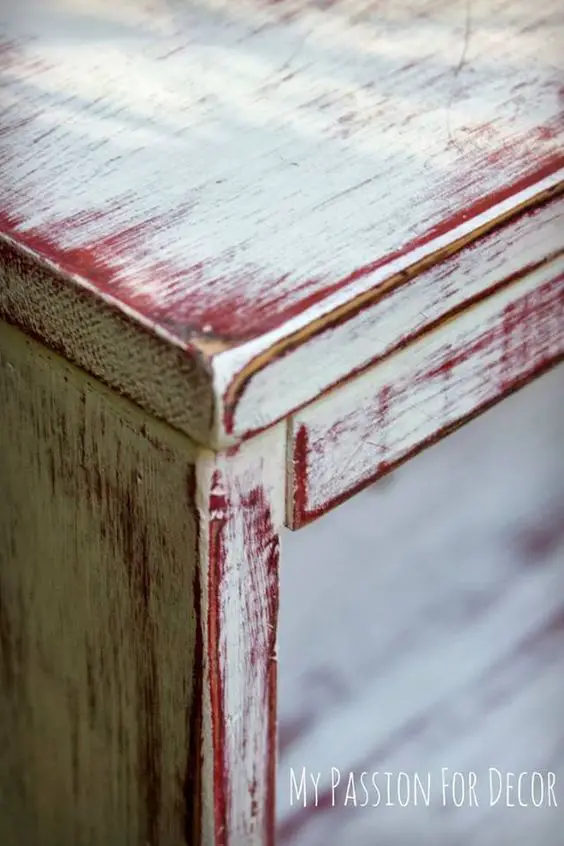
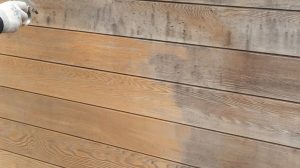
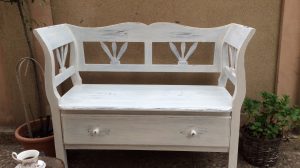
To make a piece of furniture look old, the easiest way is to paint it a different colour, then sand the edges until you get the original colour and even the wood. The process is called distressing, but you can also find it with the term consumption or burning of the edges. It's simple to do, and if the colour is applied with a brush, the antique effect is even more pronounced. Because you are likely to get to the wood when sanding the edges it is good to apply a clear varnish on top. The varnish doesn't have to be very glossy because it's hard to believe that old furniture shines. Very good for such finishes are low gloss varnishes and even natural effect (no gloss) varnishes. Before applying the varnish check the compatibility between the coats.
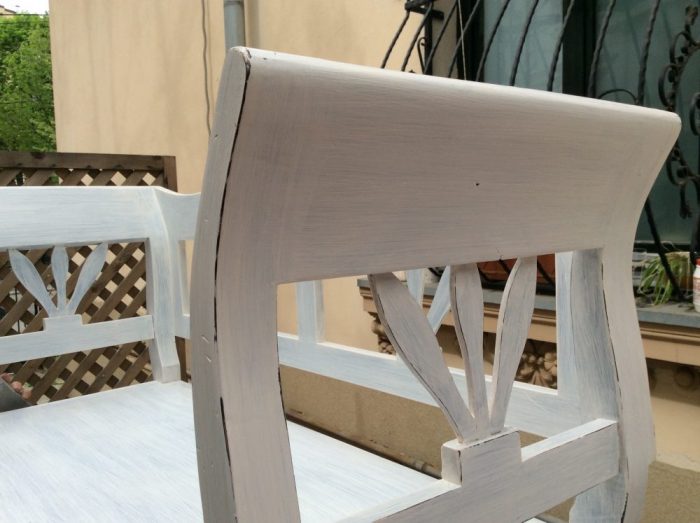
If you want an even older, more rustic look (like long-used country furniture) sanding can also be done on the surface of the furniture. But you have to be careful that nothing looks overdone or unnatural. Try to imagine places where the furniture might normally "take" the knocks and sand there. Always look at the big picture, the furniture as a whole, don't think of each door or drawer individually. They may look fine separately, but together the whole thing becomes exaggerated, out of touch with reality. Antique furniture means furniture that has been used for a long time, and all the processes should lead to that, not to a battered, scratched and scuffed new furniture look.
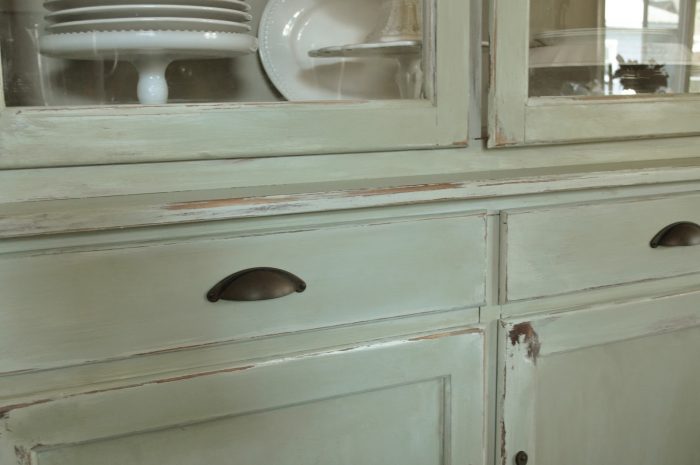
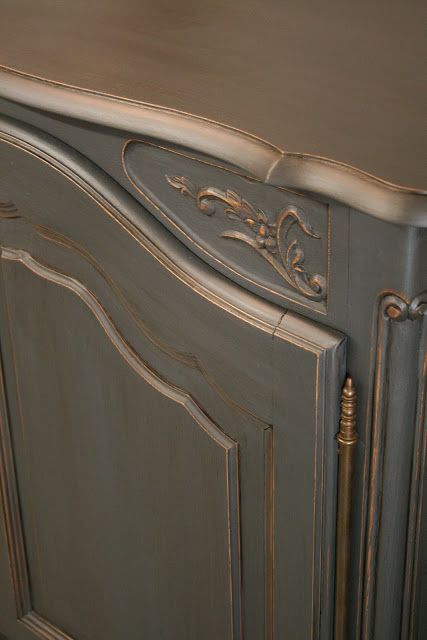
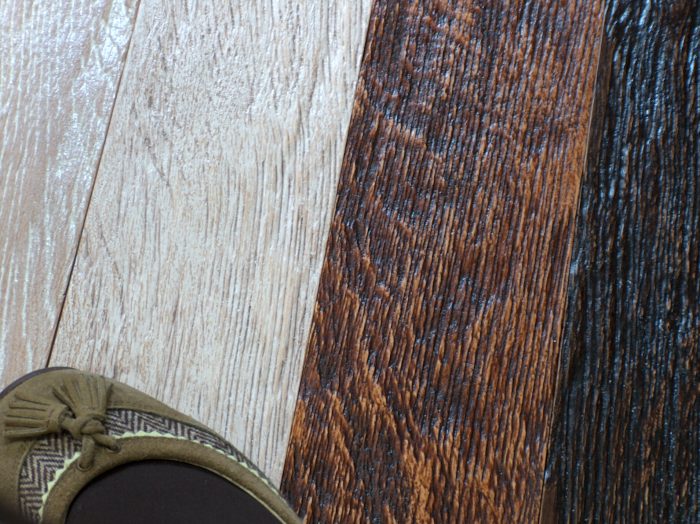
To accentuate the aged look, ageing patinas can be used. These are generally dark in colour (walnut, dark walnut), but green patinas (like mould) or bluish grey ones, like weathered wood, give a very authentic look. In the case of furniture that has been painted and then sanded on the edges, the patina is applied all over. You can use patinas that are sanded with abrasive sponges or steel wool after application (much smoother appearance) or patinas that are applied by wiping.
A very interesting look are the metallic skates. Discreetly applied, they add a touch of class to furniture. The most beautiful effects are achieved with bronze patinas. Used with care, gold also gives an interesting, precious look. The silver one is cooler, more distant and must be well adapted to the model to be credible.
The same aged look is achieved by applying coloured wax over the entire surface. I used shoe polish at one time. Mind you, not solution but shoe polish. Worked best with the brown one.
A very interesting look can be achieved by structuring the wood, i.e. bringing out the pattern of late wood and early wood. Late wood, being harder, remains in relief and early wood, being softer, is removed superficially. So when you run your hand perpendicularly over the wood you will feel its raised pattern. It can be done using round wire brushes fitted to a drill. It is mandatory that the furniture is solid wood.
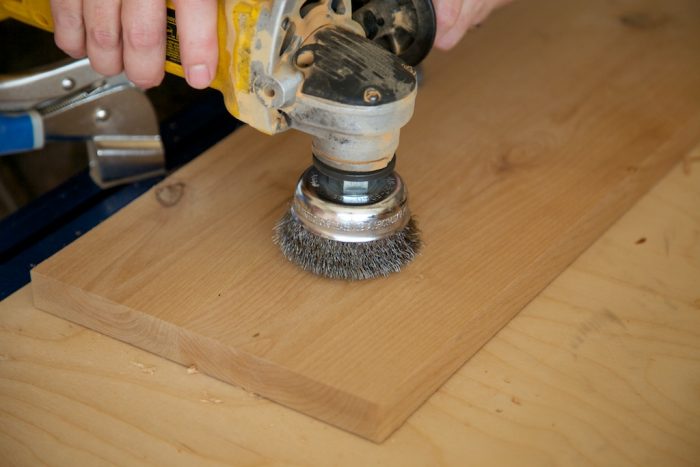
You can't get structured wood on veneered panels. If you want to structure, for example, an old table top, there is no need to remove the finish, the wire brush will do all the work. If some colour remains it's even better. The old effect will be even more pronounced.
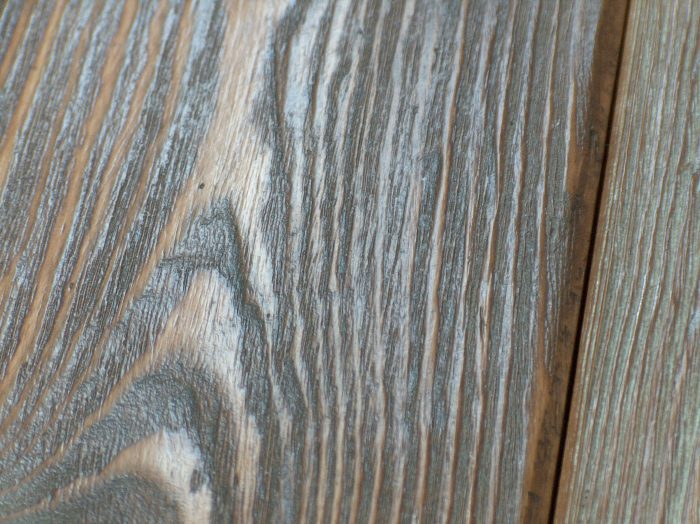
Structuring also looks great on fir or oak floors. A very nice effect is achieved if you apply a coat of paint over the structured wood and then sand. Sanding can be done in 2 ways: either you remove the paint only from the late wood, which highlights the design even more, or you insist on it, so that it remains partially on the wood, the effect obtained is that of "washed" wood, i.e. a little painted, but you can still see the wood unevenly. The washed effect also looks good on unfinished wood.
The subject is very interesting and there is much more to say about it. But I think it's good to stop here with the promise that I'll be back with a part 2 (probably part 3) very shortly.


What primers, paints are for wood-MDF?
For spray finishing MDF the best system is the pigmented polyurethane: 2 coats of white primer, sanding, one coat of white or coloured varnish (gloss or matt).
You can find more information here.
All the best.
Hello,
I really appreciate your site, even though I don't deal with furniture everything I read here I enjoy like stories and try to apply the information to my home.
I have a big request, to help me with some advice. I want to buy from a certain furniture outlet a rubberwood chest of drawers that is very dark, and I would like to paint it in white-beige with vintage effects. I have chalk paint and wax from Borma Wash , I have never used them, and in my mind this process should not be difficult but I would like to not fail . How do I go about changing the colour of the furniture?
Thank you very much!
Hello,
Thanks for your appreciation!
You should lightly sand the furniture before applying paint or wax. You can sand with fine sanding sponges that you can find at DIY stores. In sanding forms you can find here if here. Sanding helps to remove dirt and any previously applied materials that might prevent adhesion. After sanding, remove the dust and apply the paint. Read the application instructions beforehand to see if you need to thin it. For wax there is no need to sand. Simply wipe all the furniture with a cloth with water and detergent, then with a dry cloth. Let it dry thoroughly for a while and then you can apply wax. Apply it in a thin layer and spread it very well. Then polish with a soft cotton cloth. You can also apply the paint and then the wax and in this case there is no need to clean the furniture before applying the wax. Good luck.
Thank you very much!
Let's get my courage up....
A wonderful day!
Hello,
while waiting for the "victim" (the "victim") I look on youtube looking for information about reconditioning, painting, varnishing furniture etc., and I have seen people who use a solution of water and vinegar to remove the dust from the polished surfaces. So I come back with the question if I have to wipe the furniture with something special or if a soft cloth is enough. I've also remembered that it's good to go on to painting immediately after stripping so I'm taking a weekend off for all the work.
Thank you!
Vinegar is used for degreasing. Wax-containing solutions (Pronto, for example) are used for furniture maintenance. Varnish cannot be applied over wax because it has no adhesion. That is why, after sanding, it is sanded with vinegar solution. For safety. I think that if the sanding is well done, there is no need for vinegar and you can only sand with a soft cotton cloth. If you want to be sure, you can also use vinegar.
The varnish should be applied on the day of sanding. If you do the sanding today and the sanding tomorrow, it's no good again. 🙂
Good luck!
It's very hard to find tips for DIY projects in Romanian and I'm glad I found this article. I have a solid wood chest of drawers that I want to sand and paint with water based matte paint, because chalk paint seems too expensive, plus I also need wax from the same range at the end which is just as expensive.
I want to ask you something because I see you have a lot of experience:
Can I apply brown shoe wax over white water-based paint for an antiquing effect? If so, do I need to add anything else to protect the antiquing effect, or is brown wax enough to hold?
If not, what do you advise me to use to get that antique brown effect in the wood pattern, other than chalk paint products?
Good evening.
You can use shoe polish, but the classic kind, not the modern kind in those tubes with the sponge at the end. We recommend not applying too much and spreading it well, so that not too much is left in one place. You can only apply wax over wax. I recommend applying a layer of colourless wax over the coloured wax. Ordinary commercial floor wax. Leave the coloured wax to dry for at least 24 hours, then apply a thin layer of colourless wax, also in a thin layer, well spread.
If you apply wax to the sanded paint, more will stick. Without sanding, less will remain on the surface.
There are also patinas for effects on furniture, but the simplest is with wax.
To avoid unpleasant colour surprises, try a more hidden part first to see the effect. If you are happy, apply to the rest of the furniture.
Good luck!
Don't forget to subscribe to the printed Wood Magazine! For only 58 lei/year you can find out news in the field, discover craft ideas or trade secrets. We remind you that the content in the printed magazine is different from the one on the website. Details in the link below.
Thank you!https://revistadinlemn.ro/product/abonament-revista-din-lemn/