


Choppers, spoons, bowls, juicers, there is no home without such a wooden kitchen gadget. Many of them are unprotected, uncovered, as they were used in the past. Wooden spoons and ladles, butter churns and bread cups were not covered with any protective coating. Over time, the wood would darken, begin to accumulate dirt and eventually the objects would be replaced with new ones. Now we can protect them to keep them longer. But non-toxic finishing materials are needed because all these wooden objects come into contact with food. So what materials are used to protect them without poisoning us?
Why you need a finish for wooden objects in the kitchen
Before we see why we protect them. There are three main reasons:
- protecting wood from mechanical actions that can damage it
- highlighting the natural design of the wood
- reducing the absorption of water and other liquid materials inside the wood.
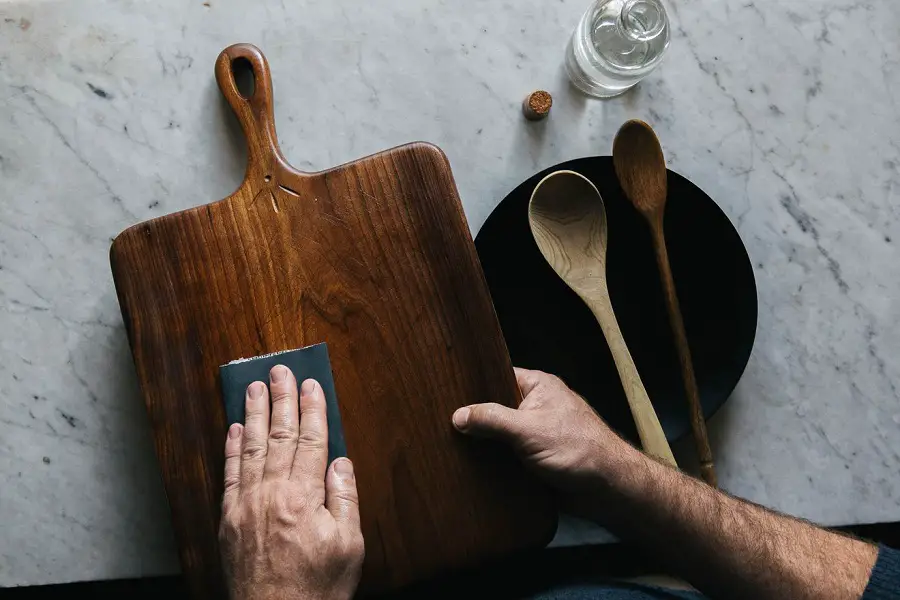
During work, objects come into contact with knives or other utensils that can puncture or drill holes or with abrasive cleaning and maintenance materials. By protecting them with non-toxic finishing materials the surface becomes harder or acquires a film that prevents scratching or chipping.
With the help of finishing products the natural design of the wood is highlighted. This is best seen on objects made of wood from plop or lime. Unprotected, the objects are white and uniform. When a finishing material is applied, the design made by the annual rings begins to be visible.
But the most important effect of finishing is to prevent or reduce absorption into the wood. In the kitchen water or other liquid products are a constant presence. Wood is hygroscopic so it will absorb water. Absorption and removal of water can lead to stresses that cause wood to crack. In addition, water also carries dirt with it and so the wood becomes deeply soaked. With finishing materials, absorption can be controlled.
Main modes of protection
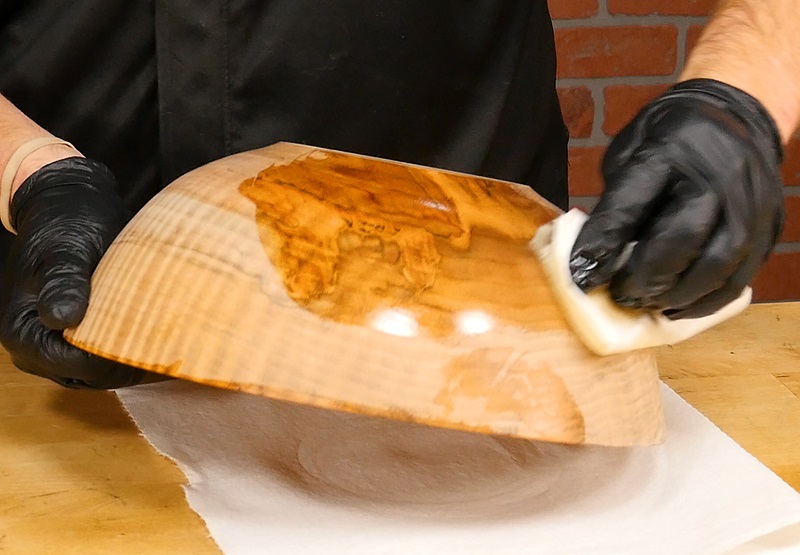
Protecting wooden objects used in the kitchen can be done with oils or/and natural waxes or synthetic catalyzed varnishes. In the first case the wood will absorb the material inside, the surface being very lightly coated. The beauty of the wood will be highlighted and the absorption of liquids inside will be reduced. However, the protection against mechanical shock will still be reduced and the wood may still be scratched or knocked.
In the second case, a film forms on the surface of the wood. It is thus much better protected against mechanical shocks and liquid absorption. However, the appearance is more 'plastic' and the wood loses its natural charm.
1. Oils and waxes as non-toxic finishing materials
There are several types of oils and waxes that can be used to coat wooden kitchenware. They must be natural and without added synthetic compounds. Oil finishing is done by applying successive coats, with drying time between them and wiping off the excess. Apply for as long as the wood continues to absorb. Ceara can be applied mixed with oil or as a separate product. It remains on the surface of the wood as a protective layer, but has no mechanical resistance. Here are some of the oils or oil-wax mixtures used as non-toxic finishing materials:
Mineral oil is the most widely used non-toxic material for finishing wooden objects in the kitchen. It is a tasteless, colourless and odourless material obtained from the distillation of petroleum. The product must be highly purified. Wood finished with mineral oil has a very fine and pleasant grain and does not feel greasy. It is a material you can find in pharmacies and is also used for digestive disorders.
Linseed oil - the natural non-digested one is used. The bleach contains metal salts which can be dangerous. Natural linseed oil dries very slowly, with one coat taking several days to dry. To speed up drying, linseed oil can be boiled before use.
Tung oil. It is the oil that most beautifully highlights the wood design. The natural version, undiluted with synthetic solvents, should be used. For dilution use turpentine, also a natural product.
Walnut oil is very good for finishing wooden objects in the kitchen, just like the coconut. However, it is not recommended for use by those with nut and peanut allergies.
Linseed, tung and walnut oils also have the ability to give some hardness to wood. During drying, a polymerisation-like process takes place which strengthens the wood fibre where the oil adheres. Unlike these oils, sunflower, olive or grape oils do not harden during drying. Their main disadvantage, however, is that they turn rancid in the presence of air and acquire a very bad smell.
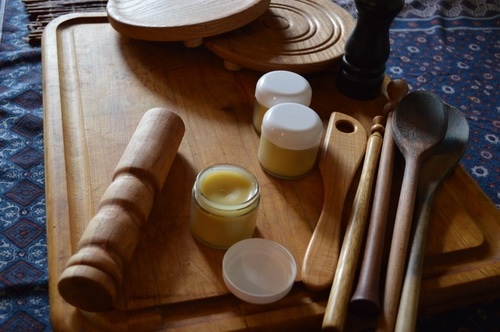
Beeswax and oil mixturei de in is often used to finish wooden objects in the kitchen. The mixture is made hot, being careful not to ignite. A recipe with good results contains 5 parts linseed oil and 1 part wax). The mixture can be used cold, when it is solid but the consistency of soft butter, or hot, in liquid form. As a liquid it penetrates the wood better and the moisture protection is much better.
Carnauba wax emulsion. It is a natural wax that protects the leaves of a palm species. The emulsion is only used to protect the surface of the wood. It is best used for products that are not used very often. Heavy use makes them tarnish and refinishing is more difficult because all the old coating has to be removed.
2. Use of film-forming products
Lacquers that can be used are those with chemical curing, especially those polyurethane. The final chemical reaction results in an inert product that is not toxic to the body. These products can also be used to finish baby cots and toys.
In order to be used safely, finished objects should be left for at least 30 days for the reaction to set. During this time there is a risk that some of the varnish may not have reacted with the catalyst and thus be very harmful.
Other hardening varnishes can also be used - polyester, acrylic, water-based. The higher the curing percentage, the safer the resulting end product. This is why polyurethane products are recommended, their curing percentage being between 50 and 100%.
Also in the class of film-forming products are shellac. The product must be natural, obtained from a beetle species, without the addition of synthetic products. It is recommended to use the object after the total evaporation of the solvent in the film (min. 2 weeks after application).
Regardless of the product used for protection, objects need to be maintained. Oiled items should be re-oiled at least once every 6 months if they are used regularly. When products are protected with wax, the old coating should be removed to apply a new one. Waxes absorb dirt over time that cannot be removed by simply washing. Objects protected with varnish should be checked regularly for cracks or deep scratches. In these cases water penetrates under the film and the protection is no longer effective. It can even be dangerous because harmful fungi and moulds can grow under the film.
I hope you find the information interesting and useful. If you think it's a useful article for others, you can share it. And if you have any comments, questions or additions, please leave them in the space below.


I'm making a pine wood chipper and wanted to give it a bath before the mineral oil. In this case, does the oil still work? Thank you very much.
Good evening!
Yes, the oil will get into the wood and protect it against moisture. Apply the oil after the wood is completely dry. Use recommended staining baths for food contact products. Over time the oil can be removed by use and there is a risk of getting on the bait. You can use food colouring.
All the best!
Thanks very much for your help 🙂
Nice article. I think you should write on any page where linseed oil is discussed that warning about self combustion. Enough of a soaked rag left crumpled up for a fire.
Good idea! We will add this warning to all articles where oil or products that have white spirit as a diluent are mentioned.
All the best!
Hello, I need a little help please, this is my first time doing this and I don't know if I'm doing it right. I have read a few hundred comments and many articles in the last 3 days since I discovered you. It's phenomenal this site, you have my respect and admiration for your skill and the passion you have for wood.
But I couldn't find anything concrete about spruce, maybe it's useful to someone else in the same situation if you have time to advise me.
I bought some spruce wood panels from dedeman with the aim of mounting some as shelves for clothes, and one as a work surface for the office (picture3). I like the idea of natural wood, clean, without chemical varnishes, and I thought they would smell of the forest... But: 1. they don't smell of anything, not even when sanded, 2. I think they will get dirty very quickly, and especially 3. I don't like the colour of spruce at all, it's very pale, I'm afraid it won't turn yellow or orange in time. I prefer warm shades of wood, but not dark (I had a chest of drawers with natural oak veneer that "aged" very nicely.
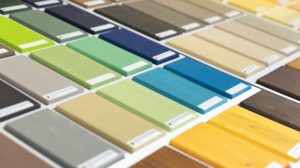
I find the smells of varnishes and paints in general very strong, so I bought "Oskar Aqua wood varnish, oak colour, water based, interior/exterior". The criteria for choosing from many samples from different manufacturers was the lack of smell and the only shade I liked.
Now, my dilemma: on the product page it says that it requires primer first, but on the technical data sheet on that page it also says that for new, interior wood, it is applied directly to the wood. How should I proceed, with or without primer? Did I choose the right product instead of oil, wax and many other options that I don't understand because I have no experience in this field? Is there a specific application technique, apart from along the grain? Where the brush repeats overlap will the color look darker, or does it even out as it dries?
I should mention that the handlebars and its supports are made of lime wood, made and sanded by my father. Is it ok to apply this varnish directly, without primer, to the shelves, the desk top and the coat hanger bar? Will the desk top behave well over time? (PC mouse, sewing scissors, etc - someone said on a blog that spruce is so soft that when you write with a pen on a sheet of paper, there are indentations in the wood...)
It would be easier for me in terms of time and money without primer, but I would be sorry to see stains when varnishing or using it, especially since I have no experience, just zeal and joy of feeling the wood and making something with my hand. What do you advise?
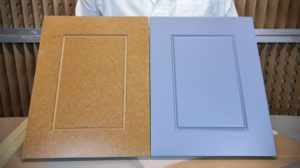
The shade I wanted is the one in the first picture, but I think that's a nobler wood. I also like the one in the second picture, when I tried it on a scrap wood it came out closer to this one.
https://www.pinterest.ca/pin/433049320422526631/
https://www.pinterest.ca/pin/433049320421440638/
https://www.pinterest.ca/pin/433049320419698055/
Thank you kindly for the eventual reply, all the best and good luck in all you do!
Good evening!
Let's take turns not to miss anything. 🙂
Spruce is the most common tree in the Romanian forests, that's why it is easy to find and cheap. Unlike in the past, when trees were cut when fully mature, now they are cut when they are still young. Hence the lack of smell and low resistance to mechanical action. If you want a more resistant resinous tree (like the spruce) with a specific smell, look for Nordic or Siberian pine or larch.
Softwoods (spruce, fir, pine, larch, thuja) begin to change colour immediately after cutting. The change occurs due to light and is accelerated by the sun. The spruce turns yellowish-orange over time.
Oak is very different from spruce. It is much tougher and over time the poses become more marked and the natural pattern more visible. Spruce, like all softwoods, has no pores. Even if you use the oak colour, in the end, the effect will be different because there are no pores.
Wax and oil give a natural and pleasant look to wood, but they have no mechanical resistance. To get that resistance you need lav, so you have chosen well.
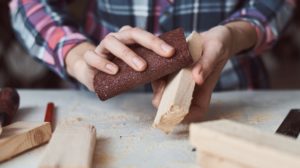
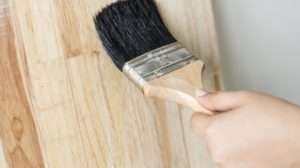
The varnish can also be used without primer. It will be more difficult to sand between coats, but you will manage. To get a smooth surface after painting you need a small trowel with a hard sponge for applying paint and medium and fine abrasive sponges (find the materials in DIY stores). Start by sanding the surface of the wood. Use a medium abrasive sponge and sand along the grain. Dust and wipe with a soft cotton cloth. The surface should not cling to the cloth and be pleasant to the touch. Apply the first coat of varnish with a trowel, without overlapping the surfaces as the area will darken. Let it set for an hour and apply another coat in the same conditions. After another hour, repeat. Then leave to dry until the next day. The next day check that the coat is dry. You will also find that the surface has become rough. The wood fibre has absorbed the water from the varnish, has lifted up, been covered with varnish and has hardened like this. You need to get back to the flat surface and to do this you gently sand the surface, along the grain, with the fine sponge. Dust off, wipe with a rag and check the surface. it should be smooth, with a nice cough. If it is not, continue sanding but do not press to avoid removing the wood layer. Sand again and apply a final coat of varnish with a trowel. Leave to dry until the next day.
You can finish all surfaces like this. Where you can't use a trowel, try a brush. If you can't get it right, dilute the varnish with water, but not more than 5%.
Unfortunately, in the links sent I only see homages with dresses and hairstyles from pinterest:)
I hope I managed to be coherent enough. I have put below three links that I hope you will find useful.
All the best!
https://revistadinlemn.ro/2020/04/23/vopsirea-si-lacuirea-sfaturi-pentru-incepatori/
https://revistadinlemn.ro/2017/01/17/cum-deosebim-lemnul-de-molid-de-cel-de-brad/
https://revistadinlemn.ro/2017/01/10/lemnul-de-rasinoase-comparativ-cu-cel-de-foioase/
Thanks for your patience and for all the information, it's very helpful! I'm so glad when I discover people like you, it's a pleasure to read the articles here, I learn a lot from the comments too.
I think now the correct images are visible and relevant anyway, more for me as inspiration 🙂
I hope to be able to come back soon with evidence of a job well done or, at worst, lesson learned - so no 🙂
Good health, and all the best!
Good luck! Waiting for the result! 🙂