


When a photo of a highly finished piece of furniture is posted on profile groups, the first question is what kind of varnish was used. If it was only the quality of the varnish, we would probably only see highly finished furniture everywhere. To get a really good lacquer film on wood, however, you need more than just a top material. Important are the preparation of the materials, the quantity applied, the working conditions, the sanding and more. Each of these can make the film look bad, even if the varnish chosen was of the highest quality. Find out what you need to keep in mind to get the perfect varnish film on wood in the recommendations below.
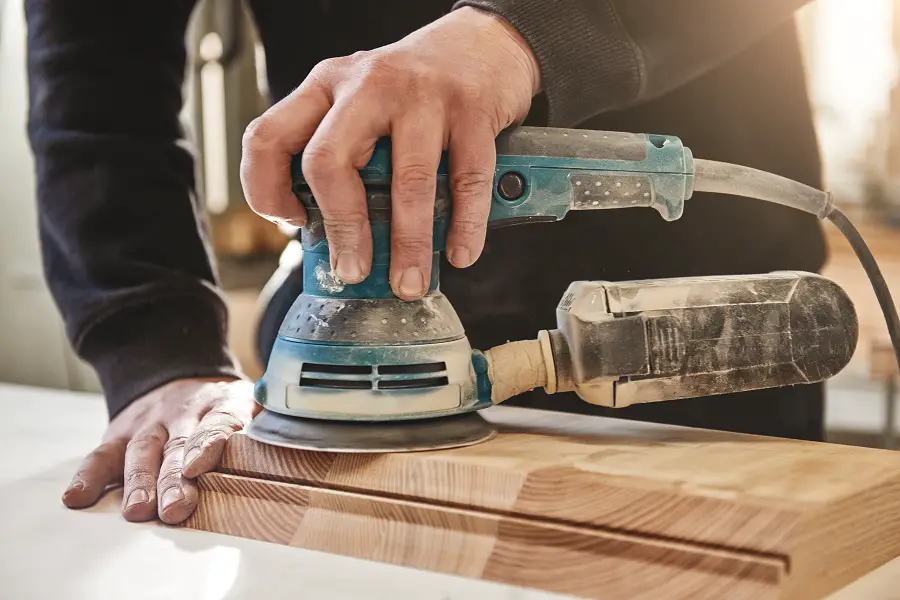
1. Wood sanding
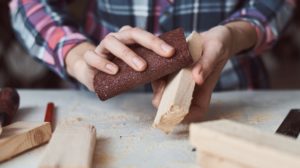
Wood sanding is one of the most important stages of finishing. The more time and attention given to it, the better the end result will be. The purpose of the operation is to remove any scratches, impressions or stains that may have appeared during the previous stages. Sometimes, in order to see them better, it is sanding wetting the surface with water or solvent. Even if they are not visible when sanding, they will show when staining the wood or when the first coat of primer is applied. Such defects become more visible the glossier the final lacquer. Wetting will highlight them and they can be removed.
Another purpose of sanding is to even out the grain of the wood for a stain-free staining and good adhesion of the primer. The abrasive material cuts the fibre evenly and the surface becomes increasingly pleasant to the touch as the sandpaper becomes finer. Wood sanding paper is used, the final recommended grit is 180. Using paper that is too fine can decrease adhesion of coatings next due to the fine wood dust formed that enters the fibres and blocks absorption.
2. Conditions of application
Temperature, air humidity and dust in the space where the finishing materials are applied influence the final appearance.
Temperature The optimal temperature recommended by the manufacturers for application is 18-20°C. Small deviations are acceptable because they have no visible consequences, but at larger deviations problems start. Too low a temperature does not let the varnish spread, it will need more thinner, resulting in a thinner film. Too high a temperature will dry the varnish too quickly and not give it enough time to set. The result will be orange peel film. Also, the film will dry out before the air and solvent can escape, which will give a grainy appearance.
Humidity influences drying, especially if the products are water-based. The optimum humidity is 55-60%, but it should not fall below 40% or be higher than 65-70%. Too low a humidity speeds up drying, too high a humidity slows it down.
Praful is the lakes' greatest enemy. During drying, dust is trapped in the film, and the result will be an unpleasant film to the touch and defects on the surface. The more the lake is shinier, the better the trapped dust will show through. Varnishing is not done in the same space as machining. A slight overpressure in the application area will keep the dust at bay. This is the principle on which pressurised spray booths are built.
3. Acclimatisation of materials, their preparation
It is very important that the wood and finishing materials are at the temperature of the working environment. If they are stored in other temperatures, they should be brought to the finishing area and left for a few hours to acclimatise. Different temperatures will cause the film to not spread well, have air entrapped or poor adhesion.
All finishing materials mix thoroughly before use in original packaging. Differences in viscosity may occur if this is not the case, gloss level or color. If catalyst varnishes are used, follow the manufacturer's recipe. Substitution with other similar materials may change the ratio.
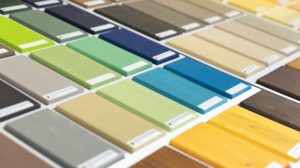
4. Correct choice of materials
Not all materials are the same. There are different types of varnishes, not just different brands. There are varnishes for indoors or outdoors, varnishes resistant to abrasion, humidity or high temperatures, more or less hard varnishes. Just because a varnish looks great on a table or a piece of furniture doesn't mean it will be suitable for floors or stairs.
If the furniture or objects you are making are for commercial use, use professional varnishes. They are more restrictive, but the results are much better. DIY varnishes, the ones usually found in DIY stores, are made especially for amateurs. They're easier to apply, don't require special conditions, but the results aren't spectacular either.
5. Thinner, as important as lacquer
Even if it seems hard to believe, the thinner can make all the difference between a very good varnish film and a bad one. Especially with varnish, the choice of thinner is important. Varnish, as the last coat, cannot be sanded off to remove any defects. It must therefore spread well, have time to dry and have the desired gloss. All this can be adjusted with thinner.
Water-based products also perform better if special thinners are used instead of water. It's more expensive, but the wood grain won't lift as much as it does if you dilute the primer with water, and sanding will be much easier.
If varnishing wooden objects is not a hobby, my recommendation is to still use professional products for the diluents. The improvement in film quality will be noticeable.

6. To make the varnish look good, apply primer first
You can also apply several successive coats of varnish, but the film will not look as good as when 1-3 coats of primer are applied first. The primer provides better adhesion to the wood and can be sanded so that a flat surface is obtained on which the varnish can spread perfectly.
A primer and varnish film is thicker than a varnish film because primer usually has more resin. It's made that way to allow sanding without the coating disappearing altogether. Lacquers, especially professional ones are made to give film-forming properties, not thickness. They give gloss, tint and resistance to abrasion, staining, rubbing, moisture.
7. Do not apply thick layers
It is always better to apply 2-3 thin coats than one thick one. This is one of the important rules of finishing. Thick coats tend to crack due to the stresses that arise from drying. A coat of varnish should be no more than 150 g/m², unless the manufacturer says otherwise. Applying thick coats also runs the risk of drips on the edges or sides of the object, which are difficult to remove and look ugly.
8. Compliance with drying times
Don't rush the drying, you won't get a good film. The varnish needs time to spread well and for the thinner and air to escape from the film. Hurrying drying can lead to orange peel and bubbles trapped in the film. Instead of a pleasant cough you'll have a scratchy one. The film will lose its transparency, and in the case of water-based varnishes it can become opalescent.
Respect of the drying times of the materials is essential to obtain quality results. A primer that doesn't dry well sands hard and poorly and the varnish won't sit well on it, which can affect gloss.
9. Sanding between coats
Like sanding wood, it is very important. Sanding between layers ensures a flat surface for perfect varnish spreading and removal of defects occurring in the intermediate stages: dust and bubbles trapped in the film, spills, orange peel.
Use finer sandpaper, minimum 280, to sand the primer. If a very glossy varnish is applied on top, the sandpaper should be a minimum of 400 to avoid seeing the fine curls that the sandpaper makes. The lack of the wetting agent inside makes the lacquer very transparent.
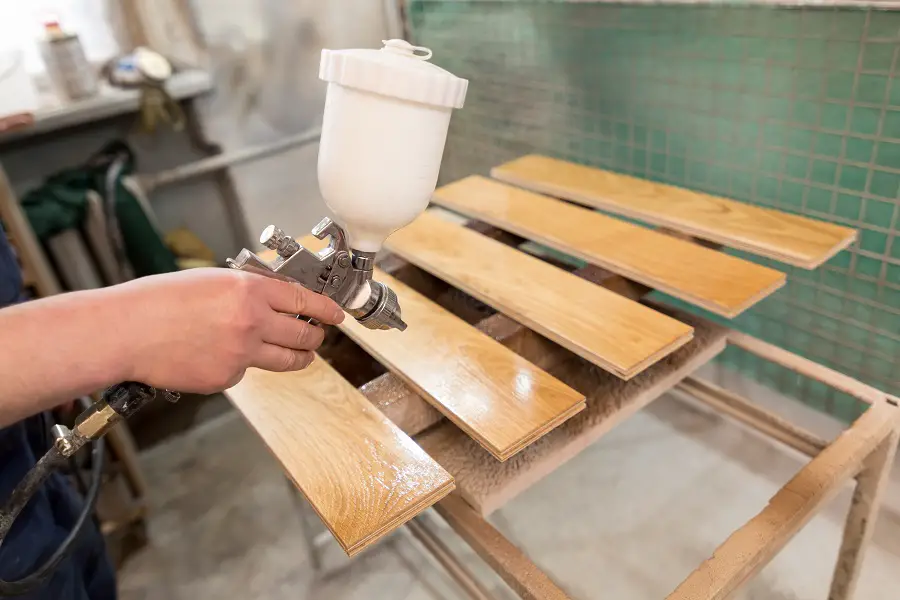
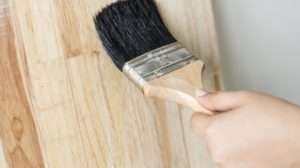
10. Use of appropriate appliances
It is difficult to get a very good film if the application is done with a brush. Application with spray gun makes the film more evenly spread. The investment in a high-performance, professional spray gun pays for itself quickly because defects are reduced and quality increases. To maintain its performance, it must be cleaned and maintained continuously.
I hope you find the information useful. As usual, additions are welcome. And if you have any questions or queries, please leave them in the space below. I'm sure I'll reply.


Hello, I want to make myself a walnut table top and would like to know about coating it in epoxy wax.
Hello!
I assume you are referring to epoxy resin, in which case the link below gives you all the information you need. You will need clear epoxy resin for casting, casting frame materials (chipboard or plastic), technical skills and patience. The resin needs to be for wood. There are also resins for concrete or flooring. The wood must be sanded and prepared beforehand as for any other material (varnish, primer, wax, paint). Before pouring the resin, the wood must be thoroughly sanded.
To increase the strength of the countertop, after curing the epoxy resin, it is recommended to apply a layer of polyurethane varnish.
In my opinion, however, unless you use small pieces of walnut or lumber cut from the peeled log, it's a shame to put it in resin. It looks much better finished with oil. Using tung oil will bring out the natural colour and pattern of the walnut and the strength of the worktop will be very good.
https://revistadinlemn.ro/2018/04/12/rasina-epoxidica-pardoseala-epoxidica/
https://revistadinlemn.ro/2017/06/07/combinarea-lemnului-cu-rasina-epoxidica/
https://revistadinlemn.ro/2018/11/19/cum-se-coloreaza-rasinile-epoxidice/
https://revistadinlemn.ro/2018/03/16/bar-din-tevi-rasina-epoxidica-frasin-si-343-de-capace-de-bere-diferite/
https://revistadinlemn.ro/2020/06/10/uleiul-de-tung-uleiul-pentru-lemn-care-face-pelicula-si-rezista-foarte-bine-la-umezeala/